How Long Does It Take to Cook a 20 Pound Turkey Perfectly
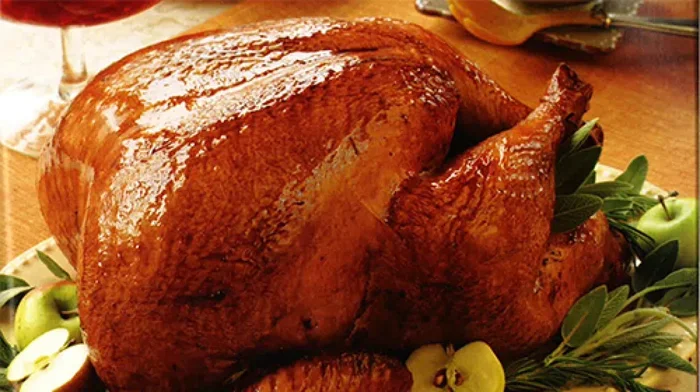
How long does it take to cook a 20 pound turkey depends on a few key factors like oven temperature, whether it is stuffed, and your cooking method. A 20 pound turkey typically takes about 4 to 5 hours at 325°F when roasted in the oven. Understanding the right cooking time, internal temperature, and resting period will help you serve a juicy, golden brown bird every single time.
Key Takeaways
- Plan for 4 to 5 hours: A 20 pound turkey needs roughly 4 to 5 hours at 325°F to cook through completely.
- Use a meat thermometer: The safe internal temperature for turkey is 165°F in the thickest part of the breast and thigh.
- Brine for juiciness: Brining your turkey overnight adds flavor and keeps the meat moist during cooking.
- Let it rest: Always let your turkey rest for 20 to 30 minutes before carving to lock in the juices.
- Stuffing adds time: A stuffed turkey takes about 30 to 45 minutes longer than an unstuffed one.
- Cover with foil: Tenting the turkey with foil partway through prevents the skin from burning.
📑 Table of Contents
- How Long Does It Take to Cook a 20 Pound Turkey
- Best Oven Temperature for a 20 Pound Turkey
- Should You Brine Your Turkey Before Cooking
- Turkey Cooking Time: Stuffed vs Unstuffed
- How to Tell When Your Turkey Is Done
- Tips for Juicy and Flavorful Turkey Every Time
- Common Mistakes to Avoid When Cooking a Large Turkey
- Final Thoughts on Cooking a 20 Pound Turkey
How Long Does It Take to Cook a 20 Pound Turkey
Cooking a 20 pound turkey can feel intimidating, especially if you have never done it before. The good news is that once you understand the basics, it becomes much easier than you think. The big question most people ask is simple: how long does it take to cook a 20 pound turkey? The answer depends on a few things, but we will walk you through everything step by step.
Most roasting guidelines suggest about 13 to 15 minutes per pound at 325°F. That means your whole turkey will need roughly 4 to 5 hours in the oven. However, this is just a starting point. Several factors can change your actual cook time, and knowing them will help you plan a stress-free holiday meal.
Whether you are preparing for Thanksgiving dinner or a weekend family gathering, getting the timing right matters. Nobody wants a dry, overcooked bird or a turkey that is still raw in the middle. This guide covers everything you need to know about roast turkey timing, temperature, and technique.
Why Cooking Time Varies
Not every 20 pound turkey cooks at the same speed. The oven temperature you use plays a big role. A lower temperature like 325°F takes longer but produces more even cooking. A higher temperature speeds things up but can dry out the outer meat before the inside is done.
The shape of your bird also matters. A deep, round turkey takes longer than a wider, flatter one because the heat has to reach the center. Similarly, whether your turkey is stuffed or unstuffed changes the timeline significantly. We will break this down in detail below.
Quick Reference Timeline
Here is a simple timeline to help you plan your day around the turkey cooking process:
- Preheat the oven to 325°F and let it warm up before the turkey goes in.
- Roast the turkey for about 4 to 5 hours total, depending on your specific bird.
- Check the temperature after the 3-hour mark using a meat thermometer.
- Tent with foil if the skin is getting too dark before the inside is done.
- Let the turkey rest for 20 to 30 minutes after pulling it out of the oven.
Following this timeline gives you a clear roadmap. It removes the guesswork and helps you serve a perfectly cooked turkey on time.
Best Oven Temperature for a 20 Pound Turkey
The most recommended oven temperature for turkey is 325°F. This moderate heat cooks the bird evenly without burning the outside. Most food safety experts and chefs agree that 325°F is the sweet spot for a whole turkey of any size.
Some cooks prefer a higher temperature of 350°F to save time. This can reduce your total cooking time by about 30 minutes or so. But the tradeoff is that the outer layers can dry out or brown too quickly. If you go this route, keep a close eye on the skin and use foil if needed.
For the best results, stick with 325°F. It gives you a wider window to monitor progress and produces a juicy, golden brown turkey with crispy skin. Here is a quick comparison of common oven temperatures:
Temperature and Time Comparison
Below is a simple table showing how different oven temperatures affect your turkey roasting time:
- 325°F: 4 to 5 hours for a 20 pound bird. This is the safest and most reliable option.
- 350°F: 3.5 to 4.5 hours. Slightly faster but requires more attention to prevent drying.
- 375°F: 3 to 4 hours. Faster still, but the risk of dry meat increases.
As you can see, lower and slower is the way to go for most home cooks. The extra time gives the heat a chance to penetrate the thickest parts of the bird without overcooking the thinner areas.
Should You Brine Your Turkey Before Cooking
Brining a turkey is one of the best things you can do for flavor and moisture. A brine is simply a saltwater solution that the turkey soaks in for several hours or overnight. The salt helps the muscle fibers hold onto more water during cooking, which means a juicier result.
If you want to brine your 20 pound turkey, start the process 12 to 24 hours before cooking. You will need a large container or a brining bag that fits inside your refrigerator. Use about 1 cup of kosher salt per gallon of water, and add aromatics like garlic, bay leaves, and black pepper for extra flavor.
Here are some quick tips for brining:
- Make sure the turkey is fully submerged in the brine at all times.
- Use a food-safe container or a dedicated brining bag.
- Rinse the turkey thoroughly after brining and pat it completely dry.
- Do not brine for more than 24 hours, or the meat can become too salty.
Brining adds about 12 to 24 hours of prep time before you even turn on the oven. But the difference in the final result is well worth it. A brined turkey is noticeably juicier and more flavorful than one that skips this step.
Wet Brine vs. Dry Brine
If you do not want to deal with a large container of saltwater, try a dry brine instead. Simply rub kosher salt all over the turkey and let it sit uncovered in the refrigerator overnight. The salt draws out moisture, which then gets reabsorbed into the meat. This method works great and requires less space.
Both wet and dry brining deliver excellent results. Choose whichever method fits your schedule and kitchen setup. The key is to give the salt enough time to work its magic before the turkey goes into the oven.
Turkey Cooking Time: Stuffed vs Unstuffed
One of the biggest factors that changes your turkey cook time is whether you stuff the bird or not. A stuffed 20 pound turkey takes longer to cook because the cold stuffing inside needs to reach a safe temperature too.
For an unstuffed turkey, plan on about 4 to 5 hours at 325°F. For a stuffed turkey, add 30 to 45 minutes to that estimate. This means a stuffed bird could take closer to 5 to 5.5 hours.
It is important to note that the stuffing itself must reach an internal temperature of 165°F for food safety. The best way to check this is to insert a meat thermometer into the center of the stuffing, not just the meat.
Should You Stuff Your Turkey?
Many cooks prefer to cook the stuffing separately. This gives you more control over the cooking time and ensures the stuffing reaches a safe temperature without overcooking the turkey. Separate stuffing also allows the bird to cook more evenly.
If you do stuff your turkey, pack the stuffing loosely and do not pack it too tightly. Tight packing creates cold spots where bacteria can survive. Also, make sure the stuffing is at room temperature before you put it inside the bird. Cold stuffing right from the fridge adds extra time to your turkey roast time.
How to Tell When Your Turkey Is Done
The only foolproof way to know if your 20 pound turkey is done is to use a meat thermometer. Visual cues like the color of the juices or how the legs move can be misleading. A thermometer takes the guesswork out completely.
Insert the thermometer into three key spots: the thickest part of the breast, the thickest part of the thigh, and the center of the stuffing if you used any. All three spots should read 165°F for safe eating.
Here are some signs that your turkey is ready:
- The thickest part of the breast reads 165°F.
- The innermost part of the thigh reads 165°F.
- The juices run clear when you pierce the thickest part.
- The leg moves easily and feels loose in the joint.
- The skin is deep golden brown and crispy.
Why the Breast and Thigh Differ
It is common for the breast meat to cook faster than the thighs. The breast is leaner and thinner, so it reaches the target temperature sooner. If your breast is already at 165°F but the thigh is still a few degrees below, simply cover the breast with foil and keep cooking until the thigh catches up.
This is why many experienced cooks recommend pulling the turkey out at about 160°F in the breast and letting the carryover cooking finish the job. The temperature will rise 5 to 10 degrees as the bird rests, bringing it up to the safe 165°F mark.
Tips for Juicy and Flavorful Turkey Every Time
Cooking a 20 pound turkey perfectly is about more than just timing. A few extra steps can take your bird from good to outstanding. Here are some proven tips that make a real difference in the final result.
Bring the Turkey to Room Temperature First
Take your turkey out of the refrigerator about 1 to 2 hours before cooking. Letting it sit at room temperature helps it cook more evenly. A cold turkey going straight into a hot oven creates uneven cooking, with the outside overcooked and the inside still cold.
Use a Roasting Rack
Place your turkey on a roasting rack inside the pan. This lifts the bird off the bottom of the pan and allows hot air to circulate all around it. The result is more evenly cooked meat and crispier skin on the bottom too.
Baste the Turkey Regularly
Basting every 45 minutes or so keeps the surface of the turkey moist and promotes even browning. Use the pan juices and spoon them over the top and sides of the bird. This simple step adds flavor and improves the texture of the skin.
Do Not Overcook the Turkey
One of the most common mistakes is cooking the turkey too long. This dries out the meat and ruins the texture. Use your thermometer and pull the bird out as soon as it hits 160°F to 165°F in the thickest parts. Remember that carryover cooking will raise the temperature another 5 to 10 degrees during the resting period.
Let the Turkey Rest Before Carving
Resting is just as important as cooking. Once the turkey is out of the oven, tent it loosely with foil and let it sit for 20 to 30 minutes. This allows the juices to redistribute throughout the meat. If you carve too soon, the juices run out onto the cutting board instead of staying in the meat.
Save the Drippings
The pan drippings from your roast turkey make incredible gravy. Pour them into a fat separator or a jar and let the fat rise to the top. The remaining liquid is pure flavor gold that you can use to make a rich, savory gravy for your entire meal.
Common Mistakes to Avoid When Cooking a Large Turkey
Even experienced cooks sometimes make mistakes with a 20 pound turkey. Here are the most common errors and how to avoid them.
- Not thawing the turkey fully: A frozen turkey takes much longer to cook and can result in uneven doneness. Allow 24 hours of thawing in the refrigerator for every 4 to 5 pounds.
- Skipping the thermometer: Relying on time alone is unreliable. Always use a meat thermometer to check the internal temperature.
- Cooking at too high a temperature: High heat dries out the outer meat before the inside is cooked through. Stick with 325°F for the best results.
- Forgetting to rest the turkey: Cutting into the bird immediately after removing it from the oven causes the juices to escape, leaving dry meat.
- Overcrowding the pan: Make sure the turkey fits comfortably in the roasting pan with room for air to circulate around it.
Avoiding these mistakes will save you from a dry, undercooked, or unevenly cooked turkey. A little planning goes a long way toward a successful holiday meal.
Final Thoughts on Cooking a 20 Pound Turkey
So, how long does it take to cook a 20 pound turkey? The short answer is about 4 to 5 hours at 325°F for an unstuffed bird. But the full picture includes brining, bringing the bird to room temperature, monitoring the internal temperature, and letting it rest properly before serving.
A 20 pound turkey is a centerpiece of any holiday table. When you follow the right steps and pay attention to the details, you will end up with a bird that is juicy, flavorful, and beautifully golden brown. The key is to plan ahead, use a thermometer, and resist the urge to rush the process.
Whether this is your first time roasting a whole turkey or you are looking to improve your technique, these tips will help you achieve great results. Start early, stay patient, and enjoy the process. Your family and guests will thank you for it.
Frequently Asked Questions
How long does it take to cook a 20 pound turkey at 325°F?
A 20 pound turkey takes about 4 to 5 hours at 325°F when roasted unstuffed. This is the most recommended temperature for even cooking and juicy results. Always use a meat thermometer to confirm doneness.
Should I cook a 20 pound turkey covered or uncovered?
Start cooking the turkey uncovered for the first 2 to 3 hours to get crispy skin. Then, if the skin is getting too dark, tent it loosely with aluminum foil for the remaining cook time. This prevents burning while the inside finishes cooking.
How long should a cooked turkey rest before carving?
Let the turkey rest for 20 to 30 minutes after removing it from the oven. This allows the juices to redistribute throughout the meat, making it much juicier when you carve it. Tent it loosely with foil during this time.
Can I cook a 20 pound turkey overnight at a low temperature?
Yes, some cooks prefer a low-and-slow approach at 275°F, which can take 8 to 10 hours. This method produces very tender meat but requires careful monitoring to ensure food safety. The internal temperature must still reach 165°F in the thickest areas.
What is the safe internal temperature for a 20 pound turkey?
The safe internal temperature for turkey is 165°F in the thickest part of the breast, the thickest part of the thigh, and the center of the stuffing if you used any. A reliable meat thermometer is essential for checking this accurately.
How do I thaw a 20 pound turkey safely?
Allow about 24 hours of thawing time in the refrigerator for every 4 to 5 pounds. A 20 pound turkey will take roughly 4 to 5 days to thaw fully in the fridge. Never thaw a turkey at room temperature, as this creates a risk of bacterial growth.
=== CONCLUSION ===
Cooking a 20 pound turkey does not have to be stressful. With the right cooking time, temperature, and technique, you can serve a delicious and juicy bird that everyone will love. Remember to plan for 4 to 5 hours at 325°F, use a meat thermometer, and let the turkey rest before carving. Follow these guidelines and you will have a perfect roast turkey that is the highlight of your meal every time.