
Car Interior Detailing Tips
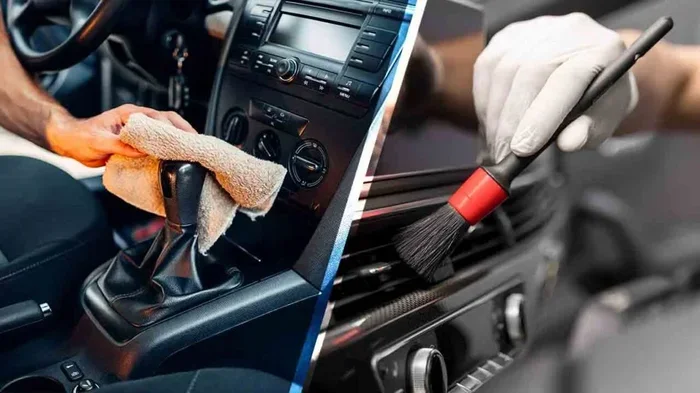
Car interior detailing tips help you transform a dirty cabin into a fresh, clean space. You will learn the best techniques for cleaning seats, dashboards, and carpets using simple supplies and smart methods. These car interior detailing strategies save you money and keep your vehicle looking great for years.
Key Takeaways
- Start with a deep clean: Remove trash and vacuum thoroughly before applying any products to your car surfaces.
- Use the right tools: Microfiber cloths, soft brushes, and a quality vacuum make all the difference in car interior cleaning.
- Protect your investment: Applying protectants to dashboards and seats prevents wear and keeps your interior car care routine simple.
- Tackle odors naturally: Baking soda and activated charcoal remove stubborn smells without harsh chemicals.
- Stay consistent: A regular car detailing routine prevents buildup and makes each session faster and easier.
📑 Table of Contents
- Why Car Interior Detailing Matters More Than You Think
- Gather Your Car Detailing Supplies
- Step-by-Step Car Interior Detailing Process
- Common Car Interior Detailing Mistakes to Avoid
- How to Keep Your Car Interior Looking Great Between Deep Cleans
- Quick Tips for a Professional-Level Finish
- Benefits of Regular Car Interior Detailing
- Final Thoughts on Car Interior Detailing Tips
Why Car Interior Detailing Matters More Than You Think
Most people focus on washing the outside of their car. They wax the paint. They clean the wheels. But the inside? That often gets ignored. Car interior detailing is about so much more than looks. It affects how you feel every time you sit behind the wheel.
A dirty car interior can harbor bacteria. It can trap allergens. It can even affect your focus while driving. When you invest time in detailing a car interior, you are investing in your health and comfort. Plus, a clean car holds its value better if you ever decide to sell.
Think about it. You spend hours in your car each week. You eat in it. You drive with your kids. You carry gym bags and groceries. All of that adds up. Interior car care keeps that daily mess from becoming a permanent problem.
The good news? You do not need a professional detailer. You do not need expensive equipment. With the right car detailing supplies and a little know-how, you can achieve amazing results at home. This guide walks you through every step.
Whether your car is a daily driver or a weekend cruiser, these car interior detailing tips will change the way you maintain your vehicle. Let us get into it.
Gather Your Car Detailing Supplies
Before you start, grab everything you need. Having the right tools makes the process smooth and fast. You do not want to stop halfway through to find a cloth or a spray bottle.
Essential Cleaning Products
- All-purpose interior cleaner – safe for most surfaces like plastic, vinyl, and painted areas
- Upholstery cleaner – designed specifically for fabric and cloth seats
- Leather cleaner and conditioner – if your car has leather seats
- Glass cleaner – for windows and mirrors inside the car
- Dashboard protectant – prevents fading and cracking
- Baking soda – a natural odor remover
- Activated charcoal – absorbs stubborn smells
Essential Tools
- Microfiber cloths – at least 5 to 6, they do not scratch surfaces
- Soft-bristle brush – great for vents and crevices
- Vacuum with crevice tool – essential for seats and carpet
- Detailing brushes – small brushes for tight spots
- Spray bottles – for mixing your own solutions
- Compressed air can – blows dust out of hard-to-reach areas
With these car detailing supplies ready, you are set to tackle every part of your cabin. A well-stocked kit also means you can handle spills and messes right away instead of letting them sit.
Step-by-Step Car Interior Detailing Process
Now that you have your supplies, let us walk through the actual process. Follow these steps in order for the best results.
Step 1: Remove All Trash and Personal Items
Start by taking everything out of your car. Trash bags, old receipts, phone chargers, water bottles. Pull out the floor mats. Remove any seat organizers or accessories. This gives you a blank canvas to work with.
Check under the seats. Look in the glove box. Examine the pockets on the doors. You will be surprised what falls out. This step alone can make your car feel instantly better.
Step 2: Vacuum Thoroughly
Vacuuming is the backbone of any car interior detailing tips routine. Start with the seats. Use the brush attachment on fabric seats. Use the crevice tool along seams and edges. Move to the carpet and floor areas.
Do not forget the trunk. Dirt and debris collect back there too. Vacuum the dashboard area carefully. Use compressed air to blow dust out of vents before you vacuum it up.
For best results, vacuum in multiple directions. Go slow. Let the suction do the work. If you have pets, you may need to vacuum more frequently to control shedding.
Step 3: Clean the Hard Surfaces
Spray your all-purpose cleaner onto a microfiber cloth. Not directly onto the surface. This prevents excess moisture from dripping into cracks. Wipe down the dashboard, center console, and door panels.
Use a soft brush for the vents. Dust collects in those tiny slats and can be hard to reach. A detailing brush works perfectly here. For stubborn grime on the console, let the cleaner sit for a minute before wiping.
After cleaning, apply a dashboard protectant. This adds a light shine and shields the surface from UV damage. It also makes future cleaning easier because dust does not stick as easily.
Step 4: Treat the Seats
Your seats take the most abuse. They absorb spills. They collect dirt from shoes. Treating them properly is a key part of interior car care.
For fabric seats, spray your upholstery cleaner and gently scrub with a soft brush. Blot with a clean microfiber cloth. Do not soak the fabric. Let it dry completely before putting anything back in the car.
For leather seats, use a dedicated leather cleaner. Wipe gently in circular motions. After cleaning, apply a leather conditioner. This keeps the leather soft and prevents cracks. Condition every few months for the best protection.
Step 5: Clean the Windows and Mirrors
Clean the inside of your windows last. Cleaner from other steps can leave residue on glass. Spray glass cleaner onto a fresh microfiber cloth. Wipe in an S-pattern for streak-free results.
Use a dry section of the cloth to buff any remaining streaks. Pay attention to the edges where the glass meets the trim. Those areas collect grime fast.
Step 6: Deodorize and Refresh
Even after cleaning, your car might still smell. That is where odor removal comes in. Sprinkle baking soda on the carpet and seats. Let it sit for 15 to 20 minutes. Then vacuum it up.
For persistent smells, place activated charcoal in a breathable bag under a seat. Charcoal absorbs odors naturally without adding any fragrance. You can also leave a small bowl of coffee grounds in the car overnight.
If you keep a yoga mat in your car for post-workout stretches, make sure to air it out regularly. A mat left in the car can trap moisture and cause a musty smell. If you are wondering whether it is safe to leave items like this in your vehicle long-term, check out this guide on whether you can leave your yoga mat in the car for helpful advice.
Common Car Interior Detailing Mistakes to Avoid
Even with the best intentions, people make mistakes that can damage their car interior. Here are the most common ones to watch out for.
Using Too Much Water
Excess moisture can seep into electronics and cause short circuits. It can also lead to mold and mildew under the seats. Always dampen your cloth, not soak it. Less is more when it comes to liquid inside your car.
Skipping the Protectant
Clean without protecting is a wasted effort. UV rays break down plastic and vinyl over time. A protectant adds a barrier that slows this process. Your car interior detailing routine should always include this step.
Using the Wrong Cleaner
Not all cleaners are safe for every surface. Ammonia-based cleaners can damage leather. Harsh chemicals can fade fabric. Always check the label and test in a hidden spot first.
Neglecting the Small Stuff
Cupholders, seat tracks, and door pockets collect dirt fast. These small areas make a big difference in how clean your car feels overall. Spend extra time on these spots during your car detailing routine.
Waiting Too Long Between Sessions
Mud, spills, and dust build up over time. The longer you wait, the harder the cleaning job becomes. A quick car interior cleaning session every two weeks keeps things manageable.
How to Keep Your Car Interior Looking Great Between Deep Cleans
Deep cleaning is important. But maintaining your results between sessions is just as crucial. A few simple habits make a huge difference.
Keep a small trash bag in your car. Empty it every time you exit the vehicle. Wipe down surfaces with a quick-detailer spray after long road trips. Use a sunshade on your windshield to protect the dashboard from sun damage.
If you transport bulky items like fitness equipment, make sure your car interior is protected. For example, if you are learning how to transport a treadmill in your car, use a protective blanket to prevent scratches and dirt transfer to your seats and carpet.
Also, consider how you maintain other items you keep in or around your car. If you use a bike pump to air up your car tire regularly, keep the pump clean and store it properly so it does not track dirt into your cabin.
Small habits add up. Over time, they keep your car looking nearly new with minimal effort.
Quick Tips for a Professional-Level Finish
Want your car interior detailing to look like it was done by a pro? Try these bonus tips.
- Work top to bottom. Clean the dashboard first, then the seats, then the carpet. Gravity pulls dirt downward, so you avoid re-cleaning lower areas.
- Use two buckets. One for clean water and one for dirty water. This prevents spreading grime across your surfaces.
- Dry everything completely. Moisture left behind can lead to mold. Use a dry microfiber cloth to buff surfaces after cleaning.
- Replace your cabin air filter. A fresh filter improves air quality and eliminates lingering odors from the ventilation system.
- Add a subtle scent. After deep cleaning, a light car freshener keeps the cabin smelling fresh without being overpowering.
These small additions elevate your car interior cleaning game significantly. They are easy to do and make a noticeable difference every time you get behind the wheel.
Benefits of Regular Car Interior Detailing
Why put in the effort? The benefits go beyond just a clean car.
Better air quality. A clean cabin means fewer allergens, dust, and bacteria floating in the air you breathe. This is especially important for people with asthma or allergies.
Improved resale value. A well-maintained interior signals that the car has been cared for. Buyers notice this, and it can justify a higher price.
Enhanced driving experience. There is something deeply satisfying about sitting in a clean, fresh-smelling car. It makes every drive more enjoyable.
Longer-lasting materials. Regular cleaning and protection prevent premature wear. Your seats, dashboard, and carpet stay in good shape for years longer.
Less stress. A cluttered, dirty car adds to mental clutter. A clean car creates a calm, organized space that makes you feel good every time you drive.
When you combine all these benefits, the case for regular car interior detailing becomes impossible to ignore. Even a 30-minute session every couple of weeks pays off significantly over time.
Final Thoughts on Car Interior Detailing Tips
Car interior detailing does not have to be complicated or expensive. With the right supplies, a clear process, and a little consistency, you can keep your car cabin looking and feeling fantastic. Start with the basics. Build your routine. Adjust as you learn what works best for your vehicle.
The tips in this guide give you a strong foundation. From deep cleaning sessions to daily maintenance habits, every step matters. Your car is a big investment. Treating the interior with care protects that investment and improves your daily life.
So grab your microfiber cloths and your favorite cleaner. Put on some music. Make it a relaxing ritual rather than a chore. Once you see and feel the difference, you will never go back to skipping this step again.
Your car deserves to look and smell as good as it drives. Start your car interior detailing journey today and enjoy the results every time you hop behind the wheel.
Frequently Asked Questions
How often should I detail my car interior?
A deep car interior detailing session every 4 to 6 weeks is ideal for most drivers. If you eat in your car or have pets, you may need to clean more frequently. Even a quick 15-minute vacuum and wipe-down between deep sessions keeps things in great shape.
What is the best cleaner for car dashboards?
An all-purpose interior cleaner works well for most dashboards. Avoid products with harsh chemicals or heavy oils that can leave a greasy residue. Always spray onto a cloth first, not directly on the surface, to prevent moisture from getting into vents and electronics.
Can I use household cleaners in my car?
Some household cleaners are safe, but many are too harsh for car surfaces. Ammonia-based window cleaners can damage vinyl and plastic over time. Stick to products designed for automotive interiors whenever possible to protect your surfaces during interior car care.
How do I remove stubborn stains from car seats?
For fabric seats, use an upholstery cleaner and a soft brush. Blot the stain gently rather than rubbing it deeper. For leather, a dedicated leather cleaner and a microfiber cloth work best. Let the cleaner sit for a minute before wiping for tough stains.
What causes bad smells in a car interior?
Common causes include spilled food, pet hair, damp carpet, and trash left too long. Bacteria growth in hidden areas also creates odors. Regular vacuuming, deodorizing with baking soda, and keeping trash out of the car are effective ways to maintain a fresh-smelling cabin.
Do I need special equipment for car interior detailing?
No special equipment is required. A good vacuum, microfiber cloths, a soft brush, and basic cleaning products are all you need. You can upgrade to a detailing brush set or compressed air can for harder-to-reach spots, but these are optional additions to your car detailing supplies.


