Can I Use My Bike as a Stationary Bike
Yes, you absolutely can use your regular bike as a stationary bike! The most common and effective method is with a bicycle trainer, which lifts your rear wheel and provides resistance. Rollers are another option for a more realistic, skill-based ride. This setup is a cost-effective way to get a dedicated indoor cycling experience without buying a separate piece of equipment. However, it requires some consideration for your bike’s frame, tires, and your own safety to ensure a smooth and durable workout solution.
Key Takeaways
- Yes, It’s Possible: You can convert most standard bicycles into effective stationary trainers using a bike trainer or a set of rollers.
- Trainers vs. Rollers: Trainers are easier for beginners and provide fixed resistance, while rollers offer a more realistic, dynamic ride but require better balance.
- Bike Compatibility is Key: Check your bike’s rear axle type (quick-release vs. thru-axle) and frame material before purchasing a trainer to ensure a safe, secure fit.
- Tire Wear is a Factor: Using a trainer will cause accelerated wear on your rear tire; a dedicated trainer tire is a smart investment for longevity.
- It’s a Major Cost-Saver: This approach is significantly cheaper than buying a new smart bike or high-end stationary cycle, making it ideal for budget-conscious home gyms.
- Setup and Safety Matter: Properly securing your bike, using a front wheel riser, and ensuring a stable surface are non-negotiable for a safe and effective workout.
- Not Ideal for All Bikes: Bikes with suspension, certain carbon frames, or unique rear dropouts may not be suitable for trainer use; always consult your bike manufacturer’s guidelines.
📑 Table of Contents
- Your Two-Wheeled Ticket to Indoor Fitness: Yes, You Can!
- Method 1: The Bicycle Trainer (Your Best Bet for Most)
- Method 2: Bicycle Rollers (The Skill-Based Alternative)
- Essential Gear and Setup: Making it Safe and Smooth
- Pros, Cons, and Critical Considerations
- Safety First: A Non-Negotiable Checklist
- When It’s NOT a Good Idea: Exceptions and Cautions
- The Verdict: Is It Worth It?
Your Two-Wheeled Ticket to Indoor Fitness: Yes, You Can!
Staring at your trusty road bike or mountain bike gathering dust in the corner while the weather outside is frightful? Dreaming of a stationary bike for your home gym but cringing at the price tag? Take a deep breath and look at that bicycle again. That machine built for freedom on the open road might just be your perfect, low-cost solution for indoor cycling. The short, enthusiastic answer is a resounding yes. You can absolutely use your bike as a stationary bike.
But how? And is it safe? Will it wreck your prized two-wheeler? These are all excellent questions. Converting your bike isn’t about some rickety, jury-rigged contraption. It’s a well-established practice in the cycling world, used by pros and recreational riders alike for winter training, hot summer days, or just the convenience of a controlled workout at home. This guide will walk you through every single step, method, and consideration, turning your “how can I?” into a confident “I did it!” Let’s roll up our sleeves and get that bike spinning indoors.
Method 1: The Bicycle Trainer (Your Best Bet for Most)
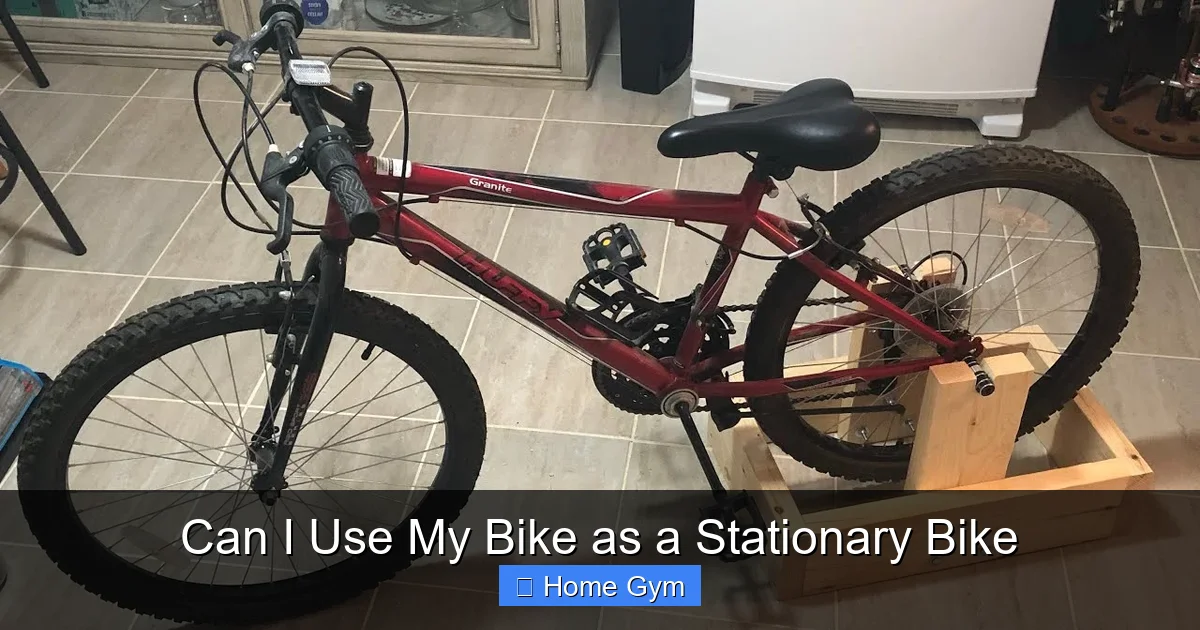
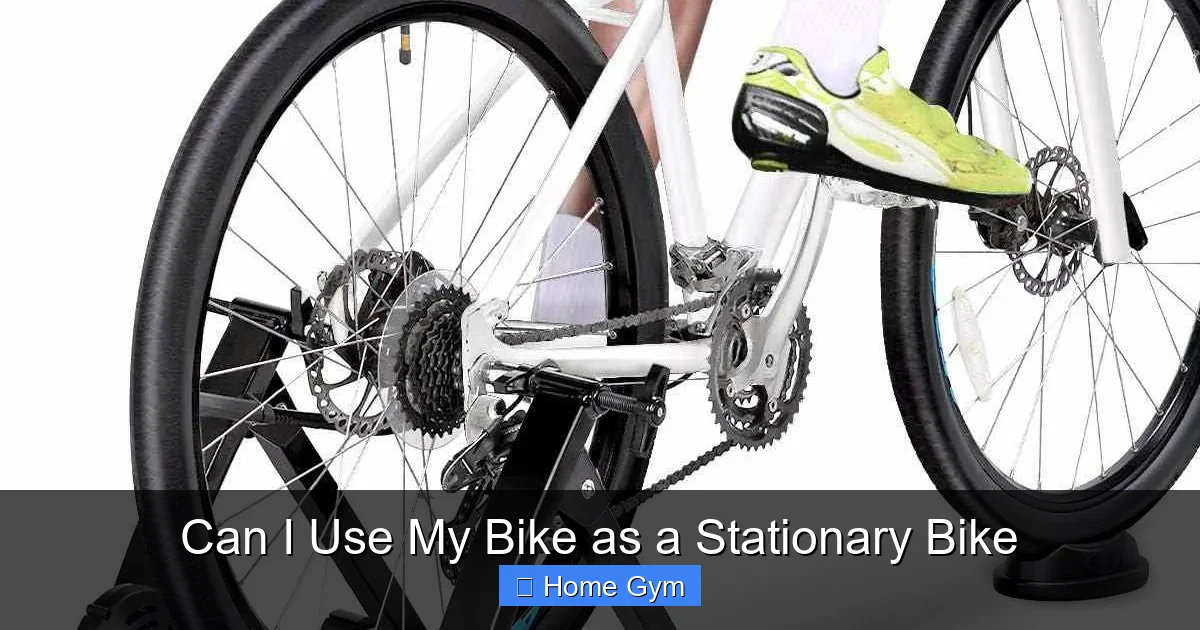
When people think of turning a bike stationary, they’re almost always thinking of a bicycle trainer. This is a sturdy, often triangular stand that you place your bike onto. The key action? It lifts your rear wheel off the ground and clamps onto the rear axle. The wheel then spins against a roller or a set of fan/magnetic/fluid resistance units, creating the workout load. It’s simple, effective, and the most popular method for a reason.
Visual guide about Can I Use My Bike as a Stationary Bike
Image source: i.ytimg.com
How a Trainer Works: The Basic Mechanics
Imagine a rigid A-frame. You roll your bike backward into it. A cup or clamp at the apex of the frame grabs your rear axle. A large cylindrical roller (the resistance unit) sits directly beneath your rear tire. As you pedal, your tire presses against this roller, spinning it and generating resistance. The front of your bike remains on the ground, but it’s usually too high, causing the bike to point sharply upward. This is where a front wheel riser block comes in—a simple plastic or rubber wedge you place under the front wheel to level the bike and create a natural, stable riding position.
Types of Resistance: From Wind to Smart
Not all trainers are created equal, and the resistance mechanism is the biggest differentiator. Your choice depends on budget, desired realism, and noise tolerance.
- Wind Trainers: The original. A fan blades spin against the air as your tire turns. They are affordable and offer progressive resistance (harder you pedal, harder it gets), but they are very loud—think vacuum cleaner levels. Great for a garage, not so much for an apartment.
- Magnetic Trainers: Use magnets to create resistance. They are quieter than wind trainers, and many have a dial on the unit for manual resistance adjustment. They can feel a bit “stepped” rather than smooth.
- Fluid Trainers: The popular middle ground. A fluid-filled chamber provides incredibly smooth, quiet, and road-like resistance. The resistance is progressive. They offer a great balance of realism, quiet operation, and cost.
- Direct-Drive (or “Wheel-Off”) Trainers: The premium option. You remove your rear wheel entirely and bolt the bike directly onto the trainer’s cassette. The trainer has its own built-in resistance unit and often a massive flywheel. These are the quietest, smoothest, and most accurate for power measurement (many are “smart” and connect to apps like Zwift or TrainerRoad). They are heavier and more expensive but provide the most realistic and stable experience.
Choosing the Right Trainer for Your Bike
This is the most critical step. A mismatch can damage your bike or be dangerously unstable. Here’s your checklist:
- Axle Compatibility: This is #1. Does your bike have a quick-release (QR) skewer or a thru-axle? Trainers are built for one or the other, and sometimes require specific adapters for different thru-axle sizes (e.g., 12x142mm, 12x148mm). Measure or check your bike’s specs. Most modern mountain bikes use thru-axles; many older road and hybrid bikes use QR.
- Frame Clearance: Look at your bike’s rear triangle. Does your rear brake or any frame protrusion (like a fender mount) stick out far enough that the trainer’s resistance unit might hit it? Place your bike on a stand and spin the rear wheel; watch for clearance. Some trainers offer “low-profile” units for bikes with limited space.
- Bike Weight Limit: Every trainer has a maximum rider + bike weight it can safely handle. Don’t exceed it.
- Material Matters: If you have a carbon fiber frame, you must be extra cautious. The clamping force of some trainers can damage carbon. Look for trainers specifically rated for carbon frames or those that use a “cup” system that distributes pressure more evenly. When in doubt, contact the trainer manufacturer and your bike manufacturer.
- Your Bike’s Wheel Size: Most trainers adjust for common sizes (700c, 26″, 27.5″, 29″). Just confirm the range fits your wheel.
Method 2: Bicycle Rollers (The Skill-Based Alternative)
Rollers are the classic, minimalist way to ride indoors. They consist of three long cylinders (usually aluminum) mounted on a frame. Your bike rides directly on these cylinders—both wheels are on the rollers. There is no clamping; you simply balance on them. The resistance comes from the friction between your tires and the rollers. The faster you go, the more resistance.
Visual guide about Can I Use My Bike as a Stationary Bike
Image source: bikesreviewed.com
The Roller Experience: Balance and Focus
Using rollers is like riding a treadmill for your bike. It requires constant micro-adjustments to stay centered. For a beginner, it can feel wobbly and intimidating. However, it’s fantastic for improving pedal stroke smoothness, core stability, and balance. Many seasoned rollers users find it a more engaging, “real” riding feel because you have to steer and balance, unlike on a fixed trainer. A common addition is a resistance unit (a magnetic or fan cylinder) that can be added to the front roller for more workout variability.
Are Rollers Right for You?
Rollers are best suited for riders who already have good bike handling skills and want a dynamic workout. They are generally quieter than wind trainers and very compact for storage. However, they are not ideal for high-intensity interval training (HIIT) where you might stand and mash the pedals—you’ll likely fly off. They are perfect for steady-state endurance rides, warm-ups, and technique work. If you’re new to indoor training, starting on a trainer is usually safer and more confidence-building.
Essential Gear and Setup: Making it Safe and Smooth
You’ve chosen your method. Now, let’s talk about the crucial accessories and setup steps that transform a potentially shaky experiment into a professional-grade home studio.
Visual guide about Can I Use My Bike as a Stationary Bike
Image source: shop.vescape.com
The Non-Negotiable Front Wheel Riser
Whether you use a trainer or rollers (some roller sets include them), you’ll likely need a front wheel riser. When the rear wheel is elevated, the front end points down, putting you in an awkward, sloping position that strains your neck, shoulders, and back. A riser block—a simple wedge—goes under your front wheel to level the bike, putting your body in a natural, efficient riding posture. Most trainers include one, but if yours didn’t, they are cheap and universal. For rollers, a riser is essential to match the height of the rear rollers.
Protecting Your Bike: The Trainer Tire
This is a lesson learned the hard way by many. The friction and heat generated against the trainer’s roller will destroy a standard road or mountain bike tire in a matter of hours or a few rides. The rubber will melt, become gummy, and develop flat spots. The solution is a dedicated trainer tire or indoor training tire. These are made from a harder, more heat-resistant rubber compound designed specifically for the punishing, constant friction of a trainer. They are often black with a smooth tread or a distinct red/blue tread. It’s the single best upgrade you can make to protect your expensive outdoor tires and ensure a consistent, safe grip on the roller.
Cooling and Ventilation: Don’t Overheat
Indoor cycling gets hot. There’s no wind in your face. You must create airflow. A simple box fan or pedestal fan positioned in front of you is essential. Point it at your torso and face. For a more immersive setup, some riders get creative with multiple fans or even a DIY “air wall.” Hydration is also critical—have a water bottle within easy reach on your bike’s cage or a nearby table.
Securing Your Bike: The Roller Mat
Place your entire trainer/roller setup on a non-slip trainer mat or thick rubber mat. This does three things: it protect your floor from sweat and tire debris, it dampens vibration and noise, and most importantly, it prevents the whole unit from sliding across the floor during a hard sprint or out-of-seasel effort. A mat is a small investment for stability and floor protection.
Pros, Cons, and Critical Considerations
Before you dive in, let’s have an honest talk about the realities. Using your bike indoors has fantastic advantages but also some real trade-offs compared to a dedicated stationary bike.
The Overwhelming Advantages
- Cost: This is the biggest win. A good quality fluid or magnetic trainer costs $200-$400. A direct-drive smart trainer is $800-$1500. Compare that to a decent stationary bike starting at $500 and going well over $2000. You’re using a asset you already own.
- Realism and Feel: You are on your own bike. The geometry, saddle, handlebar width, and shifting are all exactly what you’re used to. This translates perfectly to your outdoor riding. A stationary bike, no matter how good, is a different machine.
- Portability and Storage: When you’re done, you can often fold the trainer and put it in a closet. Your bike goes back on its wall hook or stand. It doesn’t command a permanent 4’x2’ footprint in your living room.
- Training Specificity: For cyclists, this is the gold standard for indoor training. You can use your own power meter (if you have one), your own gearing, and your own pedals (clipless or flats). It’s the exact same movement pattern.
The Potential Drawbacks and Warnings
- Frame and Fork Stress: Over time, the clamping force and the unusual static load on the rear triangle can stress certain frames, especially steel or aluminum frames with tight clearance. Carbon frames are most at risk. Never use a full-suspension mountain bike on a trainer that clamps the rear axle—the rear suspension will be locked, transferring pedal forces directly to the frame in ways it wasn’t designed for, potentially causing damage.
- Noise: Unless you opt for a premium direct-drive or fluid trainer, there will be noise. Wind trainers are loud. Even magnetic ones hum. If you live in an apartment with downstairs neighbors, this is a serious consideration.
- Tire Wear and Mess: As mentioned, you’ll shred a normal tire. You’ll also get a fine black dust of rubber debris around the trainer area. The mat helps, but it’s a factor.
- No Built-In Console: You don’t get a built-in screen, heart rate monitor, or programmed workouts. You need to supply your own entertainment (tablet, TV) and potentially sensors (speed/cadence, power) to track metrics. This can be a pro or con depending on your tech preference.
- Single-Bike Limitation: You can only ride the bike that’s on the trainer. If multiple people in the household want to train, swapping bikes on and off the trainer can be a hassle.
Safety First: A Non-Negotiable Checklist
Before you ever push that first pedal stroke, run through this list. Your safety and your bike’s integrity depend on it.
- Read the Manual: Seriously. Every trainer model is different. Understand the clamping mechanism, the weight limit, and the specific setup instructions.
- Inspect Your Bike: Give your bike a once-over. Check the rear axle for any cracks or damage. Ensure the rear dropout (the part the axle sits in) is solid. If you have any doubt about your frame’s suitability, do not proceed.
- Secure the Clamp: This is the most important step. Tighten the trainer’s axle clamp knob or bolt with firm, even pressure. It should be extremely tight. The bike should not wiggle or shift side-to-side at the rear axle when you apply body weight. Give it a firm yank to test.
- Level the Bike: Use the front wheel riser. Get the bike as level as possible. An unlevel bike puts unnatural stress on the handlebars, stem, and headset, and creates an inefficient riding position.
- Check Tire Pressure: Inflate your rear tire to the higher end of its recommended range (e.g., 100-110 PSI for a road tire). A firmer tire creates less deformation against the roller, reducing heat, wear, and the “squishy” feeling.
- Start Slow: For your first few sessions, pedal gently and stay seated. Get a feel for the stability. Stand up gradually and only when you’re confident in the setup.
- Have an Exit Strategy: Make sure you can easily stop and put your feet down if you lose balance. Ensure the area around you is clear of obstacles.
- Listen and Feel: If you hear any concerning creaks from your frame, see any flexing, or feel the clamp slipping, stop immediately. Reassess your setup.
When It’s NOT a Good Idea: Exceptions and Cautions
While the answer is mostly “yes,” there are clear cases where you should not attempt to use your bike on a trainer.
- Full-Suspension Mountain Bikes: As stated, this is the #1 rule. The rear suspension linkage is not designed to be rigidly clamped. The forces can break the linkage, damage the frame, or cause catastrophic failure. Some brands make specific “trainer mode” kits that lock the suspension in a safe way, but it’s rare. Assume you cannot use a full-sus bike on a standard trainer.
- Bikes with Certain Carbon Frames: Many high-end carbon road bikes have warranty conditions that exclude trainer use, or they require a specific trainer with a “cup-style” clamp that distributes pressure over a larger area. Clamping force on a narrow carbon axle can crush it. Check your manufacturer’s guidelines explicitly.
- Bikes with Unusual Rear Dropouts: Some bikes have track ends, horizontal dropouts, or proprietary designs. These may not interface correctly with a trainer’s vertical clamping force. You may need a special adapter, or it may be impossible.
- Bikes with Fenders or Heavy Racks: These can interfere with the trainer’s resistance unit or the frame. You’ll likely need to remove them.
- If Your Bike is Your Only Transportation: If this is your sole bike and you absolutely cannot afford to have it out of commission for a day due to a setup issue or tire failure, the risk might not be worth it. A cheap used bike dedicated to trainer duty is a far safer bet.
The Verdict: Is It Worth It?
For the vast majority of cyclists with a compatible bike, using your bike as a stationary bike is an outstanding, cost-effective, and high-performance solution. The realism of being on your own machine is unparalleled. The upfront cost is a fraction of a new piece of cardio equipment. The space-saving nature is perfect for small homes and apartments.
The key is informed preparation. Investing in the right trainer for your axle type, buying a proper trainer tire, setting up safely with a riser and mat, and respecting the limitations of your bike’s frame material will give you years of reliable, effective indoor training. It bridges the gap between outdoor passion and indoor necessity beautifully. So, go ahead, roll that bike into your living room, garage, or basement, and turn those winter blues into powerful, sweat-filled gains. Your future self—stronger, fitter, and with a few extra dollars in the wallet—will thank you.
Frequently Asked Questions
Will using a trainer damage my bike’s frame?
It can, if done incorrectly. The main risks are to carbon fiber frames (from clamp pressure) and full-suspension mountain bikes (from locked suspension forces). Always check your manufacturer’s guidelines, use a trainer rated for your frame material, and ensure the clamp is secure but not over-tightened on carbon axles.
How much faster will I wear out my rear tire?
Dramatically faster. A standard tire can be destroyed in just a few 1-hour sessions due to heat and friction. A dedicated trainer tire, made of harder rubber, is essential and can last for hundreds of indoor hours. Always use a trainer-specific tire for any regular indoor training.
Are trainers loud? My neighbors will hear me.
It depends entirely on the type. Wind trainers are very loud (like a vacuum). Magnetic trainers have a moderate hum. Fluid and direct-drive trainers are the quietest, often described as a soft whir. If noise is a primary concern, prioritize fluid or direct-drive models.
Can I use my mountain bike with knobby tires on a trainer?
You can, but it’s not ideal. Knobby tires create excessive vibration, noise, and uneven wear. They also can be less stable on the roller. The best practice is to have a dedicated smooth or semi-slick trainer tire mounted on a separate wheel that you swap on for indoor use.
Do I need a special wheel or axle for a direct-drive trainer?
Yes, direct-drive trainers require you to remove your rear wheel. You then bolt your bike’s frame directly to the trainer’s body, which has its own built-in cassette and resistance unit. You must ensure your bike’s rear dropout spacing (usually 130mm for road, 135mm for MTB) matches the trainer’s specification. Most modern direct-drive trainers include adapters for various thru-axle standards.
What’s the biggest mistake beginners make when setting up a trainer?
Failing to use a front wheel riser. Riding with the front end pointed down leads to a terrible riding position, strains your neck and shoulders, and can make the bike unstable. Always use the riser block to level the bike. The second biggest mistake is not tightening the rear axle clamp sufficiently, allowing the bike to shift under hard pedaling.