The Ultimate Beef Temperature Chart for Perfect Steaks
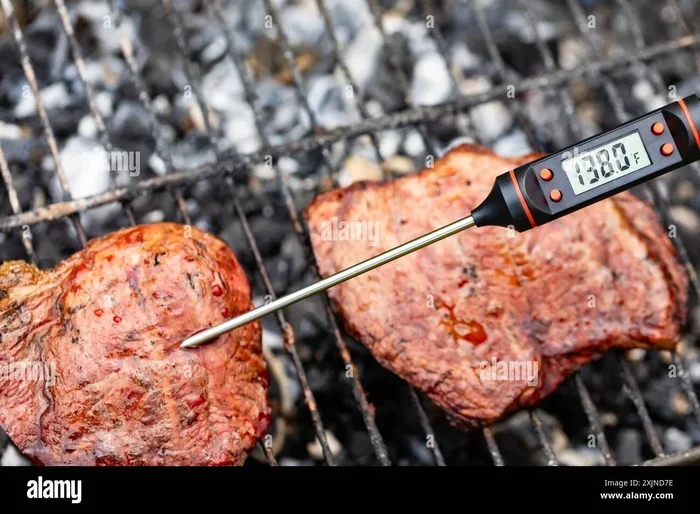
A beef temperature chart is the single most important tool for cooking steaks that are juicy, flavorful, and cooked exactly how you like them. Whether you are grilling outdoors or searing in a cast iron pan, knowing the right internal temperature takes the guesswork out of cooking. This guide walks you through every doneness level, the best thermometer choices, and expert tips for restaurant-quality results at home. You will learn how carryover cooking affects your steak and how to avoid the most common temperature mistakes. By the end, you will feel confident cooking any steak to perfection using a reliable beef temperature chart.
A perfectly cooked steak is one of life’s simple pleasures. Whether you prefer a juicy medium rare center or a more well-done piece of meat, the secret to great steak is all about temperature. A beef temperature chart takes the guesswork out of cooking and helps you achieve consistent results every time you fire up the grill or heat up your stove.
Many home cooks rely on guesswork or the touch test to determine if their steak is done. But those methods are unreliable. A meat thermometer removes all the doubt. It tells you the exact internal temperature of your steak so you can cook it precisely the way you like it. In this guide, we will walk you through everything you need to know about using a beef temperature chart to cook steaks that rival your favorite restaurant.
We will cover every doneness level, explain how different cooking methods affect temperature, and share practical tips that will level up your steak game right away. Let us dive in.
Key Takeaways
- Use a meat thermometer: It is the only reliable way to check your steak’s internal temperature and ensure food safety.
- Know your doneness levels: Each level from rare to well done has a specific temperature range that changes the texture and juiciness of your steak.
- Account for carryover cooking: Your steak continues to rise in temperature after you remove it from the heat source.
- Rest your steak properly: Letting it rest for 5 to 10 minutes redistributes juices and improves flavor.
- Choose the right cooking method: Grilling, pan-searing, and sous vide each require slightly different approaches to temperature control.
- Avoid common mistakes: Cutting into the steak too early, skipping the rest, and relying on touch alone lead to inconsistent results.
- Invest in an instant-read thermometer: It gives you fast, accurate readings every single time you cook.
📑 Table of Contents
- Why a Beef Temperature Chart Matters
- The Beef Temperature Chart: Doneness Levels Explained
- How to Use a Meat Thermometer Correctly
- Best Cooking Methods for Perfect Steak Temperatures
- Common Mistakes When Checking Steak Temperature
- Expert Tips for Restaurant-Quality Results at Home
- Comparison: Beef Doneness Levels at a Glance
- Final Thoughts
Why a Beef Temperature Chart Matters
Cooking steak without a temperature reference is like driving without a speedometer. You might get lucky sometimes, but most of the time you will end up with inconsistent results. A beef temperature chart gives you a clear target to aim for every single time.
The chart maps out specific internal temperature ranges for each level of doneness. From a cool-red rare center to a fully cooked well done steak, each temperature range produces a different texture, juiciness, and flavor profile. When you follow a steak doneness guide, you remove the stress from cooking and focus on what really matters: enjoying your meal.
Food safety is another important reason to use a beef temperature chart. The USDA recommends cooking whole cuts of beef to at least 145 degrees Fahrenheit for food safety. However, many steak lovers prefer their steaks below that temperature because they enjoy the taste and texture of less-cooked beef. Understanding these guidelines helps you make informed decisions about how you cook and serve your steak.
How Temperature Affects Steak Texture
The internal temperature of your steak directly controls how the proteins and fats behave. At lower temperatures, the meat retains more moisture and stays tender. As the temperature rises, proteins tighten and squeeze out moisture, making the steak firmer and drier.
Here is a quick breakdown of what happens at each stage:
- Below 120°F: The meat is very soft and raw. The proteins have barely started to tighten.
- 120°F to 130°F: This is the medium rare sweet spot. The steak is juicy, tender, and has a bright red center.
- 130°F to 140°F: Medium steak with a pink center. The texture starts to firm up slightly.
- 140°F to 150°F: Medium well with a hint of pink. Noticeably less juicy but still flavorful.
- 150°F and above: Well done. The steak is fully cooked through, firm, and significantly drier.
Understanding these texture changes is the first step toward mastering steak cooking. A beef temperature chart makes it easy to track exactly where your steak falls on this spectrum.
The Beef Temperature Chart: Doneness Levels Explained
The core of any good beef temperature chart is the doneness levels. Each level has a temperature range that defines how cooked the steak is. Let us walk through each one in detail so you know exactly what to aim for.
Rare (120°F to 125°F)
A rare steak has a cool-red center and is very soft to the touch. The internal temperature stays low enough that the proteins barely tighten, so the meat is extremely juicy and tender. This level is perfect for high-quality cuts where you want to taste the pure flavor of the beef.
Rare steaks are best for cuts like ribeye, filet mignon, and strip steak. If you are using a grill temperature setup, you want a hot sear followed by a short rest before serving.
Medium Rare (130°F to 135°F)
Medium rare is widely considered the ideal doneness for steak. The center is warm-red and juicy, with a perfect balance of tenderness and flavor. This is the level you will see most chefs recommend for a quality cut.
When you pull your steak off the heat at around 125°F, carryover cooking will raise the temperature another 5 degrees during the rest period. This is why many cooks pull their steak a few degrees early.
Medium (135°F to 145°F)
A medium steak has a pink center and a slightly firmer texture than medium rare. It is still very juicy but not quite as tender. This level works well for thicker cuts where you want a bit more structure in the bite.
Many people start at medium rare and work their way up to medium as they get used to checking temperatures. A beef temperature chart makes this transition easy because you can see exactly where you are aiming.
Medium Well (145°F to 155°F)
Medium well steaks have only a thin band of pink left near the center. The meat is noticeably firmer and less juicy. This level suits people who prefer their steak cooked more thoroughly but still want some moisture.
Thinner cuts can quickly overshoot this range, so you need to watch the grill temperature or pan heat carefully. An instant-read thermometer is essential here because the window between medium well and well done is very small.
Well Done (155°F and above)
A well done steak is cooked all the way through with no pink remaining. The texture is firm and dry because most of the moisture has been driven out of the meat. Some people enjoy well-done steak, especially with rich sauces that add moisture back in.
If you prefer your steak well done, consider using a sous vide method to maintain a consistent oven-baked steak temperature without overcooking the outer layers. This approach keeps the meat from drying out as much as traditional high-heat cooking.
How to Use a Meat Thermometer Correctly
A beef temperature chart is only as useful as the tool you use to read the temperature. A good meat thermometer is an essential piece of equipment for any home cook who wants consistent results.
Types of Thermometers for Steak
Not all thermometers are created equal. Here are the most common types you will encounter:
- Instant-read thermometers: These give you a fast reading in about 10 seconds. You insert the probe, wait for the number, and pull it out. They are affordable and reliable for most home cooks.
- Leave-in probe thermometers: These stay in the steak throughout the entire cooking process. They connect to a display unit or app and let you monitor the temperature without opening the oven or grill.
- Wireless thermometers: Similar to leave-in probes but with wireless connectivity. You can monitor your steak from across the room using your phone.
- Thermapen-style thermometers: These are the gold standard for speed and accuracy. They are pricier but give you an instant reading with high precision.
Where to Insert the Thermometer
Placement matters a lot when checking steak temperature. You want to insert the probe into the thickest part of the meat, away from any bone, fat pockets, or the pan or grill surface.
Push the probe in sideways so it goes through the center of the steak. Avoid touching the bottom of the pan or the grill grate because those surfaces are much hotter than the center of the meat. A correct placement gives you a true internal temperature reading that matches what your beef temperature chart shows.
When to Check the Temperature
Start checking your steak about 5 minutes before you think it might be done. This gives you time to pull it off the heat at the right moment. Remember that carryover cooking will raise the temperature by 5 to 10 degrees after you remove the steak from the heat source.
For thicker steaks, check the temperature in multiple spots. The center might be cooler than the edges, so aim for the lowest reading you get. That is your true steak doneness indicator.
Best Cooking Methods for Perfect Steak Temperatures
Different cooking methods require different approaches to temperature control. Each method interacts with your beef temperature chart in unique ways. Let us look at the most popular methods and how to manage temperature with each one.
Grilling
Grilling is the most popular way to cook steak, and it works beautifully with a beef temperature chart. The key is managing your grill temperature zones. Create a two-zone fire with a hot direct heat side and a cooler indirect heat side.
Start by searing the steak over direct high heat for 2 to 3 minutes per side. Then move it to the indirect side to finish cooking. This approach gives you a charred crust on the outside while bringing the internal temperature up evenly. Use your thermometer frequently to track progress.
Pan-Searing
Pan-searing in a cast iron skillet creates a beautiful charred crust and locks in juices. Heat your pan until it is smoking hot, add a high-smoke-point oil, and place the steak in. Sear for 2 to 3 minutes per side.
For thicker steaks, you can finish them in the oven after searing. This is called the reverse sear method. Start in a low oven at around 250°F until the internal temperature is about 10 degrees below your target. Then sear in a hot pan for a crisp exterior. The beef temperature chart guides you through both phases.
Sous Vide
Sous vide cooking gives you the most precise temperature control of any method. You vacuum-seal the steak and cook it in a water bath set to your exact target temperature. This method eliminates carryover cooking almost entirely because the steak never exceeds the water temperature.
After the sous vide bath, you still need a quick sear in a hot pan to develop the charred crust. But the internal temperature will be perfectly even from edge to edge. Sous vide is a game-changer for anyone serious about steak cooking times and temperature precision.
Common Mistakes When Checking Steak Temperature
Even experienced cooks make mistakes when it comes to steak temperature. Knowing what to avoid saves you from ruined steaks and frustration.
Cutting Into the Steak to Check Doneness
This is the most common mistake home cooks make. When you cut into the steak to check the color, you release all those precious juices. The steak loses moisture and flavor every time you slice into it.
Instead, rely on your meat thermometer and your beef temperature chart. You get an accurate reading without losing a single drop of juice. Your steak stays juicier and more flavorful.
Ignoring Carryover Cooking
Carryover cooking is the phenomenon where the steak continues to rise in temperature after you remove it from the heat. This happens because the outer layers are hotter than the center, and heat transfers inward during the resting period.
A good rule of thumb is to pull your steak 5 degrees below your target temperature. For example, pull at 125°F for a medium rare finish of 130°F. Ignoring carryover is one of the fastest ways to overshoot your steak doneness level.
Not Resting the Steak Long Enough
Resting is not optional. When you pull the steak off the heat, let it sit for at least 5 to 10 minutes before slicing. During this time, the juices redistribute throughout the meat instead of pooling on the cutting board.
Tent the steak loosely with aluminum foil to keep it warm without trapping too much steam. A proper rest period makes a noticeable difference in juiciness and tenderness.
Relying Only on the Touch Test
The touch test where you press the steak with your finger can give you a rough idea of doneness, but it is not precise. Everyone’s hand feels different, and the firmness of the meat changes with thickness and fat content.
Use the touch test as a rough guide, but always confirm with a meat thermometer. A beef temperature chart removes all subjectivity and gives you a clear target every time.
Expert Tips for Restaurant-Quality Results at Home
Professional chefs rely on precision and technique to deliver perfect steaks consistently. You can apply many of their methods at home with just a little practice.
Let Your Steak Come to Room Temperature
Take your steak out of the refrigerator 30 to 45 minutes before cooking. A steak that starts at room temperature cooks more evenly than one straight from the fridge. This simple step reduces the risk of a cold center with an overcooked exterior.
Season Generously and Early
Salt your steak at least 40 minutes before cooking, or right before you sear. Early salting draws out moisture, which then gets reabsorbed and seasons the meat deeply. This creates a better charred crust and more flavorful result.
Use the Right Oil
Choose an oil with a high smoke point like avocado oil or grapeseed oil for searing. Olive oil burns at high temperatures and can create off-flavors. The right oil supports a clean, high sear temperature that builds a perfect crust.
Invest in Quality Cuts
Even the best temperature technique cannot save a low-quality cut. Look for well-marbled steaks from reputable sources. The fat content affects how the steak responds to heat and how juicy the final result is. Steak grades like USDA Prime or Choice have more marbling and respond beautifully to precise temperature control.
Track Your Cooks
Keep a simple cooking log where you note the internal temperature, pull temperature, rest time, and final result. Over time, you will learn exactly how your specific grill, pan, and cuts behave. This data-driven approach accelerates your mastery of steak cooking.
Comparison: Beef Doneness Levels at a Glance
Here is a quick reference guide that summarizes the key temperature ranges and characteristics for each level of steak doneness. Keep this near your cooking station for easy access.
- Rare: 120°F to 125°F. Cool-red center. Very soft and juicy. Best for high-quality cuts.
- Medium Rare: 130°F to 135°F. Warm-red center. Juicy and tender. The most popular choice.
- Medium: 135°F to 145°F. Pink center. Slightly firmer texture. Great balance of juiciness and structure.
- Medium Well: 145°F to 155°F. Thin pink band. Firmer and less juicy. For those who prefer more cooking.
- Well Done: 155°F and above. No pink. Firm and dry. Best with sauces or braised preparations.
Use this reference alongside your beef temperature chart and a reliable instant-read thermometer for the best results. Every steak is slightly different, so always check the actual temperature rather than relying solely on time or visual cues.
Final Thoughts
Cooking a great steak is a skill anyone can learn with the right tools and knowledge. A beef temperature chart is the foundation of that skill. It gives you clear targets, removes guesswork, and helps you cook every steak to your preferred steak doneness level.
Pair your chart with a quality meat thermometer, learn to account for carryover cooking, and always let your steak rest before slicing. These simple habits transform your home cooking and deliver results that rival any steakhouse.
Start with medium rare if you are new to checking temperatures, and adjust from there as you build confidence. The more you cook with a beef temperature chart, the more intuitive the process becomes. Soon you will be able to close your eyes, pull the steak at exactly the right moment, and serve a perfect steak every single time.
Grab your thermometer, fire up the grill or preheat your pan, and put your new knowledge to work. The perfect steak is waiting for you, and now you have the tools to make it happen.
Frequently Asked Questions
What is the best internal temperature for a medium rare steak?
A medium rare steak should reach an internal temperature of 130°F to 135°F. This is the sweet spot where the steak is juicy, tender, and has a warm-red center. Pull the steak a few degrees early to account for carryover cooking during the rest period.
How accurate should my meat thermometer be for reading steak temperatures?
Your meat thermometer should be accurate to within 1 to 2 degrees Fahrenheit. You can test its accuracy by inserting it into ice water, which should read 32°F, or boiling water at 212°F at sea level. An inaccurate thermometer can throw off your entire beef temperature chart reference, so calibration matters.
Can you use a beef temperature chart for other types of meat?
A beef temperature chart is specifically designed for beef cuts. Other meats like pork, chicken, and lamb have different food safety temperature requirements. Always use the appropriate temperature chart for the specific meat you are cooking to ensure both safety and quality.
How long should you rest a steak after cooking?
Let your steak rest for at least 5 to 10 minutes after removing it from the heat. This allows the juices to redistribute throughout the meat and gives carryover cooking time to finish raising the internal temperature to your target level. A proper rest makes the steak significantly juicier and more flavorful.
Is sous vide better than grilling for steak temperature control?
Sous vide offers the most precise temperature control of any cooking method because the water bath maintains an exact temperature throughout. Grilling and pan-searing are faster and create a great charred crust, but they require more attention to avoid overshooting your target steak doneness. Many chefs use both methods together for the best results.
What should I do if my steak is overcooked?
If your steak turns out overcooked, you can still improve it by slicing it thinly and serving it with a flavorful sauce like chimichurri, mushroom sauce, or compound butter. The sauce adds moisture and flavor to compensate for the drier texture. Next time, pull the steak off the heat a few degrees earlier and use your beef temperature chart as a guide.