Adjusting your stationary bike seat isn’t just about comfort—it’s critical for preventing injury and maximizing your workout efficiency. An improperly fitted saddle can cause knee pain, hip strain, and numbness, derailing your fitness goals. This guide provides step-by-step, model-agnostic instructions to find your ideal seat height, fore-aft position, and angle, ensuring every pedal stroke is effective and safe.
You’ve hopped on your stationary bike, ready to crush a cardio session. You crank up the resistance, start pedaling, and within minutes, you feel a nagging ache in your knee, a tingling sensation, or you’re simply sliding forward with every push. The culprit is almost always one thing: an improperly adjusted seat. Learning how to adjust the seat on a stationary bike is the single most important skill you can master for a safe, comfortable, and effective workout. It’s not a “set it and forget it” task. Your body changes, your flexibility shifts, and different workouts demand slightly different positions. This comprehensive guide will walk you through every step, method, and nuance to achieve the perfect saddle setup, whether you’re on a sleek spin bike, a compact recumbent, or a basic upright model.
Think of your bike fit as the foundation of your house. If the foundation is cracked, everything else—your power output, your endurance, your joint health—is compromised. An incorrect seat height forces your knee into unnatural angles, straining ligaments and tendons. A seat that’s too far forward or back misaligns your entire kinetic chain, from hip to ankle. Even the tilt of the saddle can cause you to grip the handlebars too tightly, leading to sore shoulders and a sore back. By the end of this article, you’ll move beyond guesswork and use precise, repeatable methods to dial in your fit. You’ll understand the *why* behind each adjustment, not just the *how*, empowering you to make micro-corrections on the fly and truly own your ride.
Key Takeaways
- Correct seat height is foundational: Your leg should have a slight knee bend (25-35 degrees) at the bottom of the pedal stroke, not be locked straight or overly bent.
- The “Heel Method” is a quick, reliable starting point: Place your heel on the pedal; your leg should be fully straight with a flat foot. When you switch to the ball of your foot, you’ll have the correct micro-bend.
- Fore-aft position affects knee tracking: Your kneecap should align vertically with the pedal axle when the crank is horizontal to avoid undue joint stress.
- Seat angle matters for comfort: A perfectly level or very slightly nose-down tilt (1-2 degrees) is ideal for most riders to prevent sliding forward or pressure points.
- Different bikes have different adjustment mechanisms: Know whether your bike uses a quick-release lever, an Allen key bolt, or a pin-and-hole system to make adjustments efficiently.
- Re-check your fit after every few rides: Your body adapts, and muscles loosen. A setup that felt perfect last week might need a minor tweak today for optimal alignment.
- Proper setup prevents common injuries: Correct seat adjustment is the primary defense against patellar tendinitis, iliotibial band syndrome, and perineal numbness.
📑 Table of Contents
Why Your Seat Adjustment Is Non-Negotiable for Health and Performance
Before we dive into the mechanics of the adjustment levers and bolts, let’s establish why this matters so much. It’s easy to dismiss saddle position as a minor comfort issue, but it’s a major biomechanical determinant. Your stationary bike is a fixed machine; you are the moving variable. Your goal is to make your body move in harmony with the machine’s geometry, not fight against it.
The Injury Triangle: Knee, Hip, and Back Pain
The most common complaints from poor bike fit manifest in three key areas. Knee pain, often felt as a sharp ache in the front (patellar tendinitis) or the sides (iliotibial band friction syndrome), is the #1 sign of a seat that’s too low or too far forward. When your seat is too high, you’ll feel a pulling sensation at the back of the knee (hamstring tendonitis) and experience that painful “hyperextension” lockout at the bottom of the stroke. Hip pain or groin strain usually indicates a seat that’s too high or tilted excessively upward, forcing your hip into excessive extension. Lower back pain often stems from a combination of factors: a seat that’s too far back, causing you to overreach and round your spine, or a seat that’s too high, rocking your pelvis with each pedal stroke. Adjusting your seat correctly distributes forces evenly across your joints and muscles.
Power Output and Efficiency: You’re Leaving Watts on the Table
Beyond injury prevention, a proper fit is a performance enhancer. When your leg is at the optimal angle throughout the pedal stroke, your largest muscle groups—the quads and glutes—can fire most effectively. A seat that’s too high forces you to use your hamstrings and calves to pull the pedal up, which are smaller, less powerful muscles. A seat that’s too low prevents full leg extension, truncating your power phase. You’ll fatigue faster, burn fewer calories, and hit a plateau because you’re not using your body’s full mechanical potential. Think of it like trying to squat with poor form; you can’t lift as much weight safely. The same principle applies to pedaling.
Comfort Equals Consistency: The Secret to Long-Term Adherence
Let’s be honest: if your ride hurts, you won’t ride. Numbness, chafing, and general discomfort are the fastest ways to abandon a fitness routine. A well-adjusted seat means you can comfortably sit for 30, 45, even 60+ minutes, which is crucial for building cardiovascular endurance and burning fat. Comfort isn’t about soft seats (in fact, overly padded saddles can cause more friction); it’s about correct skeletal support. Your sit bones (ischial tuberosities) should bear your weight on a wide, stable part of the saddle. If you’re perched on the nose or sliding off the back, no amount of cushion will help. Proper height, fore-aft, and tilt ensure your skeleton, not your soft tissue, supports your weight.
Understanding Your Stationary Bike: The Adjustment Mechanisms
Before you can make any changes, you need to know what you’re working with. Stationary bikes, while similar in function, have vastly different adjustment systems. Identifying yours is the first practical step.
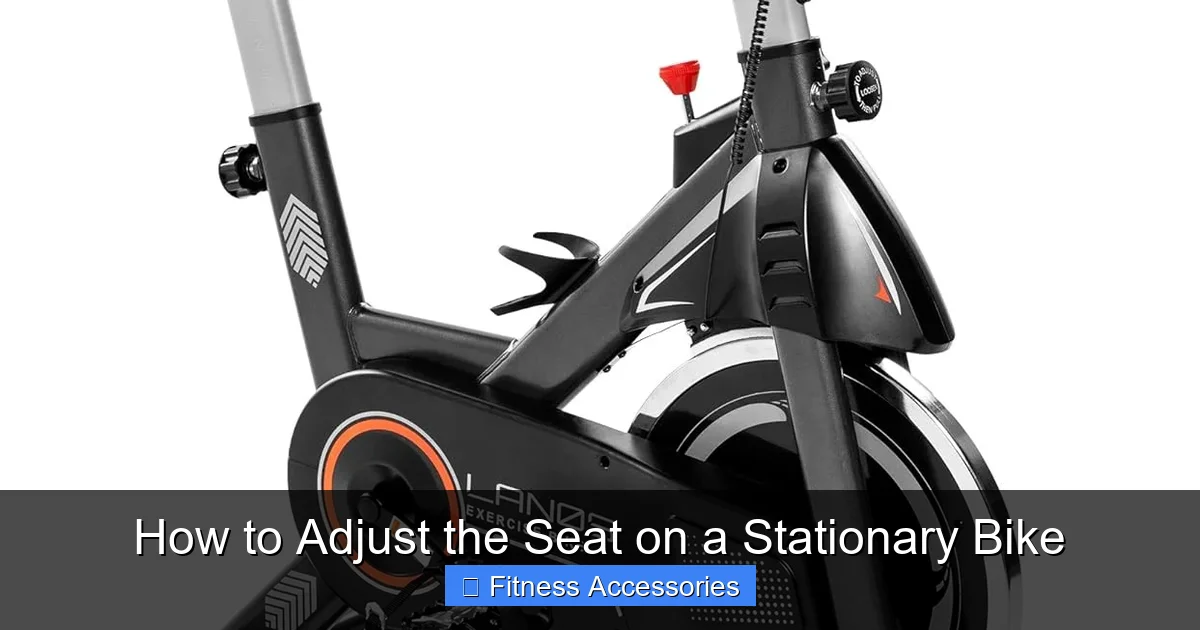
Visual guide about How to Adjust the Seat on a Stationary Bike
Image source: m.media-amazon.com
Upright/Spin Bikes: The Classic Lever and Pin System
Most traditional upright bikes and spin bikes you see in studios use a combination of systems. Seat Height: This almost always uses a “pin and hole” system. A vertical post slides into the main frame tube, which has a series of holes. A quick-release lever or a knob with a pin inside secures it. To adjust, you pull the lever/loosen the knob, slide the post up or down to align the pin with your desired hole, and release/tighten. Always give the post a firm tug downward after securing to ensure it’s locked. Seat Fore-Aft (Slide): This is typically a rail system. The seat clamp grips two long, parallel metal rails on the underside of the saddle. You loosen a single bolt (usually an Allen key or a quick-release lever) on the front or side of the clamp, slide the saddle forward or backward on the rails, and retighten. Seat Angle: Often controlled by a bolt at the front of the clamp where it meets the rails. Loosen it slightly, tilt the saddle to your desired angle (use a small level for precision), and retighten.
Recumbent Bikes: The Easy-Rider Adjustments
Recumbent bikes, with their laid-back seating position, have a different set of priorities. Seat Backrest Angle: This is a primary adjustment. A lever or bolt allows you to recline the entire backrest assembly. A more upright position engages your core more; a reclined position is easier on the lower back. Seat Pan Position (Fore-Aft): Because you’re reclined, “fore-aft” is more about sliding the entire seat assembly along a track on the main frame. This adjustment is crucial for reaching the pedals comfortably without overextending your legs. It’s usually a pin-in-hole or a sliding bolt system. Lumbar Support: Many recumbents have an adjustable pad in the backrest. Position this to fill the natural curve of your lower back for support.
Hybrid/Fitness Bikes: The Multi-Tool Approach
These often blend features. Seat height might be a twist-to-lock collar instead of a pin. Fore-aft adjustment might require an Allen key (hex wrench), which is almost always included with the bike or can be a standard 5mm or 6mm size. Always consult your owner’s manual first, as it will specify the exact mechanism and tool size. The principles of fit remain identical, only the hardware differs.
The Holy Grail: Step-by-Step Seat Height Adjustment
Seat height is the most critical and easiest to get wrong. A bad height setting will undermine every other adjustment you make. We’ll use the most reliable, equipment-free method first, then verify with a more precise check.
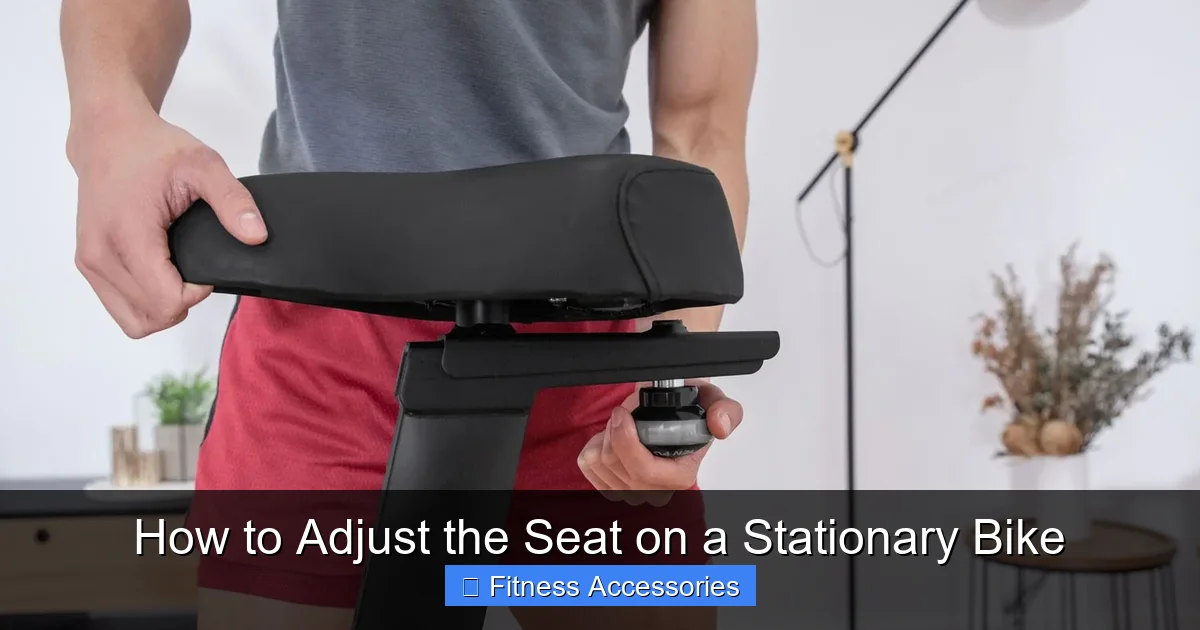
Visual guide about How to Adjust the Seat on a Stationary Bike
Image source: cdn.shopify.com
Method 1: The Heel Method (The Gold Standard for First-Time Setup)
This method gives you a perfect starting point 95% of the time. It’s based on the simple fact that when your heel is on the pedal at the bottom of the stroke, your leg should be completely straight. This ensures that when you ride with the ball of your foot on the pedal (the correct position), you’ll have a slight, healthy bend.
- Start Low: Set the seat very low. You should be able to easily mount the bike with both feet flat on the floor while seated.
- Pedal with Your Heel: Get on the bike and begin pedaling slowly. Place the heel of your foot on the pedal (not the ball of your foot). Keep your toe pointed up.
- Check the Bottom Stroke: Pedal until your heel is at the very bottom of the stroke (6 o’clock position). Your leg should now be fully extended and straight. There should be no bend in the knee, but also no feeling of your hip rocking to reach the pedal. If your knee is bent, the seat is too low. If you have to point your toes drastically to make your leg straight, or if your hip hinges, the seat is too high.
- Lock It In: Once you find that “straight leg with heel” position, note the hole or mark on the post. That is your correct height setting. Secure the lever or knob firmly.
Now, when you ride normally with the ball of your foot on the pedal, you will have a knee bend of approximately 25-35 degrees at the bottom of the stroke. That is the ideal range for power and joint health.
Method 2: The Goniometer (Angle) Check (For Precision Tuning)
Once you have a starting height from the Heel Method, you can fine-tune. This is useful if you have specific flexibility issues or previous injuries. You’ll need a goniometer (a physical therapy tool) or even a smartphone app that measures angles.
- Get in Position: Sit on the bike with your hands on the handlebars in your normal riding position. Pedal slowly until your crank arms are horizontal (pointing straight out to 3 and 9 o’clock).
- Find the Landmark: Focus on your driving leg (the one at the bottom, 6 o’clock). Identify the bony bump on the outside of your knee (the lateral femoral condyle) and the bony bump on the outside of your ankle (the lateral malleolus).
- Measure the Angle: Align the goniometer’s stationary arm along your femur (thigh bone) and the moving arm along your tibia (shin bone). The angle at your knee joint should read between 25 and 35 degrees. If it’s less than 25 (almost locked), lower the seat a notch. If it’s more than 35 (deep squat), raise the seat a notch.
This method is more scientific but less practical for everyday adjustments. The Heel Method is faster and just as effective for most riders.
Dialing In the Fore-Aft Position: Knee Over Pedal Spindle
With height set, we now address the horizontal position of the saddle. This determines where your knee tracks over the pedal, which is paramount for healthy patellar (kneecap) tracking.

Visual guide about How to Adjust the Seat on a Stationary Bike
Image source: wikihow.com
The Crank Arm Horizontal Method: Simple and Effective
This is the standard, easiest way to set fore-aft.
- Level the Crank: Position your crank arms so they are horizontal, parallel to the ground. Your dominant leg (the one you push hardest with) should be in the forward position (at 3 o’clock).
- Drop a Plumb Line: Imagine a plumb line (a string with a weight) dropping from the bony bump at the front of your kneecap (the patella). The goal is to have this line pass directly over the pedal axle (the center of the pedal) of your forward foot.
- Adjust the Saddle: If the plumb line falls behind the pedal axle, your seat is too far back. Slide it forward in small increments (1/2 inch at a time). If it falls in front of the axle, your seat is too far forward. Slide it back. Re-check after each adjustment.
Why is this so important? When your knee is directly over the pedal axle at the power phase of the stroke (3 o’clock), the forces are transmitted straight down through your shin and into the pedal. If your knee is significantly behind the axle, you’re pulling on the pedal with your hamstring, straining the back of the knee. If your knee is far ahead of the axle, you’re pushing with your quad in a compromised position, crushing the patella against the femur. The vertical alignment minimizes shearing forces on the joint.
The Handling Variations: Hip Angle and Reach
While the knee-over-pedal rule is a fantastic baseline, body proportions vary. Someone with particularly long femurs (thigh bones) might feel more comfortable with the saddle slightly further back to avoid an extreme hip angle. A rider with a history of lower back pain might prefer a slightly more forward position to reduce the reach to the handlebars, thereby lessening spinal flexion. The rule of thumb: Start with the knee-over-pedal spindle method. If after a few rides you feel persistent strain in your hamstrings (seat too far back) or quads (seat too forward), make micro-adjustments of 1/8 to 1/4 inch at a time. Your comfort is the final judge.
Fine-Tuning Seat Angle: The Often-Forgotten Adjustment
Seat tilt is the third pillar of a perfect fit. An incorrect angle can cause you to slide, create pressure points, and force you to grip the handlebars incorrectly.
The Level Baseline: Start at Zero Degrees
For the vast majority of riders, the ideal starting point is a perfectly level saddle. Use a small carpenter’s level on the top center of the saddle (the part you sit on, not the nose). This ensures your weight is distributed evenly across the sit bones. A level seat provides a stable platform.
When and How to Adjust: The Micro-Tilt
After riding for 10-15 minutes, assess your position. Are you sliding forward constantly? Your seat is likely tilted slightly upward at the nose. Loosen the tilt bolt and lower the nose by 1-2 degrees. Conversely, are you feeling excessive pressure on your perineum (the soft tissue between sit bones) or sliding backward? The nose may be too low. Raise it by 1-2 degrees. Never tilt the seat more than 3 degrees in either direction. A severely nose-down tilt will make you feel like you’re sliding off and force you to use your arms to brace yourself, leading to upper body fatigue. A severely nose-up tilt concentrates all your weight on the soft tissue of the sit bones and perineum, causing numbness and pain—this is the position most associated with ”
Frequently Asked Questions
What is How To Adjust The Seat On A Stationary Bike?
How To Adjust The Seat On A Stationary Bike is an important topic with many practical applications.