How to Bake a Rich and Creamy Cheesecake at Home Today
Discover how to bake a cheesecake that is rich, creamy, and absolutely delicious right in your own kitchen. This guide covers everything from choosing the best cream cheese to mastering the perfect water bath technique. You will learn simple tips that prevent cracks and give you a bakery-quality dessert every single time.
Key Takeaways
- Use room temperature ingredients: This creates a smooth, lump-free batter that bakes evenly.
- Always use a water bath: It keeps the cheesecake moist and prevents cracking on top.
- Cool gradually after baking: Turning off the oven and letting the cheesecake cool inside prevents sudden temperature shocks.
- Choose full-fat cream cheese: It delivers the richest flavor and creamiest texture every time.
- Grease your springform pan properly: This ensures the cheesecake releases cleanly without sticking.
- Chill for at least 4 hours: Patience is the secret ingredient that sets the perfect creamy texture.
📑 Table of Contents
- Why Homemade Cheesecake Beats Store-Bought Every Time
- Gathering Your Ingredients for the Perfect Cheesecake
- Making the Cheesecake Crust
- Mixing the Cheesecake Filling Like a Pro
- Baking and Cooling: The Patience Game
- Top Tips for a Crack-Free Cheesecake
- Delicious Cheesecake Variations to Try
- Serving and Storing Your Cheesecake
- Common Mistakes to Avoid
- Why Everyone Should Learn How to Bake a Cheesecake
- Final Thoughts
Why Homemade Cheesecake Beats Store-Bought Every Time
There is something magical about pulling a homemade cheesecake out of the oven. The kitchen fills with a warm, sweet aroma that makes everyone stop and stare. Store-bought versions just cannot compare to that fresh, creamy goodness you make yourself.
When you learn how to bake a cheesecake at home, you control every single ingredient. You decide how sweet it gets. You pick the texture. You add exactly the flavors you love. Plus, it is way more impressive than anything you can buy at the grocery store.
The best part? Baking a cheesecake is not as hard as it looks. With the right recipe and a few simple tricks, anyone can do it. Let us walk through the entire process together.
Gathering Your Ingredients for the Perfect Cheesecake
The Foundation: Cream Cheese
Your cheesecake lives or dies by the cream cheese. Always reach for full-fat cream cheese that is cold from the fridge. Popular brands like Philadelphia work wonderfully. You will need about three 8-ounce blocks for a standard 9-inch cheesecake.
Here is a golden rule. Let your cream cheese sit out for at least two hours before you start mixing. Room temperature cream cheese blends smoothly and creates a silky batter. Cold cream cheese clumps up and leaves lumps behind.
Supporting Ingredients You Will Need
Beyond cream cheese, a great cheesecake needs a few more pantry staples. Here is what goes into a classic recipe:
- Granulated sugar for sweetness
- Large eggs at room temperature for a smooth filling
- Sour cream for tang and extra creaminess
- Vanilla extract for depth of flavor
- All-purpose flour or cornstarch to help the filling set
- Lemon juice or zest for a bright, fresh kick
- Heavy cream for an ultra-rich texture
Each ingredient plays an important role. Do not skip the sour cream. It adds a subtle tang that balances the sweetness perfectly. The flour or cornstarch gives the filling structure without making it dense.
Making the Cheesecake Crust
The crust holds everything together. A classic graham cracker crust is the go-to choice for most bakers. It is buttery, slightly sweet, and pairs perfectly with any cheesecake filling.
Start by crushing about 2 cups of graham crackers into fine crumbs. You can use a food processor or place them in a zip-lock bag and crush with a rolling pin. Mix the crumbs with 5 tablespoons of melted butter and 2 tablespoons of sugar. Press the mixture firmly into the bottom of a 9-inch springform pan.
Use the bottom of a measuring cup to press the crumbs down evenly. A flat, compact crust bakes up better and holds the filling without crumbling. Bake the crust for 10 minutes at 350°F before adding the filling. This step firms it up and prevents a soggy bottom.
Mixing the Cheesecake Filling Like a Pro
Step-by-Step Mixing Process
Now comes the fun part. Making the filling is simple but requires a gentle touch. Follow these steps for the best results:
- Beat the room temperature cream cheese on medium speed until smooth and fluffy, about 3 minutes.
- Add the sugar gradually while the mixer runs on low speed.
- Add the eggs one at a time, mixing on low speed after each addition.
- Pour in the sour cream, vanilla extract, and lemon juice.
- Mix until everything is just combined. Do not overbeat.
Overbeating the batter introduces too much air. This causes the cheesecake to puff up in the oven and then collapse as it cools. A collapsed cheesecake leads to cracks on the surface. Keep your mixer on low and stop as soon as the batter looks smooth.
The Water Bath Method
The water bath is the single most important technique for baking a perfect cheesecake. It surrounds the pan with gentle, even heat. This prevents the edges from cooking faster than the center.
Wrap the outside of your springform pan in two layers of heavy-duty aluminum foil. This keeps water from seeping in. Place the wrapped pan inside a larger roasting pan. Pour hot water into the roasting pan until it reaches about halfway up the springform pan.
The water bath creates a humid baking environment. This keeps your cheesecake incredibly creamy and prevents it from drying out. It also reduces the risk of cracks significantly.
Baking and Cooling: The Patience Game
Bake your cheesecake at 325°F for about 55 to 70 minutes. The center should still jiggle slightly when you gently shake the pan. It will set up as it cools. A fully set center coming out of the oven means you overbaked it.
After baking, turn off the oven and crack the door open. Let the cheesecake cool inside the oven for one full hour. This slow cooling prevents temperature shock, which is a leading cause of surface cracks.
Once the cheesecake reaches room temperature, cover it with plastic wrap and refrigerate for at least 4 hours or overnight. Chilling is not optional. It allows the filling to fully set and develop its rich, creamy texture.
Top Tips for a Crack-Free Cheesecake
Nobody wants a cracked cheesecake. Those surface imperfections can make even the best-tasting dessert look imperfect. Here are proven tips to keep your cheesecake smooth and beautiful:
- Room temperature everything. Cold ingredients do not blend well and create an uneven batter.
- Do not overmix. Low speed and gentle mixing keep excess air out of the batter.
- Use the water bath. Gentle, even heat is the secret weapon against cracks.
- Cool slowly. Gradual cooling prevents the cheesecake from contracting and cracking.
- Run a knife around the edge. After cooling, gently separate the cheesecake from the pan sides. This prevents it from pulling apart as it settles.
- Chill thoroughly. A well-chilled cheesecake holds its shape and slices cleanly.
Delicious Cheesecake Variations to Try
Once you master the classic recipe, the fun really begins. There are endless ways to customize your cheesecake to match any mood or occasion.
Chocolate Cheesecake
Melt 8 ounces of semi-sweet chocolate and fold it into your filling before baking. Top with chocolate ganache for an extra decadent finish. Chocolate cheesecake is rich, indulgent, and always a crowd favorite.
Berry Swirl Cheesecake
Mix fresh or frozen berries with a little sugar and cornstarch. Swirl the berry mixture into the batter before baking. The fruity contrast against the creamy filling is absolutely delightful.
Lemon Blueberry Cheesecake
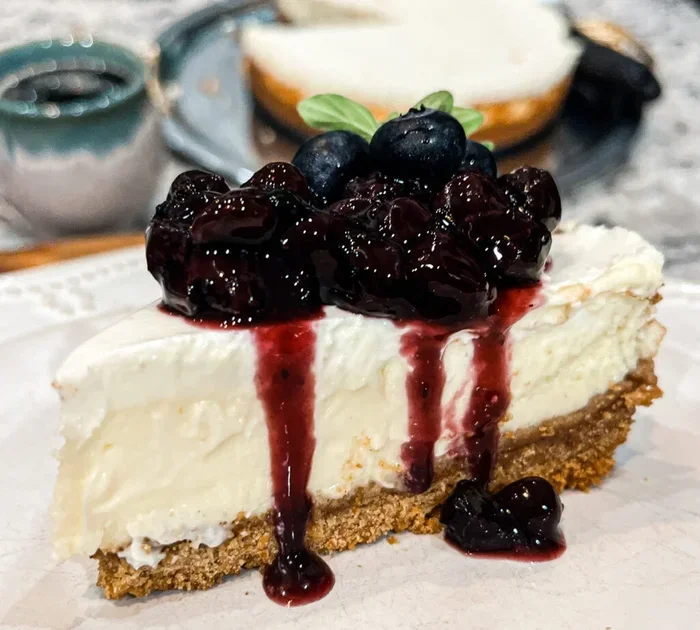
Add lemon zest and juice to the filling for a bright citrus twist. Top with fresh blueberries and a light lemon glaze. This variation is perfect for spring and summer gatherings.
No-Bake Cheesecake
If you do not want to turn on the oven, try a no-bake version. Use a gelatin-based filling mixed with cream cheese and whipped cream. Pour it over your pre-baked crust and chill overnight. It is just as creamy and delicious without any baking required.
Serving and Storing Your Cheesecake
Use a sharp knife dipped in hot water to cut clean slices. Wipe the blade between cuts for the neatest presentation. A warm knife glides through the chilled filling without dragging or crumbling the crust.
Store leftover cheesecake in the refrigerator covered with plastic wrap or in an airtight container. It stays fresh for up to 5 days. You can also freeze individual slices wrapped in plastic and foil for up to 2 months. Let frozen slices thaw in the refrigerator overnight before serving.
For an extra special touch, drizzle your cheesecake with a simple glaze made from powdered sugar and lemon juice. Or top it with fresh whipped cream and a sprinkle of lemon zest. Presentation matters, and a beautiful cheesecake makes any dessert table feel like a bakery display.
Common Mistakes to Avoid
Even experienced bakers make mistakes with cheesecake sometimes. Here are the most common pitfalls and how to avoid them:
- Skipping the room temperature step. This is the number one cause of lumpy batter. Take the time to let your cream cheese and eggs warm up.
- Overbaking the cheesecake. A slightly jiggly center is exactly what you want. The residual heat finishes the job during cooling.
- Opening the oven door too early. Sudden temperature drops cause the cheesecake to sink and crack. Resist the urge to peek for at least the first 45 minutes.
- Using a dark-colored pan. Dark pans absorb more heat and can overbake the edges. Stick with a light-colored springform pan.
- Not greasing the pan properly. Even with a springform pan, a light coating of butter on the sides helps the cheesecake release cleanly.
Why Everyone Should Learn How to Bake a Cheesecake
Baking a cheesecake is more than just making a dessert. It is a rewarding experience that brings people together. Whether it is a birthday celebration, a holiday gathering, or just a quiet Tuesday night treat, a homemade cheesecake always makes an impression.
The process teaches patience and precision. You learn how small details like room temperature ingredients and gentle mixing make a huge difference. Once you master the basic recipe, you can experiment with flavors, toppings, and crusts endlessly.
Plus, a homemade cheesecake makes an incredible gift. Wrap a chilled slice in cellophane and give it to a friend or neighbor. It is thoughtful, personal, and absolutely delicious. Few desserts carry the same sense of warmth and care as something baked from scratch in your own kitchen.
So go ahead and give it a try. Gather your ingredients, follow the steps, and enjoy the process. You will be surprised at how simple and satisfying baking a cheesecake really is. Your first attempt might not be perfect, but every cheesecake you make gets better. The skills you build today will serve you for years of delicious baking ahead.
Final Thoughts
Learning how to bake a cheesecake opens up a world of dessert possibilities. From the classic New York style to creative flavor combinations, there is always something new to try. The key is to start with quality ingredients, follow the steps carefully, and be patient with the cooling process.
Remember, the best cheesecake comes from a baker who cares about the details. Take your time. Enjoy the process. And most importantly, savor every single slice of your homemade creation.
Frequently Asked Questions
Can I use a different type of cracker for the crust?
Absolutely. You can use vanilla wafers, digestive biscuits, or even Oreo cookies in place of graham crackers. Each option gives the crust a slightly different flavor and texture. Just crush them into fine crumbs and mix with melted butter the same way.
How do I know when my cheesecake is done baking?
Gently shake the pan. The center should jiggle like set gelatin, not like liquid batter. The edges should look firm and slightly puffed. The cheesecake will continue to set as it cools, so removing it slightly underdone is the right move.
Can I bake a cheesecake without a water bath?
You can, but the water bath makes a big difference. Without it, the cheesecake is more likely to crack and the texture may be less creamy. If you skip the water bath, bake at a lower temperature and keep a close eye on it to prevent overbaking.
How long can I store a baked cheesecake?
A freshly baked cheesecake keeps well in the refrigerator for up to 5 days when covered properly. For longer storage, wrap individual slices tightly and freeze them for up to 2 months. Always thaw frozen cheesecake in the refrigerator overnight.
Why did my cheesecake crack on top?
Cracks usually happen because of overbaking, rapid cooling, or overmixing the batter. To prevent cracks, use a water bath, cool the cheesecake gradually, and mix on low speed only until ingredients are combined.
Can I make a cheesecake the day before serving?
Yes, and it is actually better that way. Cheesecake tastes best after it has chilled overnight. The flavors meld together and the texture becomes even creamier. Prepare it the day before and keep it covered in the refrigerator until serving time.