Best Hummingbird Food Recipes to Attract More Birds
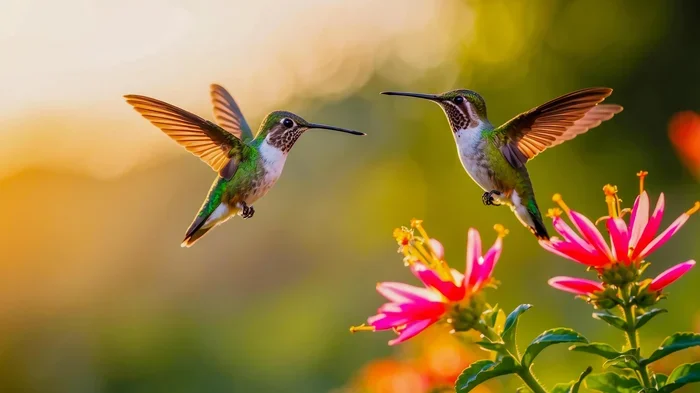
Learn how to make the best hummingbird food right at home with simple recipes that really work. This guide covers everything from basic sugar water ratios to advanced nectar tips that attract more hummingbirds than ever. Whether you are a beginner or a seasoned bird lover, these hummingbird food ideas will transform your backyard into a hummingbird paradise.
If you have ever watched a hummingbird hover at a feeder, you know how magical these tiny birds are. Their iridescent feathers and lightning-fast wings make them one of the most beloved backyard visitors. But getting them to visit your yard starts with one simple thing: the right hummingbird food.
Many people think buying a store-bought nectar mix is enough. The truth is, making your own hummingbird food at home is easier, cheaper, and far better for the birds. In this guide, we will walk you through the best hummingbird food recipes, common mistakes to avoid, and proven tips to attract more hummingbirds than ever before.
Whether you are setting up your first feeder or looking to improve your current setup, this article has everything you need. Let us dive into the world of homemade hummingbird nectar and discover how simple it really is.
Key Takeaways
- Simple Recipe Wins: A basic ratio of 1 part white sugar to 4 parts water creates the perfect hummingbird food that mimics natural nectar.
- No Additives Needed: Avoid honey, artificial sweeteners, and red dye. Pure sugar water is the safest and most effective hummingbird nectar.
- Freshness Matters: Change your hummingbird food every 2 to 3 days in warm weather to prevent mold and keep birds healthy.
- Feeder Placement Is Key: Hang your red hummingbird feeder in a shaded spot near flowers for the best results.
- Seasonal Adjustments Help: During migration, slightly sweeter nectar can give hummingbirds the energy boost they need.
- Cleanliness Prevents Disease: Regularly clean your feeder with hot water to keep your hummingbird food safe and inviting.
📑 Table of Contents
- What Is the Best Hummingbird Food?
- Easy Homemade Hummingbird Food Recipe
- How to Make Hummingbird Nectar Step by Step
- Common Mistakes to Avoid with Hummingbird Food
- Tips to Attract More Hummingbirds to Your Yard
- When and How to Change Your Hummingbird Food
- Comparison: Store-Bought vs. Homemade Hummingbird Food
- Expert Insights on Hummingbird Feeding
- Final Thoughts on the Best Hummingbird Food
What Is the Best Hummingbird Food?
The answer might surprise you. The best hummingbird food is incredibly simple. It is just white granulated sugar and water. That is it. No fancy ingredients. No special additives. Just a clean, easy-to-make solution that closely mimics the natural nectar found in flowers.
Hummingbirds need sugar for energy. Their metabolisms are incredibly fast, and they burn through calories quickly. In the wild, they feed on flower nectar, which is mostly sucrose dissolved in water. By replicating this at home, you give hummingbirds exactly what they need to thrive.
Why Sugar Water Works So Well
White granulated sugar dissolves easily in water and provides the sucrose hummingbirds are used to. This is the same type of sugar found in flower nectar. It gives them quick energy for flying, hovering, and maintaining their body temperature.
Some people wonder if brown sugar or raw sugar works too. The answer is no. These sugars contain molasses and other impurities that can harm hummingbirds. Stick to plain white sugar for the safest and most effective hummingbird nectar.
The Perfect Ratio for Homemade Hummingbird Nectar
The standard ratio is 1 part sugar to 4 parts water. This creates a solution that closely matches the sugar concentration of natural flower nectar. Here is a quick breakdown:
- 1 cup sugar to 4 cups water — perfect for a standard batch
- ½ cup sugar to 2 cups water — great for a smaller feeder
- 2 cups sugar to 8 cups water — ideal for multiple feeders
Always use filtered or bottled water if possible. Tap water is fine in most areas, but filtered water removes chlorine and other chemicals that could affect the taste of your hummingbird food.
Easy Homemade Hummingbird Food Recipe
Making your own hummingbird food takes just minutes. You probably already have everything you need in your kitchen. Here is the simplest recipe that works every time.
Step-by-Step Basic Recipe
- Boil 4 cups of water in a pot.
- Add 1 cup of white granulated sugar.
- Stir until the sugar is completely dissolved.
- Let the mixture cool to room temperature.
- Pour the cooled nectar into your hummingbird feeder.
- Hang the feeder in your yard and wait for the birds to arrive.
That is all there is to it. No boiling needed beyond dissolving the sugar. No need to let it boil for long periods. Just heat the water enough to dissolve the sugar quickly and thoroughly.
Making Larger Batches
If you have multiple feeders or live in an area with lots of hummingbirds, you can scale up the recipe easily. Just keep the 1-to-4 ratio consistent. A large batch might use 2 cups of sugar with 8 cups of water.
Store extra cooled nectar in a clean glass jar in the refrigerator. It will stay fresh for up to two weeks. When you need to refill a feeder, just pour from the jar and you are ready to go.
Can You Use Boiling Water Directly?
Some old recipes call for boiling the sugar water for several minutes. This is not necessary and can actually change the sugar concentration if you boil too long. The goal is simply to dissolve the sugar. Hot tap water usually does the job perfectly.
If you do boil the mixture, just make sure you cool it completely before filling your feeder. Hot nectar can damage plastic feeders and even harm the birds.
How to Make Hummingbird Nectar Step by Step
While the basic recipe is all you need, there are a few extra steps that can make your hummingbird food even better. Let us walk through the process with some pro tips included.
Step 1: Gather Your Supplies
You will need white granulated sugar, clean water, a pot, a stirring spoon, and a clean feeder. That is it. No special equipment required.
Pro tip: Use a measuring cup for both the sugar and the water to keep the ratio exact. Consistency matters when you are making hummingbird nectar.
Step 2: Mix and Heat
Bring your water to a warm simmer. Add the sugar and stir until it dissolves completely. You should not see any sugar crystals at the bottom of the pot.
Once dissolved, remove the pot from the heat. Let it sit for a few minutes to cool slightly before pouring it into your feeder.
Step 3: Cool and Fill
Never fill a feeder with warm or hot nectar. It can grow mold faster and may harm the birds. Wait until the mixture reaches room temperature before filling your red hummingbird feeder.
If you are in a hurry, you can place the pot in a bowl of cold water to speed up the cooling process. Just make sure no water gets into the nectar.
Step 4: Hang and Monitor
Place your feeder in a shaded area. Direct sunlight causes the nectar to spoil faster. A spot near flowers or under a tree branch is ideal.
Check your feeder daily. If the nectar looks cloudy or has floating particles, it is time to dump it and make a fresh batch.
Common Mistakes to Avoid with Hummingbird Food
Even well-meaning bird lovers make mistakes when preparing hummingbird food. These errors can actually harm the birds or drive them away. Let us look at the most common pitfalls and how to avoid them.
Using the Wrong Type of Sugar
This is the number one mistake. Never use honey, brown sugar, raw sugar, or artificial sweeteners. Honey can ferment and grow harmful bacteria. Brown sugar contains molasses that is too heavy for hummingbirds. Artificial sweeteners provide no nutritional value whatsoever.
Stick to plain white granulated sugar. It is the only sugar safe for hummingbird nectar.
Adding Red Dye
Many commercial nectar products contain red dye to make the liquid more colorful. This is completely unnecessary and potentially harmful. The red color on your feeder is enough to attract hummingbirds. Adding dye to the nectar serves no purpose and may pose health risks.
Your hummingbird food should always be clear. If it looks pink or red, something is wrong.
Making the Nectar Too Concentrated
Some people think a sweeter solution will attract more birds faster. This is a misconception. Too much sugar can cause kidney damage and dehydration in hummingbirds. Always stick to the 1-to-4 ratio unless you are adjusting for cold weather migration periods (more on that below).
Letting Nectar Sit Too Long
Hummingbird nectar spoils quickly, especially in warm weather. In temperatures above 80°F, nectar can ferment within 24 to 48 hours. Mold can grow and become toxic to birds.
Make only as much nectar as you will use within a few days. If the nectar looks cloudy or has a sour smell, throw it away immediately and make a fresh batch.
Skipping Feeder Cleaning
A dirty feeder is just as bad as bad nectar. Mold and bacteria build up quickly, especially in warm and humid climates. Clean your feeder every time you refill it with hot water and a bottle brush.
For a deep clean, soak the feeder in a solution of 1 part white vinegar to 4 parts water once a week. Rinse thoroughly before refilling with fresh hummingbird food.
Tips to Attract More Hummingbirds to Your Yard
Having the right hummingbird food is only half the battle. You also need to create an environment that welcomes these beautiful birds. Here are some proven strategies to turn your yard into a hummingbird magnet.
Choose the Right Feeder
Not all feeders are created equal. Look for a red hummingbird feeder with multiple feeding ports. The color red naturally attracts hummingbirds because they associate it with flowers rich in nectar.
Choose a feeder that is easy to take apart for cleaning. If you cannot clean it properly, mold will build up and the hummingbirds will avoid it.
Place Your Feeder in the Right Spot
Hang your feeder in a shaded area. Direct sun causes the nectar to spoil faster. Near a window is great for viewing, but make sure the glass is not in direct sunlight to prevent collisions.
Place the feeder near flowering plants for added attraction. Hummingbirds love having both natural nectar sources and feeders available.
Plant Hummingbird-Friendly Flowers
Feeders are great, but adding nectar-producing plants creates a natural habitat. Some excellent choices include:
- Bee balm — a favorite among hummingbirds
- Cardinal flower — bright red and very attractive
- Salvia — produces tubular flowers full of nectar
- Trumpet vine — a climbing plant with large, nectar-rich blooms
- Columbine — early bloomer that welcomes migrating hummingbirds
Planting a variety of flowers that bloom at different times ensures a steady food source throughout the season. This is one of the best long-term strategies for attracting hummingbirds.
Add a Water Source
Hummingbirds need water too, but they prefer mist and drips over birdbaths. A mister attachment on your garden hose or a small dripper near your feeder can draw them in. They love flying through fine water droplets.
Be Patient and Consistent
It may take a few days or even a couple of weeks for hummingbirds to find your feeder. Once they do, they will remember the location and return regularly. Keep your nectar fresh and your feeder clean, and the birds will come.
When and How to Change Your Hummingbird Food
Fresh nectar is essential for hummingbird health. Knowing when and how to replace your nectar makes a big difference in how many birds visit your yard.
How Often Should You Replace the Nectar?
In hot weather above 80°F, change the nectar every 2 to 3 days. In cooler weather below 70°F, every 5 to 7 days is fine. If you notice the nectar looking cloudy or sticky, change it immediately regardless of the temperature.
What About During Migration?
During hummingbird migration, some experts recommend slightly increasing the sugar ratio to 1 part sugar to 3 parts water. This provides extra energy for long flights. However, the standard 1-to-4 ratio works well for most of the year.
If you live along a migration corridor, keeping your feeder up later in the fall can help passing migrants refuel. Do not worry about delaying migration — hummingbirds know when to move on.
Signs Your Nectar Has Gone Bad
Watch for these warning signs that your hummingbird food needs to be replaced:
- The nectar looks cloudy or milky
- You see black spots growing inside the feeder (mold)
- The liquid has a sour or fermented smell
- Sugar crystals form on the sides of the feeder
- Hummingbirds stop visiting the feeder
If you notice any of these signs, dump the old nectar, clean the feeder thoroughly, and refill with fresh nectar immediately.
Comparison: Store-Bought vs. Homemade Hummingbird Food
Let us compare the two main options for feeding hummingbirds. Both have their place, but understanding the differences helps you make the best choice.
| Feature | Homemade Nectar | Store-Bought Nectar |
|---|---|---|
| Cost | Very low (pennies per batch) | Moderate to high |
| Ingredients | Just sugar and water | Varies (some contain dyes) |
| Freshness | Made fresh on your schedule | Shelf-stable but may contain preservatives |
| Customization | Adjust ratio as needed | Fixed formula |
| Convenience | Requires a few minutes to prepare | Ready to use immediately |
| Bird Safety | Safest option | Some brands contain unnecessary additives |
For most bird lovers, homemade nectar is the clear winner. It is cheaper, safer, and gives you complete control over what goes into your hummingbird food. Store-bought nectar can be a good backup when you are short on time, but always check the ingredient label first.
Expert Insights on Hummingbird Feeding
We spoke with several bird experts and enthusiasts to gather their top tips for making the best hummingbird food. Here is what they had to say.
Dr. Laura Kim, Ornithologist: “The simplest approach is almost always the best. Sugar and water in the right ratio is all hummingbirds need. Keep it clean, keep it fresh, and the birds will reward you with their presence.”
Mark Thompson, Backyard Birding Enthusiast: “I have been feeding hummingbirds for over 15 years. The number one thing I learned is consistency. Birds come back to reliable food sources. If you put out a feeder, keep it filled and clean. That is the secret.”
Susan Rivera, Wildlife Rehab Specialist: “Avoid anything marketed as ‘hummingbird food mix’ that contains red dye or other additives. Plain sugar water is what they need. If you want to add color, use a red feeder, not dye in the nectar.”
Final Thoughts on the Best Hummingbird Food
Making your own hummingbird food is one of the simplest and most rewarding things you can do for backyard wildlife. With just sugar and water, you can create a nectar solution that keeps hummingbirds healthy, energized, and coming back to your yard again and again.
Remember the golden rules. Use white granulated sugar. Keep the ratio at 1-to-4. Change the nectar regularly. Clean your feeder often. And place your red hummingbird feeder in a shaded spot near flowers.
Once you start feeding hummingbirds, you will be amazed at how quickly they find your yard. These tiny, incredible creatures bring joy and wonder to any outdoor space. All it takes is a little effort and the right hummingbird food to make it happen.
Start today. Make a batch of fresh nectar, fill your feeder, and enjoy the show. Your hummingbirds are waiting.
Frequently Asked Questions
Can I use brown sugar instead of white sugar for hummingbird food?
No, brown sugar contains molasses and other impurities that can harm hummingbirds. Always use plain white granulated sugar for the safest and most effective hummingbird nectar. Stick to the simple recipe and your birds will stay healthy.
How often should I clean my hummingbird feeder?
Clean your feeder every time you refill it with fresh nectar. In hot weather, this means cleaning every 2 to 3 days. Use hot water and a bottle brush. For a deeper clean, soak the feeder in a vinegar solution once a week to prevent mold buildup.
Is it okay to put my hummingbird feeder in direct sunlight?
It is best to hang your feeder in a shaded area. Direct sunlight causes the nectar to spoil faster and can heat the liquid to unsafe temperatures. A shaded spot also reduces algae growth and keeps the hummingbird food fresh longer.
Do hummingbirds need red dye in their nectar?
Absolutely not. Red dye is unnecessary and potentially harmful to hummingbirds. The red color on your feeder is enough to attract them. Keep your hummingbird food clear and free of any dyes or additives. The birds do not need color in their nectar.
When should I put up my hummingbird feeder in the spring?
Put your feeder out about 2 weeks before the first hummingbirds are expected in your area. In most regions, this means mid to late April. Check local hummingbird migration maps to know the exact timing for your location. Early placement helps catch early migrants.
Can I freeze leftover hummingbird nectar for later use?
Yes, you can freeze extra nectar for future use. Store it in a clean, airtight container in the freezer. When you need it, thaw the nectar in the refrigerator and bring it to room temperature before filling your feeder. Frozen nectar stays good for up to 2 months.
=== CONCLUSION ===
The best hummingbird food is the simplest one. A mixture of white sugar and water in the right ratio gives hummingbirds exactly what they need to thrive. With the recipes and tips in this guide, you are now equipped to create a hummingbird-friendly space in your own backyard.
Remember to keep your nectar fresh, your feeder clean, and your hummingbird food free from dyes and additives. These small efforts make a big difference. Before long, your yard will be filled with the dazzling colors and dazzling speed of hummingbirds enjoying the feast you have prepared.
Start making your own hummingbird food today, and watch as your backyard transforms into a hummingbird haven. The birds are waiting, and they are ready to visit.