How to Get Yoga Mat to Lay Flat
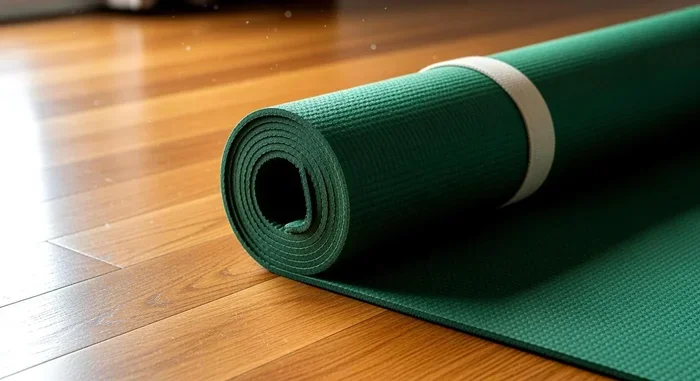
Knowing how to get a yoga mat to lay flat transforms your practice by eliminating annoying curling and bunching. A curling mat throws off your balance and focus, but simple fixes like warming the mat, adding weight, or placing it on a hard surface work wonders. These quick solutions keep TPE, PVC, and rubber mats smooth and flat so you can stay fully in the zone.
How to Get Yoga Mat to Lay Flat
There is nothing worse than trying to hold a peaceful downward dog while your mat keeps curling up at the edges. A yoga mat that won’t lay flat can throw off your entire practice. It makes poses unstable, throws off your balance, and can even lead to slips or injuries. Whether you just unrolled a new mat or your old one has started to fight you, getting it to lie flat on the floor is essential for a safe and enjoyable session.
This guide walks you through proven methods to get your yoga mat to lay flat quickly and easily. You will learn why mats curl in the first place, what simple fixes work best, and how to prevent the problem from coming back. We also share tips for new mats and advice on when it might be time for a replacement. By the end, you will know exactly how to flatten your mat and keep it smooth for every practice.
Most yoga mat curling issues come down to three things: material memory, temperature, and how you store the mat. Once you understand these causes, the fixes become simple. Let us dive into the solutions that actually work.
Key Takeaways
- Unroll your mat on a flat surface and leave it overnight to release creases.
- Use a yoga mat towel to add grip and smooth out uneven surfaces.
- Store your mat rolled with the top side facing outward to prevent curling.
- Warm up the mat with a hair dryer on low heat to soften rubber.
- Avoid direct sunlight and extreme temperatures that can warp the mat’s shape.
- Roll the mat tightly with a strap to train it to lay flat.
- Choose a thicker mat if you need extra cushioning and stability on hard floors.
📑 Table of Contents
Why Your Yoga Mat Won’t Lay Flat
Before you fix the problem, it helps to understand what is causing it. Yoga mats curl up for a few common reasons, and each one has a targeted solution.
Material Memory
Most yoga mats are made from PVC, TPE, rubber, or polyurethane. These materials have a “memory.” When a mat is rolled up for shipping or storage, it remembers that curled shape. New mats especially resist lying flat because the material wants to return to its rolled-up form. This is called material memory, and it is the number one reason new yoga mats curl at the edges.
Temperature Changes
Heat and cold affect your mat more than you might think. Rubber and PVC mats can become stiff and curly in cold rooms. They also get soft and sticky in hot environments. When you roll a mat up and store it in a warm car or a tight closet, the heat can warp the material. Then when you unroll it, it does not want to relax back into a flat shape.
Wear and Tear Over Time
Old mats lose their flatness too. After months or years of use, the surface breaks down. The foam or rubber compresses unevenly. Edges start to lift, and the mat develops permanent curls or waves. This wear happens faster if you roll your mat up the wrong way or store it improperly.
Simple Fixes to Make Your Yoga Mat Lay Flat
Now for the good news. Most curling problems are easy to fix with methods you can do at home. Here are the best techniques that actually work.
Method 1: Unroll and Weight Down
The simplest fix costs nothing. Unroll your mat completely on a flat surface. Place heavy objects along the curled edges. Books, dumbbells, or even a stack of yoga blocks work great. Leave the mat weighted down for at least 24 to 48 hours. The pressure helps the material relax and lose its memory. When you remove the weights, your mat should lie much flatter.
Method 2: Use Warm Water and Sunlight
Heat softens the material and helps it release its curled shape. Lay your mat flat outside on a sunny day. The warmth from the sun relaxes the fibers. You can also dampen the mat slightly with warm water before placing it in the sun. The combination of moisture and warmth works wonders on stubborn curls. Just make sure the mat is not in direct sunlight for too long, as this can damage some materials.
Method 3: Walk on the Edges
This old trick is surprisingly effective. Unroll your mat and stand on the curled edges. Walk back and forth along the curled sides for a few minutes. Your body weight pushes the edges down and helps them relax. It is a simple physical fix that works especially well on thinner mats. Do this for a few days in a row for the best results.
Method 4: Apply a Light Mist of Water
Spraying a fine mist of water on the top surface can help the mat relax. Use a spray bottle and mist the mat lightly. Do not soak it. Then lay it flat and let it air dry. The moisture helps the material become more flexible and less prone to curling. This method works well for PVC and TPE mats. Just make sure your mat dries completely before rolling it up again.
Method 5: Condition the Mat
Some mats benefit from a light application of mat conditioner or a homemade cleaning solution. A mixture of water and a few drops of essential oil can condition the surface. This keeps the material supple and less likely to curl. For a deep clean that also helps with flatness, check out our guide on how to wash a yoga mat in the washer. Clean mats tend to respond better to flattening treatments.
How to Prepare a New Yoga Mat
New mats come rolled up tightly in boxes or packaging. That tight roll is what causes the initial curling. Preparing your new mat properly from day one can save you a lot of frustration later.
Unbox and Unroll Immediately
As soon as you get your new mat, take it out of the box. Unroll it fully and let it relax. Do not leave it in the packaging for days or weeks. The longer it stays rolled, the stronger the memory becomes. Give it at least a full day to unroll before you use it.
Condition the Surface
New mats often have a slippery residue from the manufacturing process. Wipe the surface with a damp cloth and a mild soap. This removes the residue and helps the mat grip better. After cleaning, let the mat dry completely on a flat surface. This step also prepares the material for flattening treatments.
Store It Flat from the Start
Here is a tip most people miss. Once your new mat is flat, store it that way. Fold it gently if you must, but avoid rolling it up tightly. A flat storage position prevents curling from ever starting. If space is tight, try hanging the mat on a wall hook or storing it rolled loosely with the curl facing outward.
Tips to Keep Your Yoga Mat Flat During Practice
Getting your mat flat is only half the battle. Keeping it flat during your practice takes a little extra effort. These tips help you maintain a smooth surface every time you step on the mat.
Choose the Right Surface
Place your mat on a hard, flat floor. Carpet can cause mats to bunch up and slide. If you practice on carpet, consider using a mat towel underneath. For tips on keeping your mat stable on carpet, check out how to keep yoga mat from slipping on carpet. A stable base makes a huge difference.
Anchor the Edges
Some yoga mats come with straps or bags that help hold the edges down. You can also use heavy books or sandbags at the corners. This keeps the mat from shifting or curling up mid-practice. Even a simple trick like stepping on the edges at the start of your session can help.
Avoid Rolling Your Mat Too Tight
When it is time to put your mat away, roll it loosely. Tight rolling creates more memory and worse curling. Roll it with the top side facing outward, which is the natural flat position. This simple habit extends the life of your mat and keeps it flatter for longer.
Keep Your Mat Clean
Sweat, dirt, and oils build up on the mat surface over time. This buildup can make the mat sticky in some spots and slippery in others, which affects how it lies flat. Regular cleaning keeps the material supple and responsive. A quick wipe-down after each session goes a long way toward maintaining a flat surface.
When to Replace a Curling Yoga Mat
Not every mat can be saved. Sometimes curling is a sign that the mat has reached the end of its life. Knowing when to replace it saves you from frustration and keeps your practice safe.
Signs It Is Time for a New Mat
Watch for these warning signs:
- The curls do not go away after multiple flattening attempts
- The surface feels slippery even after cleaning
- There are deep cracks or tears in the material
- The mat has permanent bumps or uneven areas
- You notice the mat thinning out in spots
How Often Should You Replace Your Mat?
Most yoga mats last between one and five years, depending on how often you use them and how well you care for them. Heavy daily use wears a mat out faster. If you practice every day, plan to replace your mat every one to two years. For casual practitioners, a mat can last much longer with proper care.
Choosing a Mat That Stays Flat
When it is time to buy a new mat, look for one designed to stay flat. Mats with a textured surface or natural rubber tend to resist curling better than thin PVC mats. Thicker mats also hold their shape better. If you want advice on the right thickness for your needs, read our guide on how thick of a yoga mat should I get. Choosing the right mat from the start prevents a lot of curling headaches later.
Quick Reference: Mat Flatness Fix Comparison
| Fix Method | Best For | Time Needed | Effectiveness |
|---|---|---|---|
| Weight Down | Mild curling, all mat types | 24-48 hours | High |
| Sunlight and Warmth | Stubborn curls, rubber mats | 2-4 hours | Very High |
| Walk on Edges | Thin mats, quick fix | 5-10 minutes daily | Moderate |
| Water Mist | PVC and TPE mats | 1-2 hours | Moderate to High |
| Mat Conditioning | Dry, stiff mats | 30 minutes | Moderate |
Final Thoughts
A yoga mat that lays flat transforms your practice. You feel more stable, you focus on your breath instead of adjusting your mat, and your poses become more effective. The fixes in this guide are simple, affordable, and work for almost any mat type. Start with the weight-down method for a hands-off approach, or try the sunlight trick for faster results. Whatever method you choose, consistency is key. Give your mat time to relax and respond to the treatment.
Prevention is just as important as the fix. Store your mat flat or loosely rolled, clean it regularly, and replace it when it has truly worn out. A little care goes a long way toward keeping your mat smooth and flat for years to come. With these tips, you will spend less time fighting your mat and more time enjoying your practice on a perfectly flat surface.
Frequently Asked Questions
Why Does My Yoga Mat Keep Curl Up at the Edges?
Yoga mats often curl up because of heat, humidity, or the material being too thin. To fix this, unroll the mat and let it sit flat under a heavy object for several hours or overnight.
How Can I Get My Yoga Mat to Lay Flat Quickly?
Roll the mat in the opposite direction it naturally wants to curl, then leave it flat for a few hours. You can also place heavy books or dumbbells along the edges to help it relax into a flat position.
Does a Yoga Mat Warp Easily and How Do I Flatten It?
Yes, yoga mats can warp from being rolled up too tightly or stored in warm environments. To flatten it, lay the mat on a flat surface and apply gentle pressure or use a mat roller to smooth it out evenly.
What Is the Best Way to Store a Yoga Mat So It Stays Flat?
Store your yoga mat rolled up with the top side facing outward rather than folded. This prevents deep creases and helps the mat maintain its flat shape over time.
Can I Use Weights to Keep My Yoga Mat Lying Flat?
Yes, placing yoga blocks, dumbbells, or even a stack of heavy books on the edges of your mat works great. Leave the weights on for a few hours or overnight to help the mat relax and stay flat.
How Do I Stop My Yoga Mat from Folding or Bunching Up?
Make sure you are rolling the mat slowly and evenly without forcing sharp bends. Using a yoga mat bag with a wide opening also helps prevent bunching and keeps the mat lying flat when you unroll it for practice.