Packing your bike correctly for air travel is the single most important step to ensure it arrives at your destination undamaged and without surprise fees. The process starts with selecting the right protective case—a sturdy hardshell or padded soft bag—that fits your specific bike frame. You must then methodically disassemble the bike, protecting all delicate parts with padding, and pack it in a stable, secure configuration. Crucially, you must research your airline’s specific policies on size, weight, and fees well in advance to avoid costly surprises at the check-in counter. Finally, thorough documentation with photos and a packing checklist are your best defenses against damage claims. Following this systematic approach transforms a potentially stressful ordeal into a smooth, predictable part of your cycling adventure.
Key Takeaways
- Invest in a proper bike travel case: A quality hardshell or well-padded soft bag designed for air travel is non-negotiable for protecting your bike from the rough handling of airport baggage systems.
- Disassemble completely and protect everything: Remove handlebars, pedals, wheels, and the seatpost. Use frame protection, fork ends, and wheel bags to shield carbon fiber and paint from scratches and impacts.
- Know your airline’s rules before you book: Policies on accepted dimensions, weight limits, and fees vary wildly. A “sports equipment” fee can be $50 or $200+; some airlines treat bikes as standard checked baggage.
- Pack strategically and secure relentlessly: Pack the frame first, fill all voids with soft items (clothing, towels) to prevent shifting, and use multiple high-quality straps to immobilize every component inside the case.
- Document and photograph everything: Take detailed photos of your pristine bike before packing and the packed bag from all angles. Keep receipts for the bike and case. This is critical for any damage claim.
- Allow ample time at the airport:Bike check-in often requires an oversized baggage counter, which can have long lines. Arrive at least 2 hours for domestic, 3 for international flights.
- Pack a reassembly and basic repair kit: Include your multi-tool, any necessary torque wrench bits, a pump, and a spare tube or patch kit in your carry-on so you’re not stranded if your bike needs quick fixes upon arrival.
📑 Table of Contents
- Why Proper Bike Packing for Air Travel Isn’t Optional
- Choosing Your Arsenal: The Right Bike Travel Case
- Pre-Packing Preparation: The Foundation of a Successful Trip
- The Step-by-Step Packing Process: Disassembly to Sealing
- Navigating Airlines, Fees, and the Airport
- Post-Arrival: Unpacking, Inspection, and Reassembly
- Conclusion: Transforming Anxiety into Anticipation
Why Proper Bike Packing for Air Travel Isn’t Optional
Let’s be honest: the thought of checking your beloved bicycle as luggage can trigger a knot of anxiety in any cyclist’s stomach. You’ve likely heard horror stories—bikes arriving with cracked frames, bent derailleur hangers, or wheels shaped like taco shells. These aren’t just bad luck; they are the direct result of inadequate preparation. Airport baggage handlers are not bike mechanics. They see your bike bag as just another heavy, oddly-shaped piece of cargo to be stacked, thrown, and conveyed with brutal efficiency. Your bike’s safety is entirely in your hands before it ever leaves your sight. How to pack a bike bag for air travel correctly is a skill that transforms your two-wheeled companion from vulnerable cargo into a resilient, self-contained unit capable of surviving the journey. This guide is your definitive manual for that transformation, walking you through every decision, tool, and technique to ensure your bike’s arrival is as smooth as the ride you’re about to enjoy.
The Stakes: Damage, Fees, and Delays
The consequences of poor packing are threefold. First, and most devastating, is physical damage. A carbon fiber frame can be cracked by a sharp edge inside a soft bag or from a direct impact. A derailleur or brake caliper can be snapped off like a twig. Second, you face financial penalties. Airlines have specific, often confusing, policies for bicycles. You might pay a “oversized baggage” fee, a “sports equipment” fee, or, if your packed bike exceeds standard checked baggage dimensions (typically 62 linear inches), a hefty “excess baggage” surcharge. These fees can range from $50 to over $200 each way, quickly doubling the cost of your trip. Third, you risk delays. If your bike is damaged and requires repair at your destination, your riding plans are instantly derailed. If it’s simply misplaced or sent on a misroute, you could be bike-less for days. The time you invest in meticulous packing is a direct deposit into the “stress-free vacation” account and a withdrawal from the “disaster recovery” fund.
Choosing Your Arsenal: The Right Bike Travel Case
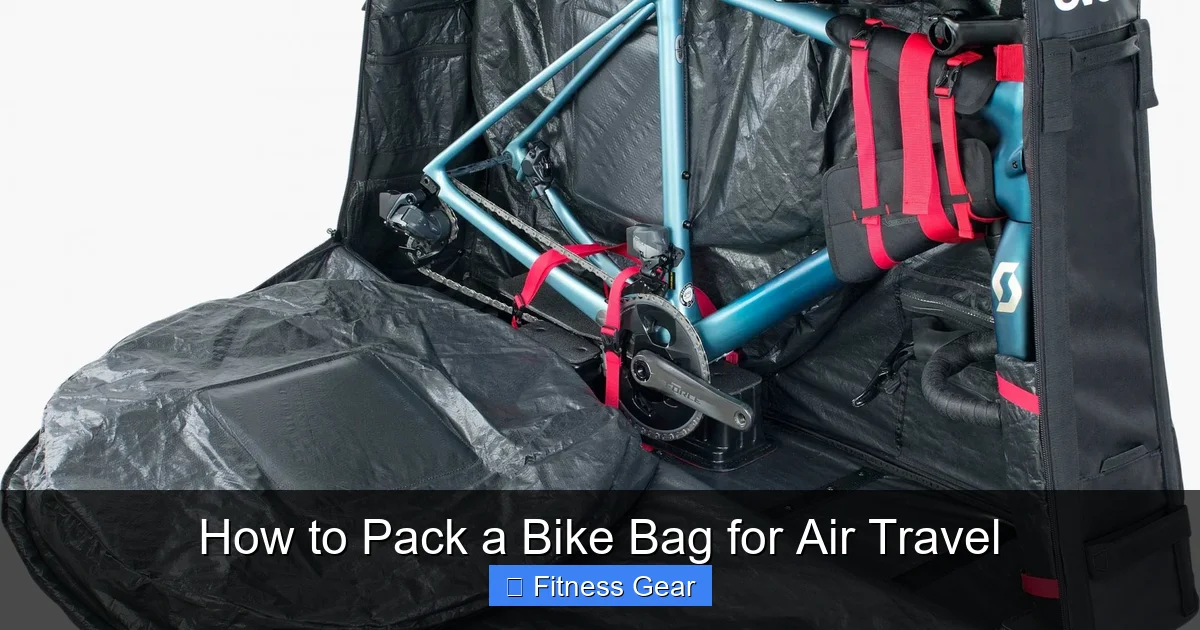
Before you touch a hex key, you must select the vessel that will house your bike. This is your most critical equipment decision. The market is dominated by two categories: hardshell cases and soft bike bags. Your choice depends on your budget, frequency of travel, bike material (especially carbon fiber), and airline tolerance.
Visual guide about How to Pack a Bike Bag for Air Travel
Image source: merlincycles.com
Hardshell Bike Cases: The Fort Knox for Your Frame
Hardshell cases, typically made from robust ABS plastic or composite materials, offer the highest level of impact protection. They are essentially a rigid cocoon that shields your bike from crushing forces and pointy objects. Pros: Superior protection for carbon frames and delicate components; often come with custom-cut foam interiors that hold the bike securely; generally more resistant to tears and water; many have locking latches and TSA-approved locks. Cons: Significantly heavier (often 10-15 lbs empty); bulkier, making storage at home or in a car more difficult; almost always more expensive ($300-$700+); they are almost universally counted as oversized baggage by airlines due to their dimensions. Brands like B&W, Thule, and Evoc lead this category. If you travel frequently with a high-value carbon bike, a hardshell case is the prudent investment.
Soft Bike Bags: The Lightweight Contender
Soft bags, constructed from heavy-duty nylon or polyester with dense padding, are the more common and affordable choice. They rely on thickness of padding and smart design to protect the bike. Pros: Lighter weight (5-8 lbs); more compact when not in use; often less expensive ($100-$300); some models are designed to meet standard checked baggage size limits (62 linear inches), potentially avoiding oversized fees—but you must verify this with your specific airline and model. Cons: Less protection against severe impacts or crushing; more susceptible to tears from sharp baggage handling equipment; padding can compress over time, reducing effectiveness. High-quality soft bags from brands like Scicon, Pro Bike Tool, and Topeak use strategic extra padding on the frame and fork ends. They are excellent for aluminum or steel bikes and for the traveler mindful of airline fees.
Size, Fit, and Airline Compatibility: Measure Twice, Buy Once
This is where many people go wrong. You cannot buy a “one-size-fits-all” bike bag. You must measure your bike after disassembly and compare it to the bag’s internal dimensions. Here’s the critical measurement sequence:
- Fork Length: Measure from the dropouts to the top of the steerer tube (with the stem removed).
- Fork Width: Measure the distance between the dropouts.
- Rear Triangle: Measure the chainstay length and the seatstay length.
- Top Tube: Measure the effective top tube length.
Add these measurements together (length + width + height) to get the linear inch total. Your packed bike bag must be under your airline’s standard checked baggage limit (usually 62 linear inches) to avoid oversized fees. Many soft bags are designed around this limit. Always check your airline’s specific website for “sports equipment” or “bicycle” policies before purchasing a bag. A bag that fits your bike perfectly but is 64 linear inches will cost you more at the airport.
Pre-Packing Preparation: The Foundation of a Successful Trip
Rushing into packing is a recipe for forgotten tools and damaged parts. This phase is all about organization and creating a clean, inspectable workspace.
Visual guide about How to Pack a Bike Bag for Air Travel
Image source: merlincycles.com
Clean, Inspect, and Document Your Bike
Begin by giving your bike a thorough cleaning. This isn’t just for vanity; it allows you to inspect every component for existing cracks, wear, or damage. Pay special attention to the frame, especially around the head tube, bottom bracket, and dropouts. Check the fork legs and steerer tube. Document the pre-trip condition with high-quality, detailed photographs from multiple angles. Include close-ups of the drivetrain, brakes, and any serial numbers. This photographic evidence is your primary defense if the airline claims damage was “pre-existing.” Create a simple checklist of your bike’s components and their condition (e.g., “Shimano Ultegra derailleur, no bends,” “Carbon frame, no chips”).
Gather Your Toolkit and Spares
You will need tools to disassemble and later reassemble your bike. At a minimum:
- A comprehensive multi-tool with Allen keys (typically 4, 5, 6mm most common), Torx bits (T25 for Shimano brakes), and screwdrivers.
- A torque wrench (if your bike has carbon parts, this is essential to avoid over-tightening).
- Pedal wrench (if your pedals are not tool-free).
- Chain tool (if you need to break the chain for packing—usually not necessary).
Pack a small “reassembly kit” within your bike bag or in your carry-on: a mini pump, a spare tube or two, a tire lever, and a multi-tool. Consider packing a single, cheap derailleur hanger as a spare—they are a common point of failure and specific to your bike model.
Protective Supplies: Your Bike’s Travel Armor
Do not rely on the bag’s padding alone. You must add dedicated protection:
- Foam Pipe Insulation: Cut pieces to slide over the frame tubes, fork legs, and seatpost. This is the best, cheap protection against scratches and minor bumps.
- Fork Ends/Protectors: These are plastic caps that fit over the open fork ends and dropouts. They prevent the delicate fork blades from being crushed against the case wall.
- Wheel Bags or Cardboard: Protect your rims and spokes. Use padded wheel bags or create Shields from cardboard.
- Bubble Wrap: For high-value items like a power meter, dropper post, or custom carbon components.
- Straps: Multiple Velcro straps or cam buckle straps to secure components inside the case.
- Plastic Bags: To cover and protect drivetrain components from grease transfer to your clothing and the case interior.
The Step-by-Step Packing Process: Disassembly to Sealing
Now, with a clean bike, tools, and protective supplies at the ready, we begin the systematic breakdown and packing. Work on a clean, soft surface like a large blanket or bike repair stand.
Visual guide about How to Pack a Bike Bag for Air Travel
Image source: merlincycles.com
Step 1: The Systematic Disassembly
The goal is to create the most compact, stable, and protected shape possible. Follow this order:
- Remove the Pedals: Use a pedal wrench. Remember: the right pedal tightens clockwise (standard), the left pedal tightens counter-clockwise (reverse thread). This is a common mistake point.
- Remove the Front Wheel: Open the quick-release or thru-axle. If you have disc brakes, be cautious not to rub the rotor against the caliper. Place the wheel in its bag or on cardboard.
- Remove the Handlebar and Stem: This is often the trickiest. You may need to rotate the handlebar and stem assembly to align with the frame for packing. For integrated cable routing, be extremely gentle. It’s often best to leave the brake and shifter cables attached to the bar if they are long enough, but ensure they are not strained. Place the handlebar/stem assembly in the bag’s designated pocket or wrap it in foam.
- Remove the Seatpost and Saddle: Mark the height on the post with tape for easy reassembly. Wrap the saddle in a plastic bag to protect it from scratches.
- Remove the Rear Wheel: This is the heaviest component. For bikes with derailleurs, shift the chain to the smallest cog and smallest chainring to minimize the derailleur’s profile. Carefully remove the wheel, being mindful of the cassette and derailleur. Place in a wheel bag.
- Optional: Remove the Drivetrain: For maximum protection of a high-end groupset or to fit a very small bag, you can remove the chain, cassette, and derailleurs. This is advanced and requires more tools and reassembly skill.
As you remove each part, immediately apply your protective sleeves (foam pipe insulation) to frame tubes, fork legs, and the seatpost. Place small parts like bolts, spacers, and stem caps in a zippered pouch and tape it securely to the inside of the frame or bag. Do not let them rattle around loose.
Step 2: Packing the Core – The Frame
This is the heart of the operation. Lay your padded bike bag open on its back.
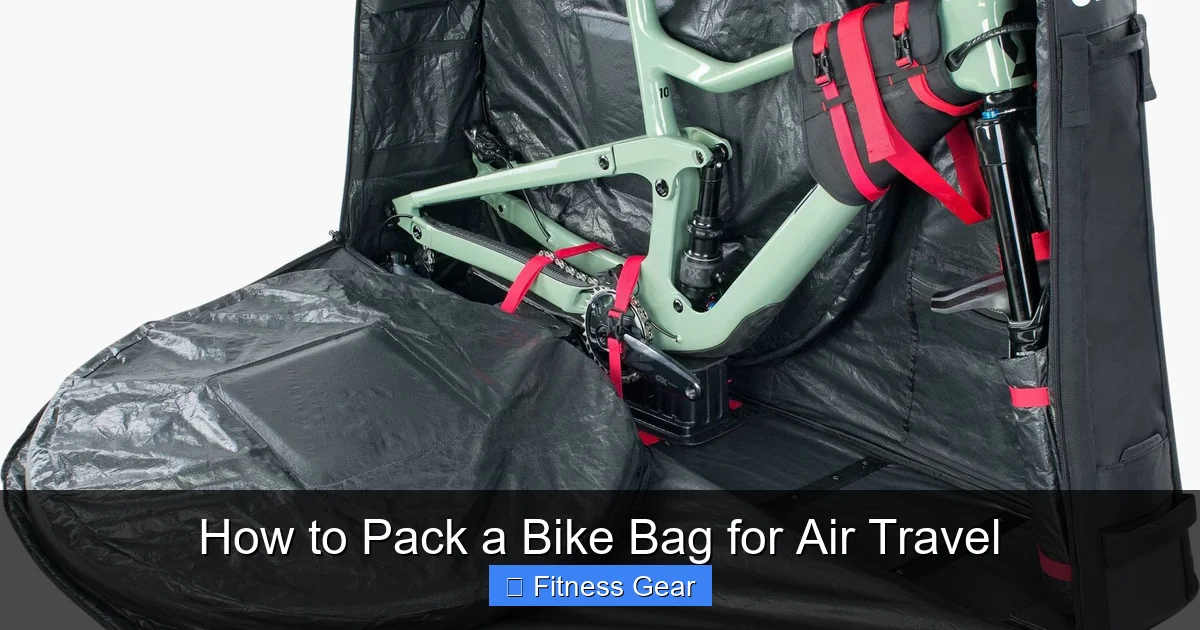
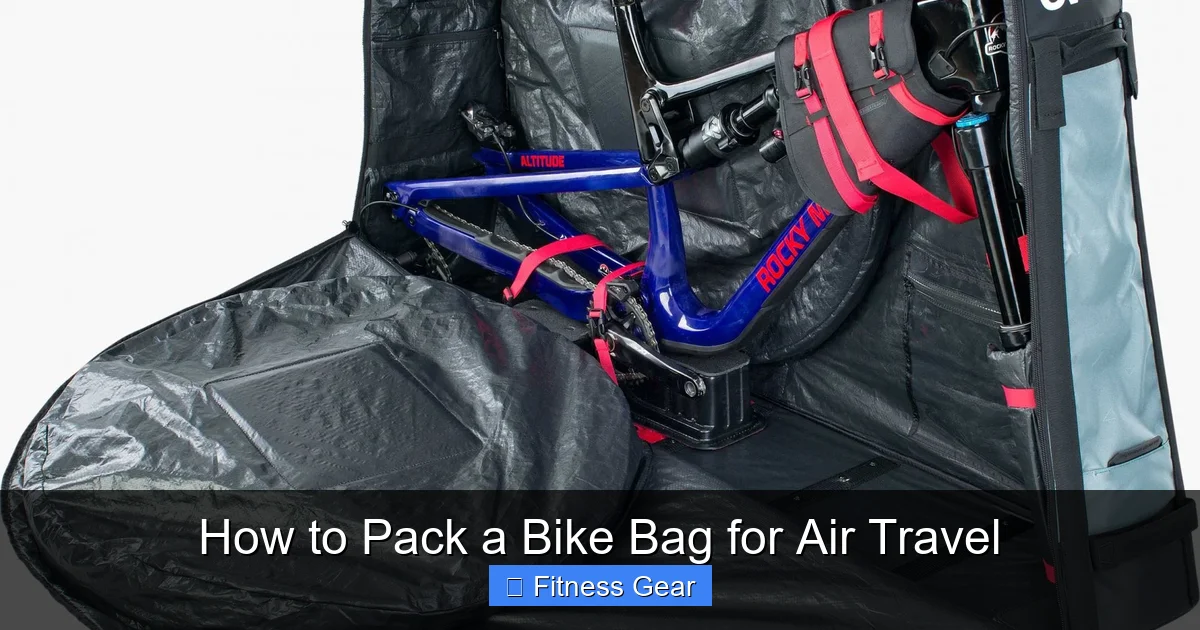
- Place the frame inside the bag first. It should sit in the center, with the bottom bracket area near the bag’s center of gravity.
- Ensure the frame is protected by foam on all contact points with the bag’s interior.
- If your bag has a specific frame cradle or straps, use them to hold the frame in place.
- Check that the open ends of the frame (head tube, bottom bracket shell, dropouts) are not pressing directly against the hard case wall. Use additional foam or folded clothing to create a buffer.
Step 3: Integrating Wheels and Handlebar
Now, fit the other major components around the frame.
- Wheels: Place the wheels in the designated wheel slots or alongside the frame. Ensure the cassette and rotor are protected. You can often slot the front wheel into the triangle of the frame if space allows. The rear wheel usually goes alongside the drive-side of the frame. Use wheel bags and ensure the axles are not pressing against anything.
- Handlebar/Stem: Tuck the handlebar assembly into the top of the bag, often in a padded pocket on the lid or alongside the top tube. The brake levers and shifters should be facing inward, away from the case walls. Use straps to secure it firmly to the frame or bag structure.
- Seatpost and Saddle: Slide the protected seatpost into the seat tube (if you left it in) or place it alongside the frame. Attach the saddle to the seatpost and secure the assembly with a strap.
Step 4: Void Fill and Final Securing
This step is critical for preventing internal movement. Any shifting during transport can cause catastrophic damage. Use every soft item you packed—your cycling clothes, towels, even your shoes (in plastic bags)—to fill every nook and cranny. Pack clothing tightly around the wheels, between the frame and handlebars, and in any empty space. The goal is a solid, immovable block. Once filled, go over the entire interior with at least 4-6 high-quality straps (Velcro or cam buckles). Compress the bike gently as you tighten each strap. The final packed bag should feel like a single, solid unit with no give when you push on it from any side. Give every strap a final, firm tug.
Step 5: Seal, Label, and Photograph
Close the bag and lock it with TSA-approved locks. Do not use non-TSA locks; they will be cut off. Affix a sturdy luggage tag with your name, phone number, and destination address. Take the final, all-important photographs. Photograph the sealed bag from all sides, showing the locks and tags. This creates an unbroken record of the bag’s condition and secure state at check-in.
Navigating Airlines, Fees, and the Airport
Your perfectly packed bike is now a piece of luggage. Now you must successfully navigate the airline’s system.
Decoding Airline Policies: The Fee Minefield
This cannot be stressed enough: policies differ dramatically. Here is a general, but not universal, framework:
- Standard Checked Baggage: If your packed bike bag (including all padding) is within the standard size (62 linear inches) and weight limit (typically 50 lbs), some airlines will treat it as a normal checked bag, included in your fare or with a standard fee. This is rare but the ideal scenario.
- Oversized/Overweight Fees: Most bike bags exceed either the size or weight limit. This triggers an “oversized” or “overweight” fee, which can be $50-$200+ each way.
- Sports Equipment Fee: Some airlines have a specific, often lower, fee for bicycles. For example, Delta, American, and United typically charge a $100-$150 “specialty item” fee for a bike (as of 2023), which is often cheaper than an oversized fee. However, this fee is in addition to your standard checked bag fee if you are also checking other luggage.
- Weight: The packed weight of a bike in a hardshell case can easily hit 50-60 lbs. Know the exact weight of your packed bag. If it’s over 50 lbs, you will pay overweight fees (usually $100+ for 51-70 lbs).
Actionable Step: Go to your airline’s website and search for “bicycle” or “sports equipment” in their baggage section. Print or screenshot the policy. Call their customer service to confirm the details for your specific route. Ask: “What is the total fee for a bicycle in a [describe your bag] traveling from A to B?” Get a reference number for the call.
Check-In, Security, and the Oversize Counter
At the airport, do not go to the standard check-in line. Proceed directly to the “Oversized/Bulky Baggage” or “Special Items” counter. This is where bikes are processed. Have your photo ID, boarding pass, and your printed airline policy ready. Be polite but firm. Weigh your bag on their scale. If it’s over the limit, you will be charged. The agent will place a “Bike” tag on it and send it to a separate cargo hold. Do not let them remove your TSA locks. After check-in, you will proceed through security. Your bike bag will be manually inspected by TSA. They may open it. Ensure your locks are TSA-approved so they can open and relock it. Keep your key or combination handy. Having your photos and documentation in your carry-on is useful here if they have questions.
International Travel and Customs
Flying internationally adds layers. Research the destination country’s customs regulations for “temporary importation” of personal effects like a bike. You may need a “Carnet de Passage” (a temporary import bond) or a simple “Temporary Admission” form. Often, showing the bike’s serial number and stating it’s for personal use is sufficient, but a written letter from you stating the bike’s value and intent to re-export can help. Keep all receipts (bike purchase, case, airline fees) in your carry-on for your records and potential tax/duty claims upon re-import to your home country.
Post-Arrival: Unpacking, Inspection, and Reassembly
The journey isn’t over until you’re riding.
The Careful Unpack and Damage Inspection
At the baggage claim, your bike bag will appear on the oversized carousel or be delivered to a separate area. Do not leave the carousel area until you have your bag. Inspect the exterior of the case thoroughly for new dents, scrapes, or broken latches. Open it immediately in a clear, open space. Do not reassemble yet. First, do a full inventory and inspection of the bike and components against your pre-trip photos and checklist. Check the frame for cracks or deep scratches. Spin the wheels to check for true. Move the derailleur to ensure it isn’t bent. Squeeze the brake levers. Only after confirming everything is undamaged should you begin reassembly. If you find damage, go to the airline’s baggage office immediately. Do not leave the airport. Show your photos of the packed, pristine bike and the damage. File a Property Irregularity Report (PIR) on the spot. This is your official claim document.
Efficient and Safe Reassembly
With your toolkit from the bike bag, begin reassembly. Follow the reverse order of disassembly. Key tips:
- Grease all bolt threads and seatposts to prevent seizing.
- Use your torque wrench for all carbon fiber and aluminum bolts, especially the stem, handlebar, and seatpost clamps. Consult your bike manufacturer’s torque specs.
- When reinstalling pedals, ensure they are tightened securely to the correct torque.
- Check wheel axle quick-releases or thru-axles are snug but not over-tightened.
- Once assembled, do a full safety check: brake function, shifting through all gears, tire pressure, and that the handlebars are aligned with the front wheel.
First Ride Checklist
Before your first real ride, do a short “shakedown” ride in a safe area. Listen for odd noises, feel for brake rub, and test shifting under load. Check all bolts again after the first 20 miles of riding, as they can settle. This simple step can prevent a mechanical failure on a remote road.
Conclusion: Transforming Anxiety into Anticipation
Packing a bike for air travel is a ritual that blends preparation, respect for your equipment, and understanding of the logistical landscape. It moves you from a passive victim of airline baggage policies to an active, prepared traveler. By investing in the right case, dedicating time to meticulous disassembly and padding, arming yourself with knowledge of airline fees, and creating an unassailable paper trail with photos, you eliminate the vast majority of risks. The goal is not just to arrive with an intact bike, but to arrive with peace of mind. You should be thinking about the stunning coastal route or the epic mountain climb you’re about to tackle, not wondering if your derailleur survived the flight. The effort you put in at home—cleaning, measuring, padding, strapping—pays dividends in the form of a ready-to-ride bike and a stress-free vacation. So pack with care, travel with confidence, and enjoy the ride.
Frequently Asked Questions
What is the best type of bike bag for air travel?
The “best” depends on your needs. Hardshell cases offer maximum protection for carbon bikes and frequent travel but are heavier and usually incur oversized fees. Soft bags are lighter, more affordable, and some fit within standard size limits, but offer less impact protection. For most occasional travelers with aluminum or steel bikes, a high-quality padded soft bag that meets airline size restrictions is the most cost-effective and practical choice.
Do I need to completely disassemble my bike for a soft bag?
Yes, for safe air travel, you must remove the handlebars (with stem), both wheels, and the seatpost (and saddle). This is non-negotiable. Leaving the handlebars on creates a wide, unstable profile that is highly susceptible to damage. Removing the wheels prevents them from being crushed against the frame. Some very large soft bags for small frames might allow the front wheel to stay on, but this is rare and not recommended for reliable protection.
How much do airlines typically charge to fly with a bike?
Fees vary drastically. Some airlines (like Southwest) treat a properly sized bike bag as a standard checked bag (first bag free on some fares, then $75+). Most major US carriers (Delta, American, United) charge a specific “sports equipment” fee of $100-$150 each way, in addition to any standard checked bag fee if you have other luggage. If your bag is oversized or overweight, you could pay $200+ each way. Always check your airline’s current policy before booking.
Should I purchase additional insurance for my bike when flying?
It’s highly recommended. First, check if your homeowner’s or renter’s insurance policy covers personal property while traveling. Often, it does, but you may need to pay a deductible. Second, consider the airline’s own declared value coverage, which has low limits (often $500-$1000) and many exclusions. Third, specialized travel insurers like World Nomads or Lemonade offer policies where you can schedule your bike for its full value, usually for a small premium. Keep all receipts and your photos as proof of value.
Will my bike bag be subject to TSA inspection, and will they repack it properly?
Yes, your bike bag will be manually inspected by TSA. They have the authority to open any lock (TSA-approved locks can be opened and relocked by them). The critical issue is that TSA agents are not bike packers. They may not understand how the components are secured and could repack it negligently, creating a risk for damage. Your pre-packed photos are vital here. If you witness them repacking it poorly, politely ask to repack it yourself or request a supervisor. Your straps and padding are your responsibility.
What’s the single most important thing to remember when packing?
Eliminate all internal movement. The most common cause of in-transit damage is components shifting inside the bag, leading to the frame banging against the case wall, wheels rubbing, or derailleurs being bent. Your void-fill with soft items and your multiple securing straps are what create a single, solid, immovable block. If you can shake the packed bag and hear or feel anything rattling or moving, you have not packed it securely enough. Repack until it is completely solid.