Properly oiling your dirt bike’s air filter with spray is a non-negotiable maintenance task that shields your engine from abrasive dirt and ensures optimal performance. This guide details the exact process, emphasizing the use of specialized aerosol oils, thorough cleaning beforehand, and the precise technique to avoid dangerous over-oiling. Follow these steps to keep your bike breathing efficiently and running strong ride after ride.
Ever stared at your dirt bike after a thrilling ride through a dusty trail, feeling that surge of adrenaline, only to have it killed by a sputtering engine? The culprit is often hiding in plain sight: your air filter. It’s the bike’s lungs, and keeping it properly oiled is the single most important—and often overlooked—piece of routine maintenance you can perform. Forget complex engine rebuilds; this simple 10-minute task is your first and best line of defense. And when it comes to efficiency and cleanliness, using a dedicated spray oil is the gold standard. This guide will walk you through everything, turning a daunting chore into a satisfying, confidence-boosting ritual. We’re talking about how to oil a dirt bike air filter with spray, the right way.
Key Takeaways
- Foam filters require oil; Paper filters do not. Oiling a paper filter will destroy it and suffocate your engine.
- Always use dedicated dirt bike air filter oil; motor oil, WD-40, or household oils are ineffective and can damage the filter media.
- Clean the filter completely before every oiling; trapped old grit and oil will reduce airflow and harm your engine if not washed out.
- The goal is a uniformly damp, not dripping, filter; over-oiling is a leading cause of fouled spark plugs and poor performance.
- Work in a well-ventilated area and let the oil soak; this ensures the oil penetrates the entire foam matrix for maximum dust capture.
- Reinstall with a proper seal; ensure the filter housing is clean and the filter sits evenly to prevent unfiltered air leaks.
- Frequency depends on conditions; after every 2-3 rides in dusty conditions, or at least once a month for casual riding.
📑 Table of Contents
- Understanding Your Dirt Bike’s Air Filter: The First Line of Defense
- Choosing Your Weapons: The Right Oil and Spray
- Step-by-Step: The Spray Oil Method from Start to Finish
- Common Mistakes That Wreck Your Engine (And How to Avoid Them)
- Aftercare and Maintenance Scheduling
- Troubleshooting: Performance Problems After Oiling
- Conclusion: Your Engine’s Breath of Fresh Air
Understanding Your Dirt Bike’s Air Filter: The First Line of Defense
Before we dive into the spray can, we need to understand what we’re working with. Not all air filters are created equal, and using the wrong method can be catastrophic.
Foam vs. Paper: Know Your Type
Dirt bikes primarily use two filter types: foam and paper. Foam filters, like the classic Uni Filter or Twin Air, are reusable, washable, and must be oiled. Their open-cell structure traps dirt in a sticky layer of oil. Paper filters, common on some modern bikes, are disposable and must never be oiled. Oil clogs the paper fibers instantly, starving your engine of air. Always check your owner’s manual. If your filter is foam, felt, or a reusable fabric blend, it needs oil. If it’s paper or a pleated media labeled “disposable,” simply replace it.
How the Filter Protects Your High-Performance Engine
Imagine your engine’s internal components—the piston, cylinder wall, valves. They operate with tolerances finer than a human hair. A single grain of sand, sucked in at high speed, can score these surfaces like sandpaper, leading to loss of compression, power, and eventually, a seized engine. The air filter’s job is to catch this abrasive grit. The oil on a foam filter acts like a flypaper; it catches and holds the dust, allowing clean air to pass through. Without oil, the foam is just a mesh—dirt passes right through.
Why Spray Oil is the Pro’s Choice
You might wonder, “Can’t I just pour some motor oil on it?” While possible in a pinch, it’s messy, uneven, and hard to control. Specialized aerosol sprays are engineered for this job. They contain a precise blend of base oil and tackifiers (sticky additives) that penetrate deep into the foam fibers and stay put, even under high airflow. They dry to a consistent, non-dripping film. The spray application ensures an even coat without oversaturating one spot, making the process faster, cleaner, and far more effective.
Choosing Your Weapons: The Right Oil and Spray
Walk into any parts aisle, and you’ll see a wall of oils and sprays. Choosing correctly is half the battle.
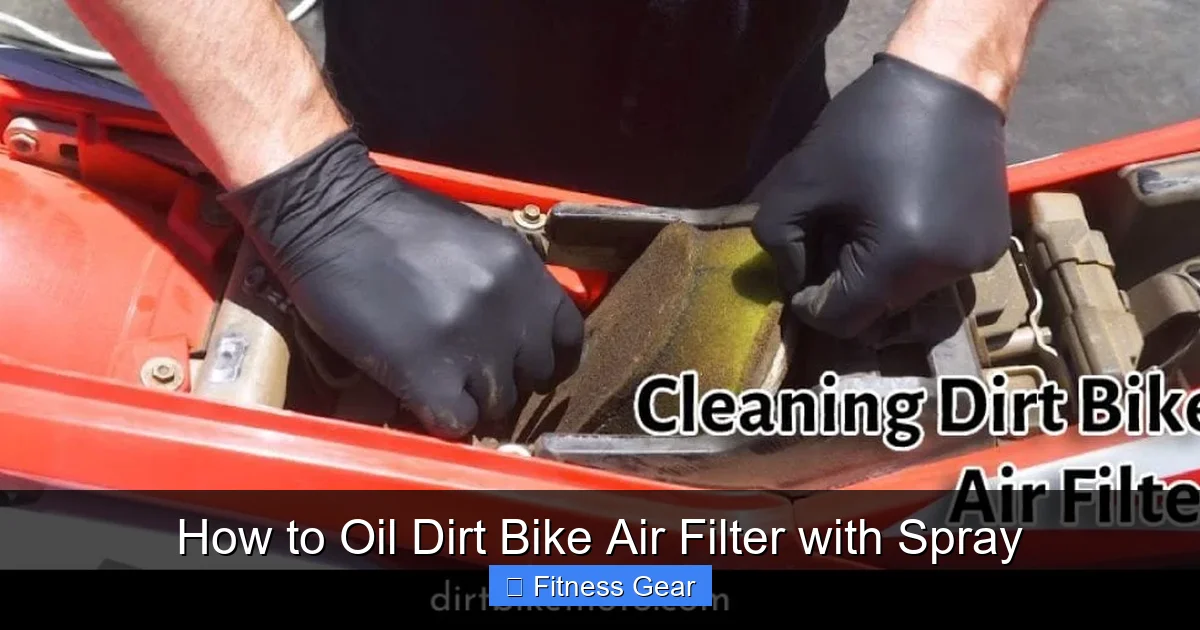
Visual guide about How to Oil Dirt Bike Air Filter with Spray
Image source: dirtbikemoto.com
Specialized Dirt Bike Air Filter Oil vs. The Garage Shelf
This is a critical distinction. Never use motor oil, vegetable oil, WD-40, or chain lube. Motor oil lacks the necessary tackifiers; it will fling off into your intake tract, coating the throttle body and intake valves with a gummy residue. Vegetable oil goes rancid. WD-40 is a water displacer and evaporates, leaving no protective film. Dedicated air filter oils (from brands like Maxima, Bel-Ray, Motul, or the filter manufacturer themselves) are formulated to be sticky yet breathable, with additives that resist degradation from heat and fuel vapors. They come in aerosol cans or pump bottles. For ease and precision, the aerosol spray is unbeatable.
Aerosol Sprays vs. Pump Bottles: The Practical Debate
Both work, but the experience differs. A pump bottle with a straw lets you target the oil inside the filter, but it’s easy to over-saturate the outer surface. Aerosol sprays produce a fine, even mist that coats the foam from all angles as you rotate the filter. It’s harder to overdo it and results in a more uniform oil distribution. For beginners and consistency, we strongly recommend the aerosol spray can. Shake it vigorously for 60 seconds before every use to mix the tackifiers.
What to Look For on the Label
When shopping, look for terms like “air filter oil,” “foam filter oil,” or “tackifier oil.” It should be a non-aerosol or aerosol specifically for air filters. A good rule: if it’s marketed for chain lubrication or as a general penetrant, skip it. If it says “for foam air filters,” you’re good.
Step-by-Step: The Spray Oil Method from Start to Finish
Now, the main event. We’ll break this down into a foolproof sequence. Grab your filter, your spray oil, some warm soapy water, and let’s get to it.
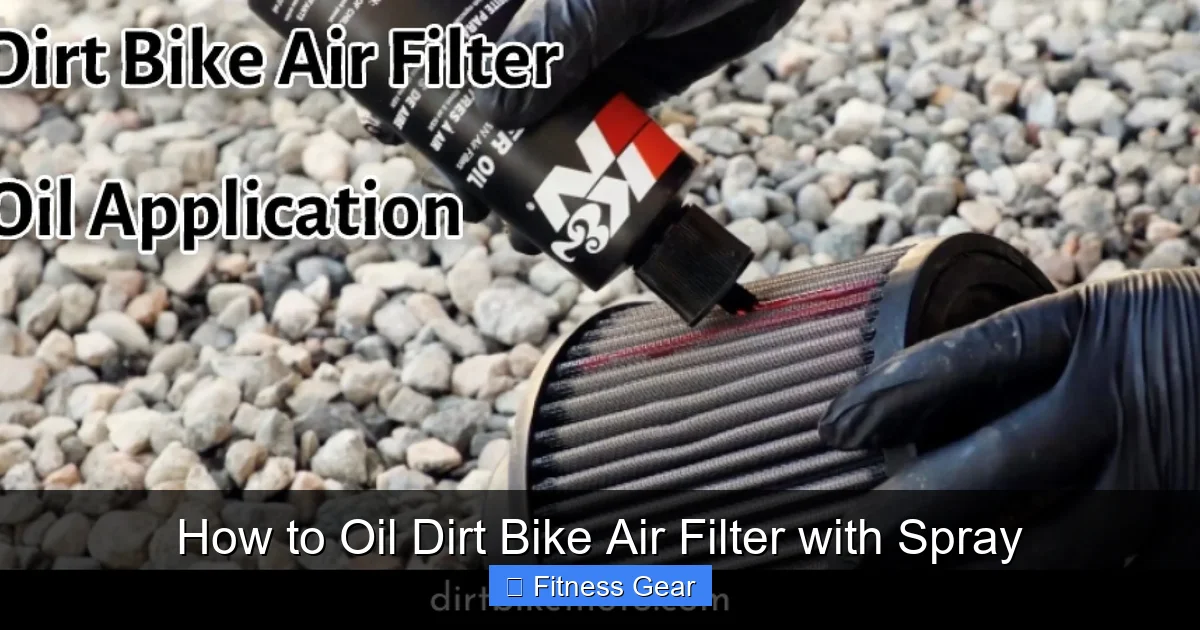
Visual guide about How to Oil Dirt Bike Air Filter with Spray
Image source: dirtbikemoto.com
Preparation: Your Clean, Ventilated Workspace
Choose a well-ventilated area, preferably outdoors. Lay down a cardboard or old newspaper—this gets messy. Have your tools ready: a plastic tub or bucket for washing, mild dish soap, soft-bristled brush (an old toothbrush works), clean rags, gloves, and your aerosol spray. Ensure the bike is stable on a stand or the ground with the kickstand up.
Removal and Inspection: The Critical First Look
Locate the air filter housing, usually on the side or top of the bike. You’ll need to remove the seat and any side panels. Carefully unclip or unscrew the housing cover. Gently pull the filter out. Do not force it. Now, inspect it under good light. Look for:
- Tears or holes: Any damage means the filter is compromised and must be replaced. No amount of oil will fix this.
- Excessive caking: A solid brick of dirt/oil means it’s overdue for a cleaning and possibly replacement.
- Debris in the housing: Clean this out with a rag. A dirty housing will contaminate your clean filter instantly.
Cleaning the Filter: You Can’t Oil Dirt
This is the most important step people skip. You must remove all old oil and trapped grit. Fill your tub with warm water and a generous squirt of dish soap. Submerge the filter and gently agitate it. Use your soft brush to work the soap into the foam, squeezing and releasing the filter like a sponge. You’ll see dirty water. Rinse under cool running water, continuing to squeeze until the water runs clear. This may take several rinses. Do not wring or twist aggressively, as this can tear the foam. Instead, press the water out. Finally, give it a final rinse with a little bit of gasoline or a dedicated filter cleaning solution if you have it, as this helps remove any residual soap. Let it air-dry completely. This is crucial—any moisture will dilute the oil and cause it to run off. Place it in a warm, dry spot with good airflow. A sunny window works well. This can take 1-2 hours. Do not use a hair dryer or heat gun, as excessive heat can damage the foam.
The Oiling Process: Technique is Everything
Once the filter is 100% dry, place it on your clean workspace. Shake your aerosol spray can for a full minute. Hold it about 6-8 inches from the filter. Starting at one edge, spray a steady, sweeping motion across the surface. Rotate the filter and spray the other side. Don’t just spray the outer surface; you need to get oil inside. A good technique is to gently squeeze the filter to open the cells while spraying, or spray from multiple angles. The goal is to see the filter change color to a uniform, darker shade—usually a dark grey or brown. You should feel a slight tackiness when you lightly touch it. Stop before it drips. A common mistake is to keep spraying until oil runs out. This is over-oiling. A properly oiled filter will feel damp, not wet. If you see any drips, gently squeeze the excess back into the filter or onto your cardboard.
The Soak and Settle: Letting the Oil Do Its Job
After spraying, place the oiled filter in a plastic bag or wrap it in plastic wrap for 10-15 minutes. This allows the oil to fully penetrate the deepest parts of the foam matrix. You’ll notice it becomes uniformly tacky. After the soak, give it one final, gentle squeeze over your cardboard to remove any surface excess that didn’t absorb.
Reinstallation: Sealing the Deal
Before reinstalling, wipe down the inside of the air filter housing and the sealing surface on the filter itself with a clean, dry rag. Any dust here will get sucked past the filter. Ensure the filter is seated correctly—most have a specific orientation (a tab or shape that fits the housing). Press it in firmly and evenly until it sits flush. Reattach the housing cover and secure all clips or screws. Double-check for a tight seal. A gap means unfiltered air is entering, bypassing your hard work.
Common Mistakes That Wreck Your Engine (And How to Avoid Them)
Even with the best intentions, it’s easy to slip up. Here are the pitfalls that turn a maintenance win into a costly repair.
Visual guide about How to Oil Dirt Bike Air Filter with Spray
Image source: dirtbikeempire.com
Mistake #1: Over-Oiling – The Spark Plug Assassin
This is the #1 error. Excess oil is sucked through the filter and into the intake. It coats the throttle body, intake valves, and eventually, the spark plug. A fouled spark plug causes misfires, poor idle, and can lead to unburned fuel washing cylinder wall oil (a condition called “gas washing”), which destroys piston rings and cylinder walls. The fix is simple: less is more. Spray until the filter changes color and feels tacky, then stop. If you’re unsure, err on the side of under-oiling—you can always add a little more after a short ride and re-check.
Mistake #2: Under-Oiling – Inhaling Sandpaper
An under-oiled filter is just a screen. It offers no sticky barrier for dust. The fine particles pass right through and begin machining your engine’s internal parts. The fix is to ensure full coverage. After spraying, the entire filter should feel uniformly damp. Check by touching multiple spots. If any area feels dry, give it another light pass with the spray.
Mistake #3: Skipping the Clean – Baking in the Grit
Pumping fresh oil over a dirty filter is like putting a clean sock over a muddy shoe. The old, sharp dirt particles are now cemented into the foam with fresh oil. They will be driven into your engine with every breath. Always, always clean first. Make it a non-negotiable rule: no oil until the rinse water runs clear.
Mistake #4: Using the Wrong Oil or a Clogged Filter
As stated, motor oil is wrong. Also, if your filter is old, stiff, and no longer pliable, even perfect oiling won’t help. The foam cells have broken down. It’s time for a new filter. A clogged filter (from over-oiling or neglect) restricts airflow, making the engine run rich (too much fuel), which fouls plugs and kills power. If your filter feels hard as a rock after cleaning and oiling, replace it.
Aftercare and Maintenance Scheduling
Oiling isn’t a “set it and forget it” task. It’s part of a regular cycle.
How Often Should You Oil Your Filter?
There’s no single answer; it depends entirely on riding conditions. Here’s a practical guide:
- Extreme Dust/Sand (desert racing, dry trails): Inspect and clean/oil after every ride.
- Moderate Dust (typical trail riding): Every 2-3 rides.
- Wet/Muddy Conditions: Mud can clog filters quickly. Clean and oil after every muddy ride, even if it looks okay.
- Casual/Backyard Riding (clean areas): At least once a month or before every season start.
Pro Tip: Get in the habit of visually inspecting your filter before every ride. If it looks visibly dirty or feels stiff, it’s time.
Proper Storage of Filters and Oil
If you have a spare filter or are storing your bike for the season, do not store it oiled. The oil will degrade and become gummy. Clean the filter thoroughly, let it dry completely, and store it in a sealed plastic bag in a cool, dry place. Your aerosol spray oil should be stored according to the label, typically in a cool, dry place away from direct sunlight and heat sources (like a garage in summer).
Knowing When to Retire a Filter
Foam filters have a lifespan. Signs it’s time for a new one:
- It tears easily during cleaning or handling.
- It remains stiff and doesn’t soften fully after washing and oiling.
- It’s permanently discolored and saturated with old oil that won’t wash out.
- It’s more than 2-3 seasons old with heavy use.
A new filter is cheap insurance against a $2,000 engine rebuild.
Troubleshooting: Performance Problems After Oiling
You followed the steps, but something feels off. Let’s diagnose.
Symptom: Engine Runs Rough, Hesitates, or Has a High Idle
Likely Cause: Over-oiling. The excess oil is being ingested, fouling the spark plug and altering the air/fuel mixture. Solution: Remove the filter. If it’s dripping, you overdid it. Wipe off excess oil with a clean rag, let it sit for an hour to absorb, then reinstall. If the problem persists, check and likely replace the spark plug.
Symptom: Loss of Power, “Bogging” Under Acceleration
Likely Cause: A severely clogged or improperly seated filter. This could be from over-oiling creating a thick, restrictive film, or from a filter packed with dirt that wasn’t cleaned. It could also be an air leak around the housing if the filter isn’t seated correctly. Solution: Remove the filter. Check for proper seating and a clean housing seal. If the filter feels hard and clogged, clean it again thoroughly. If it’s old, replace it.
Symptom: Visible Smoke from Exhaust (Not normal two-stroke smoke)
Likely Cause: Excess oil burning in the combustion chamber. This is a severe sign of over-oiling. The oil is passing through the filter and being burned. Solution: Stop riding immediately. Remove the filter, wipe off all excess oil, and let it air-dry for several hours. Check the spark plug—it will likely be fouled and need replacement. If you see oil in the intake tract, you may have a more serious issue.
Conclusion: Your Engine’s Breath of Fresh Air
Learning how to oil a dirt bike air filter with spray isn’t just a chore; it’s a fundamental skill that connects you to your machine and guarantees its health. It’s the difference between a bike that thrives in the dust and one that succumbs to it. By choosing the right spray oil, committing to a clean-first philosophy, and mastering the “damp, not dripping” technique, you take complete control of your engine’s respiratory system. You’ll notice the difference in throttle response, power delivery, and overall reliability. Make this simple ritual a non-negotiable part of your post-ride routine. Your engine—and your future self, facing a hefty repair bill—will thank you. Now go grab that spray can, give your filter some love, and get back to riding with confidence.
Frequently Asked Questions
Can I use WD-40 or motor oil on my foam air filter?
No. WD-40 is a water displacer and evaporates, leaving no protective film. Motor oil lacks tackifiers, flings off easily, and can gum up intake components. Always use a dedicated dirt bike air filter oil designed for foam.
How do I know if I’ve over-oiled my filter?
If oil visibly drips from the filter when you squeeze it, or if it feels wet and slimy rather than tacky and damp, it’s over-oiled. A properly oiled filter should feel uniformly damp to the touch but not leak any liquid.
Can I oil a paper air filter?
Absolutely not. Paper filters are designed to be dry and are not reusable. Oiling a paper filter will clog its pores instantly, severely restricting airflow and starving your engine of air, leading to poor performance and potential damage.
What happens if I forget to oil my foam filter after cleaning it?
A clean, dry foam filter is just a mesh. It will not trap fine dust particles, allowing abrasive sand and silt to enter your engine. This will cause rapid internal wear, scoring of cylinder walls, and ultimately, engine failure.
Is it better to under-oil or over-oil?
While neither is ideal, under-oiling is slightly safer in the short term as it at least allows airflow. However, it provides minimal protection. Over-oiling is far more dangerous as it can lead to immediate spark plug fouling, intake valve gunk, and a very rich air/fuel mixture that can cause “gas washing” and cylinder damage. The goal is always precise, even coating.
My filter feels hard and stiff after oiling. Is that normal?
No, a properly maintained foam filter should remain relatively soft and pliable. A hard, stiff filter indicates the foam has broken down from age, repeated harsh cleaning, or has been saturated with old, degraded oil that won’t wash out. It’s time to replace the filter.