How Much Air in a Mountain Bike Tire
Getting the right amount of air in your mountain bike tire is essential for performance, comfort, and safety. Most mountain bike tires need between 22 and 35 PSI, but the exact pressure depends on your tire width, riding style, and trail conditions. Too much air makes your ride harsh, while too little can cause pinch flats and sluggish handling. This guide walks you through everything you need to know about how much air in a mountain bike tire so you can ride with confidence every time.
Riding a mountain bike feels incredible. The wind, the trails, the rush of navigating rough terrain. But here is a simple thing that changes everything: how much air in a mountain bike tire. Too little air and your ride feels sluggish. Too much and every bump hits hard. Getting the pressure right is one of the easiest ways to improve your ride.
Many riders overlook tire pressure entirely. They pump their tires once and forget about them. But air pressure affects traction, comfort, speed, and even safety. A few extra minutes of attention before each ride can make a huge difference. Let us break down exactly what you need to know about mountain bike tire pressure.
Key Takeaways
- Optimal PSI Range: Most mountain bike tires perform best between 22 and 35 PSI, depending on tire width and rider weight.
- Check Your Sidewall: The tire sidewall lists the recommended pressure range for your specific tire model.
- Rider Weight Matters: Heavier riders generally need higher pressure, while lighter riders can go lower for better traction.
- Tubeless vs. Tubed: Tubeless tires can run lower pressures safely, giving you more grip and comfort on rough trails.
- Trail Conditions Change Everything: Wet, loose, or rocky terrain calls for different pressure settings than hard-packed trails.
- Check Pressure Before Every Ride: Air leaks slowly over time, so a quick check keeps your ride consistent and safe.
📑 Table of Contents
What Is the Right Air Pressure for a Mountain Bike Tire?
The short answer is that most mountain bike tires work best between 22 and 35 PSI. But the real answer depends on several factors. Your tire width, your body weight, the type of trail, and whether you run tubeless or tubed tires all play a role.
Start by looking at the sidewall of your tire. Every tire manufacturer prints a recommended pressure range there. For example, a wide tire like a 2.5-inch model might say 22 to 35 PSI. A narrower tire might say 30 to 50 PSI. These numbers give you a safe starting point.
Here is a simple breakdown to help you find your starting point:
- Narrow tires (1.9 to 2.2 inches): Start around 30 to 35 PSI.
- Medium tires (2.3 to 2.5 inches): Start around 25 to 30 PSI.
- Wide tires (2.6 inches and above): Start around 22 to 28 PSI.
These numbers are just guidelines. Your personal preference and riding style will shape the perfect pressure for you. If you want a plush, comfortable ride, try lowering the pressure by a couple of PSI. If you want more speed and less rolling resistance, try adding a little air.
How Rider Weight Affects Pressure
Your body weight has a big impact on the ideal tire pressure. A lighter rider can safely run lower pressures because they put less force on the tire. A heavier rider needs more air to prevent the tire from bottoming out or pinch flats.
Here is a simple rule of thumb. If you weigh less than 150 pounds, try starting on the lower end of the recommended range. If you weigh over 200 pounds, start closer to the higher end. Adjust from there based on how the bike feels on the trail.
How to Check Your Tire Pressure
Checking your tire pressure is quick and easy. You need a reliable tire gauge and a floor pump. Most gas station pumps do not give accurate readings, so invest in a good floor pump with a built-in gauge. A quality pump makes how to put air in a mountain bike tire simple and fast.
Follow these steps to check your pressure:
- Remove the valve cap from your tire.
- Press the tire gauge firmly onto the valve stem.
- Read the PSI number on the gauge.
- Compare it to the recommended range on your tire sidewall.
- Add or release air as needed.
Make this a habit. Check your pressure before every ride. Air leaks slowly over time, even in brand-new tires. A quick check takes only a few seconds but saves you from a flat or a bad ride.
For riders who want convenience, consider a digital tire gauge. These small tools give precise readings and fit easily in your saddlebag. They cost just a few dollars and are worth every penny.
Factors That Affect Mountain Bike Tire Pressure
Several factors influence the ideal pressure for your mountain bike tires. Understanding these factors helps you fine-tune your setup for any ride.
Tire Width
Wider tires need less air pressure to support your weight. A 2.6-inch tire has a larger air volume than a 2.0-inch tire. That extra volume means the tire can absorb more trail vibration at lower pressures. This is why many modern mountain bikes use wider tires. They offer better comfort and traction without needing high pressure.
Tubeless vs. Tubed Tires
Tubeless tires can run at lower pressures safely. Without an inner tube, there is less risk of pinch flats. This lets you drop the pressure down for better grip and a smoother ride. If you are running tubeless tires, check out our guide on how to put air in a tubeless bike tire for step-by-step instructions.
Tubed tires need slightly higher pressures to keep the tube from pinching against the rim. If you still use tubes, stay closer to the higher end of the recommended range.
Trail Conditions
The type of trail you ride changes everything. On hard-packed, dry trails, you can run higher pressures for less rolling resistance. On loose, muddy, or rocky trails, lower pressures give you better traction and control.
Think of it this way. Lower pressure lets the tire conform to the ground. More rubber touches the trail, which means more grip. Higher pressure makes the tire roll faster on smooth surfaces but bounce over rough terrain instead of absorbing it.
| Trail Type | Recommended Pressure | Why |
|---|---|---|
| Hard-packed, dry | Higher end of range (30-35 PSI) | Less rolling resistance, faster speed |
| Loose, sandy | Lower end of range (22-28 PSI) | More traction, better float |
| Muddy, wet | Lower end of range (22-27 PSI) | Better grip, prevents slipping |
| Rocky, technical | Mid-range (25-30 PSI) | Balance of grip and protection |
How to Add Air to Your Mountain Bike Tire
Once you know your target pressure, actually adding air is straightforward. The most common tool is a floor pump with a pressure gauge. These pumps are affordable and give you control over exactly how much air goes in.
If you want a deeper dive into the process, our guide on how to put air in a mountain bike tire covers every method in detail. Here are the basics:
- Floor pump with gauge: The most accurate and affordable option. Great for home use.
- Hand pump: Compact and portable. Good for trailside emergencies, but harder to reach high pressures.
- CO2 inflator: Fast and lightweight. Perfect for quick fixes on the trail, but less precise.
- Air compressor: Found at gas stations. Works in a pinch but can overinflate if you are not careful.
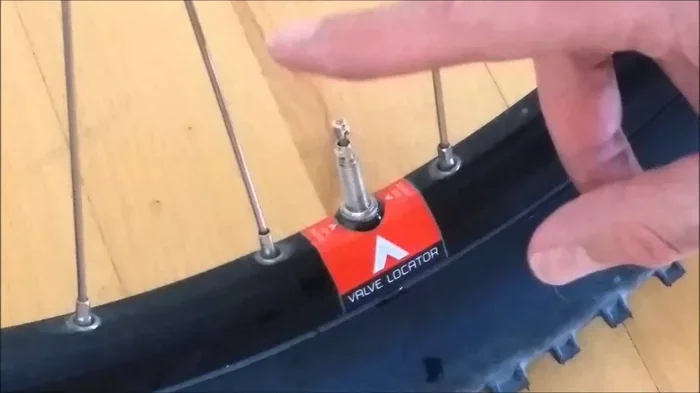
Always attach the pump head firmly to the valve. For Presta valves, unscrew the small nut first. For Schrader valves (the wider ones, like car tires), just press the pump head down. Listen for the hiss of air entering the tire and watch the gauge.
How to Let Air Out
Sometimes you add too much air. That happens to everyone. The good news is that letting air out is just as easy. Press the small pin in the center of the valve stem to release air. Use a tire gauge to check the pressure as you go. Add a little, let a little out, until you hit your target.
Common Mistakes People Make with Tire Pressure
Even experienced riders make mistakes with tire pressure. Here are the most common ones and how to avoid them.
Ignoring the Sidewall Recommendations
Every tire has a recommended pressure range printed on the sidewall. Ignoring this range is the fastest way to ruin your ride or damage your tire. Always start within the recommended range and adjust from there.
Only Checking Pressure Once a Month
Air escapes slowly through the valve and the tire bead. Checking once a month is not enough. Make it a pre-ride habit. A 30-second check before every ride keeps your pressure consistent and your ride safe.
Running the Same Pressure for Every Ride
Different trails call for different pressures. A pressure that works great on a smooth cross-country trail might feel terrible on a technical downhill run. Adjust your pressure based on the terrain and your riding goals.
Overlooking Temperature Changes
Air pressure changes with temperature. Cold weather can cause your tires to lose pressure. Hot weather can cause them to gain pressure. If you store your bike in a garage that gets cold at night, check your pressure in the morning before you ride.
Expert Tips for Perfect Tire Pressure
Want to take your tire pressure game to the next level? Here are some expert tips that make a real difference on the trail.
- Start low and work up: Begin at the low end of the range and add air in 2 PSI increments until the bike feels right.
- Use your body as a gauge: If you feel every bump, the pressure is too high. If the tire feels squishy or bottoms out, add air.
- Carry a pressure gauge on the trail: A small gauge fits in your jersey pocket and lets you adjust on the fly.
- Keep a log: Write down what pressure works best for different trails. Over time, you will build a personal pressure map that makes every ride better.
- Check for leaks: If you lose air faster than normal, inspect the valve stem and tire bead for leaks. A simple soapy water test can reveal hidden punctures.
Getting your mountain bike tire pressure right is one of the simplest upgrades you can make. It costs nothing, takes seconds, and transforms your ride. Whether you are a beginner or a seasoned trail rider, paying attention to your tire pressure pays off every single time you hit the dirt.
The next time you prepare for a ride, take a moment to check your tires. A few PSI can mean the difference between a frustrating day on the trail and an absolute blast. Your tires are the only part of your bike that touches the ground. Give them the right amount of air and they will reward you with better grip, smoother rides, and fewer flats.
Frequently Asked Questions
What happens if I put too much air in my mountain bike tire?
Overinflating your tire makes the ride harsh and uncomfortable. The tire bounces over trail features instead of absorbing them. It also reduces your contact patch, which means less grip. In extreme cases, too much air can cause the tire to blow off the rim or even pop.
Can I use a gas station pump to fill my mountain bike tires?
You can, but gas station pumps are not very accurate. They often lack a pressure gauge, which makes it easy to overinflate. If you must use one, add air in small amounts and check with a separate gauge frequently.
How often should I check my mountain bike tire pressure?
You should check your tire pressure before every ride. Air leaks slowly over time, and even a few PSI can change how your bike handles. A quick check takes less than a minute and keeps your rides safe and consistent.
Do tubeless tires need more or less air than tubed tires?
Tubeless tires generally need less air than tubed tires. Without an inner tube, you can run lower pressures safely. Lower pressure gives you better traction and comfort, which is why many mountain bikers prefer tubeless setups.
What PSI should I start with if I am a beginner?
Start in the middle of the recommended range printed on your tire sidewall. For most mountain bike tires, this means around 28 to 30 PSI. Ride a few trails and adjust based on how the bike feels. Lower pressure for more grip and comfort, higher pressure for speed.
Why does my tire lose air so quickly?
Slow air loss is normal and happens through the valve stem and the tire bead. If you notice rapid air loss, check for punctures, damaged valves, or a poor seal between the tire and rim. A soapy water test can help you find the leak quickly.
=== CONCLUSION ===
Knowing how much air in a mountain bike tire is one of the most important skills any rider can have. It is simple, fast, and free. The right pressure gives you better traction, a smoother ride, and fewer flats. Start with the recommended range on your tire sidewall, adjust based on your weight and trail conditions, and always check before you ride.
Small changes in pressure lead to big improvements on the trail. Take a few minutes before your next ride to get it right. Your tires will thank you, and your ride will feel better than ever.