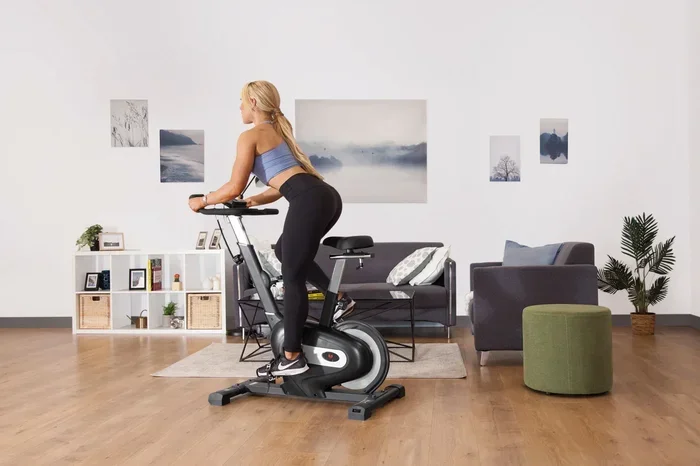
How Should a Spin Bike Be Set Up

Setting up your spin bike correctly transforms your indoor cycling experience and prevents injuries. This guide walks you through every step of the spin bike setup process, from adjusting the seat height to fine-tuning handlebar position. You will learn practical tips that help you ride with proper form, boost comfort, and get the most out of every session.
There is nothing worse than climbing on a spin bike and feeling off from the very first pedal stroke. Your knees ache. Your back protests. Your hands go numb. More often than not, the problem is not your fitness level. It is how the bike is set up.
A proper spin bike setup is the single most important thing you can do before every ride. Whether you are a complete beginner or a seasoned indoor cyclist, taking five minutes to adjust your bike can completely change your experience. In this guide, we will walk you through every adjustment step by step. You will learn how to set your seat height, position your handlebars, align your pedals, and dial in your riding posture so that every session feels smooth and natural.
Think of this as your go-to reference guide. Bookmark it. Come back to it every time you tweak your bike. Once you understand the basics of how should a spin bike be set up, you will never ride uncomfortably again.
Key Takeaways
- Seat height is the foundation: Getting this right protects your knees and improves pedal efficiency.
- Handlebar position affects your back and shoulders: A proper setup reduces strain during long rides.
- Pedal alignment and shoe cleats matter more than most people think: Small adjustments make a big difference.
- Resistance settings should match your fitness level: Start light and progress gradually.
- Body posture is just as important as hardware: Even a perfectly adjusted bike won’t help if your form is off.
📑 Table of Contents
Why Proper Spin Bike Setup Matters
Some people skip the setup and just start pedaling. That is like wearing shoes two sizes too big and going for a run. Your body compensates for poor positioning, and over time, that compensation leads to pain, injury, and poor performance.
When your indoor cycling posture is correct, several good things happen. Your joints stay aligned. Your muscles work efficiently. You breathe easier. And you can ride longer without feeling wiped out. A proper setup also helps you target the right muscle groups, especially your glutes, quads, and hamstrings.
Here are the main areas you need to focus on during your spin bike adjustment:
- Seat height — This is the most critical adjustment.
- Seat fore and aft position — How far forward or back the seat slides.
- Handlebar height and reach — Controls your upper body comfort.
- Pedal and cleat alignment — Affects your foot positioning and power transfer.
- Resistance settings — Determines how hard or easy your ride feels.
Each of these elements works together. Adjusting one without considering the others can throw off your entire ride. Let us break them down one at a time.
Step-by-Step Spin Bike Setup Guide
1. Adjusting Seat Height
The seat height is the first thing you should fix. When your seat is too low, your knees bend too much, which puts pressure on the joints. When it is too high, your hips rock side to side, and you lose power.
Here is the simplest way to find the right height:
- Sit on the bike and place your heels on the pedals.
- Pedal backward until your legs are fully extended.
- Your legs should be completely straight with no bending at the knee.
- Now place the balls of your feet on the pedals. You should have a slight bend in your knee at the bottom of the pedal stroke.
This method works for most riders. If you are unsure, ask a coach or visit a local cycling studio. Many people also search for how to set up stationary bike for your height because height plays such a big role in finding the right seat position.
Quick Tip: Stand next to the bike. The seat should be roughly at the same height as your hip bone. This gives you a good starting point before you fine-tune.
2. Setting Seat Fore and Aft Position
Once your seat height is correct, the next step is sliding the seat forward or backward. This is called the fore and aft adjustment, and it controls the alignment of your knee over the pedal spindle.
To check this, follow these steps:
- Sit on the bike with your feet on the pedals at the three o’clock and nine o’clock positions.
- Look down at your front knee. The kneecap should be directly above the pedal spindle.
- If your knee is too far forward, slide the seat back. If it is too far back, slide it forward.
Getting this right reduces knee strain significantly. Many riders ignore this step and wonder why their knees hurt after a class. A quick check of your body alignment on bike can save you weeks of discomfort.
3. Positioning the Handlebars
Handlebar position affects your back, neck, shoulders, and even your breathing. The goal is to find a position that feels relaxed and sustainable.
Start with the height. Most spin bikes allow you to raise or lower the handlebars. A good rule of thumb is:
- Beginners: Set the handlebars at the same height as the seat or slightly higher. This keeps your back straighter and reduces strain.
- Intermediate riders: Lower the handlebars slightly for a more aggressive riding position.
- Advanced riders: Lower the handlebars below seat height for maximum power output.
For the reach, you want a slight bend in your elbows when your hands rest on the handlebars. If your arms are fully locked out, the handlebars are too far away. If you feel like you are hunching forward, they are too close.
Many riders also wonder about the difference between a stationary bike vs spin bike when it comes to handlebar adjustments. The key difference is that spin bikes typically have a wider range of adjustment, giving you more flexibility to find your ideal position.
For a deeper dive into this topic, check out our guide on how to set up spin bike seat and handlebars for detailed measurements and diagrams.
4. Pedal and Cleat Alignment
Your feet are the connection between you and the bike. If they are not positioned correctly, your power output drops and your ankles and knees take the hit.
Here is what to check:
- Ball of the foot: The ball of your foot should sit directly over the pedal axle. This is where your power is generated.
- Cleat position: If you use clipless pedals, your cleats should be centered under your foot. Misaligned cleats are a hidden cause of knee pain.
- Float adjustment: Most clipless systems allow a small degree of side-to-side movement. This is called float, and it helps your feet move naturally during the pedal stroke.
If you do not use clipless pedals, simply make sure your shoes are flat and your feet are centered on the pedals. Avoid riding in shoes with thick, cushioned soles because they reduce your feel for the pedal.
5. Setting the Right Resistance
Resistance is what makes a spin bike feel like a real road bike. Too little resistance and you spin out of control. Too much and you burn out your legs within minutes.
For beginners, start with light resistance. Focus on maintaining a smooth, steady cadence. As you build strength and confidence, gradually increase the resistance.
Here is a simple framework:
- Warm-up: Light resistance, high cadence (80-100 RPM).
- Endurance rides: Moderate resistance, steady cadence (60-80 RPM).
- Climbing simulations: High resistance, low cadence (40-60 RPM).
- Sprints: Moderate-to-high resistance, maximum cadence (90-110 RPM).
Finding the right resistance settings takes trial and error. Listen to your body. If your knees hurt, the resistance is probably too high. If you feel like you are not working hard enough, increase it slightly.
Common Spin Bike Setup Mistakes
Even experienced riders make setup mistakes. Here are the most common ones and how to avoid them:
- Setting the seat too low: This is the number one mistake. A low seat causes knee pain and reduces your power output. Always check your seat height first.
- Rounding the back: Hunching over the handlebars puts unnecessary pressure on your spine. Keep your chest lifted and your core engaged.
- Gripping the handlebars too tightly: A death grip on the handlebars leads to hand numbness and shoulder tension. Keep a light, relaxed grip.
- Ignoring the seat fore and aft position: Many riders only adjust seat height and forget about the forward and backward position. Both matter equally.
- Skipping the warm-up: Jumping straight into high resistance without warming up increases the risk of injury. Always start easy.
Avoiding these mistakes will save you from pain and frustration. If you want to learn more about avoiding common pitfalls, our article on how to set up a bike for spin class covers these mistakes in greater detail.
Expert Tips for Perfecting Your Spin Bike Position
Once you have the basics down, these expert tips will help you refine your setup even further:
Record your settings. Use a notebook or your phone to write down your seat height, seat position, handlebar height, and handlebar reach. This way, you can replicate your perfect setup every time you ride.
Use a mirror or have someone film you. Sometimes you cannot feel when your posture is off. A quick video from the side can reveal problems you would never notice on your own.
Make adjustments gradually. Do not change everything at once. Adjust one element, ride for a few sessions, and then tweak again. Your body needs time to adapt to each change.
Consider your flexibility. If you are tight in the hips or hamstrings, you may need a slightly higher seat or more forward handlebar position. Your body alignment on bike should feel natural, not forced.
Invest in proper cycling shoes. Regular sneakers work fine for beginners, but dedicated cycling shoes with stiff soles dramatically improve your power transfer and comfort. They also make cleat alignment much easier to manage.
Revisit your setup regularly. Your body changes over time. Flexibility improves, fitness levels shift, and old habits creep in. Make it a habit to check your setup every few weeks.
For more guidance on making your ride comfortable, also check out our article on how to make a spin bike seat more comfortable. Seat comfort is closely tied to your overall setup, and small changes can make a huge difference.
How to Know Your Setup Is Working
You have made all the adjustments. Now what? How do you know your spin bike setup is actually correct? Here are the signs:
- Your knees feel comfortable throughout the ride.
- You can maintain a steady cadence without bouncing in the saddle.
- Your hands and shoulders stay relaxed.
- You feel strong and powerful during climbs and sprints.
- You do not feel any numbness or tingling in your extremities.
- Your back feels supported and your breathing is easy.
If you experience any of the opposite symptoms, go back and recheck your adjustments. Often a tiny tweak is all it takes to fix the problem.
For a more comprehensive look at preparing for spin sessions, also read our guide on how to set up your bike for spin class. It covers additional tips specific to group cycling environments.
Final Thoughts on Setting Up Your Spin Bike
Learning how should a spin bike be set up is one of the best investments you can make in your indoor cycling journey. A proper setup protects your body, boosts your performance, and makes every ride more enjoyable. It does not take a lot of time or fancy equipment. With a little patience and the right knowledge, you can dial in your bike to fit your body perfectly.
Start with the seat height. Move on to the fore and aft position. Adjust the handlebars. Check your pedal alignment. Set your resistance. Follow these steps in order, and you will be riding with confidence in no time.
Remember, your bike setup is not set in stone. As your fitness improves and your body adapts, you may need to make small changes. The key is to stay mindful and listen to your body. A well-set-up spin bike turns a good workout into a great one.
Now go ahead, make those adjustments, and enjoy the ride.
Frequently Asked Questions
What is the correct seat height for a spin bike?
The correct seat height allows your legs to be almost fully extended at the bottom of the pedal stroke. Sit on the bike with your heels on the pedals and pedal backward. Your legs should be straight. When you switch to the balls of your feet, you should have a slight bend in your knee.
How do I know if my handlebars are too high or too low?
If your handlebars are too low, you will feel pressure on your wrists and lower back. If they are too high, you may feel like you are sitting too upright and losing power. The right position allows you to maintain a relaxed grip with a slight bend in your elbows and a neutral spine.
Can I use a spin bike every day?
Yes, you can use a spin bike every day, but you should vary the intensity and duration. Daily low-intensity rides are great for recovery and endurance. High-intensity sessions every day can lead to overtraining and joint strain. Listen to your body and allow rest when needed.
Do I need special shoes for a spin bike?
You do not need special shoes to start, but cycling shoes with stiff soles make a big difference in comfort and power transfer. If you plan to ride regularly, investing in cycling shoes with clipless pedal compatibility is highly recommended.
What should I do if my knees hurt during a spin class?
Knee pain during a spin class usually points to a setup issue. Check your seat height first. Make sure your knee has a slight bend at the bottom of the pedal stroke. Also verify that your knee tracks directly over the pedal spindle. If the pain persists, reduce the resistance and consult a fitness professional.
How often should I recheck my spin bike setup?
You should recheck your setup every few weeks or whenever you feel discomfort during a ride. Your body changes over time, and small shifts in flexibility or strength can affect your ideal position. Making a habit of checking your settings regularly keeps your rides comfortable and efficient.
=== END OF ARTICLE ===