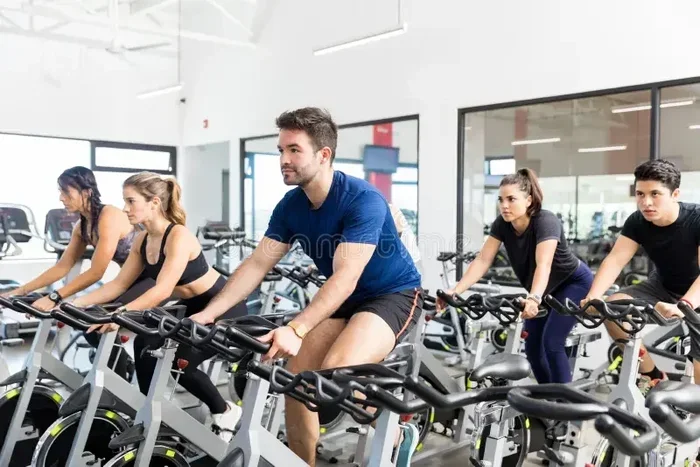
How Should a Spin Bike Be Adjusted 2

Learn how should a spin bike be adjusted for the perfect ride every time. This guide walks you through seat height, handlebar position, and pedal setup so you get maximum comfort and power on your indoor cycling sessions. Whether you are new to spin class or a seasoned rider, proper bike fit makes all the difference.
Key Takeaways
- Seat height is the foundation: Getting this right prevents knee pain and boosts pedaling efficiency.
- Handlebar position affects your back and shoulders: A proper reach keeps you comfortable during long rides.
- Pedal straps and cleats matter more than you think: They lock your feet in place for better power transfer.
- Resistance should match your fitness level: Too much or too little can ruin your workout and strain your joints.
- Small adjustments add up: Even a half-inch change in seat position can transform your ride.
- Test and re-test after every adjustment: Your body will tell you what feels right.
📑 Table of Contents
Why Proper Spin Bike Adjustment Matters
You just unboxed your new spin bike. You are pumped to start riding. But wait. Did you adjust it first?
Skipping the setup is the number one mistake beginners make. A spin bike be adjusted correctly can mean the difference between a great workout and a painful one. When your bike fits your body, everything feels easier. Your legs push with more power. Your back stays straight. Your joints stay happy.
Think of it like tying your shoes. You would never run a marathon with loose laces. The same logic applies here. A proper spin bike setup takes about ten minutes. That small investment pays off for months.
Indoor cycling is one of the best cardio exercises you can do. It burns calories, builds endurance, and strengthens your legs. But none of that matters if your bike fit is off. You will feel sore, tired, and frustrated. Nobody wants that.
This guide breaks down every adjustment you need to make. We cover the seat, the handlebars, the pedals, and more. By the end, you will know exactly how to set up your bike like a pro. Let us dive in.
How to Adjust the Seat Height
The seat is the first thing you should adjust. It affects your entire riding position. Get this wrong, and your knees will hurt within minutes.
Finding the Right Seat Height
Stand next to your bike. Raise the seat so it hits your hip bone. That is your starting point. Now sit on the bike and place your heel on the pedal. When the pedal is at the lowest point, your leg should be completely straight.
If your knee bends even slightly, the seat is too low. If your hip rocks side to side, the seat is too high. You want a slight bend in your knee when the ball of your foot rests on the pedal.
This seat height adjustment is crucial for cycling comfort. It protects your knee joint from unnecessary strain. It also helps you generate more power with every pedal stroke.
The Quick Heel Test
Here is a simple trick the pros use. Sit on the saddle. Put your heel on the pedal at its lowest point. Your leg should lock out completely. Now switch to the balls of your feet. You should have a slight bend. That is your perfect position.
Many riders skip this test. They just guess. Do not be one of them. Spend the extra thirty seconds. Your knees will thank you later.
Seat Fore and Aft Position
Height is not the only seat setting. You also need to check the forward and backward position. Look at your knee when the pedal is at the three o’clock position. Your knee should be directly above your ankle.
If your knee is too far forward, slide the seat back. If it is too far back, slide it forward. This body alignment detail is small but powerful. It changes how your legs feel during long rides.
Setting the Handlebar Position
The handlebars control your upper body comfort. A bad handlebar setup causes neck pain, shoulder tension, and lower back ache. Let us fix that.
Handlebar Height
Start by setting the handlebars level with the seat. This is a neutral position that works for most riders. If you want a more aggressive riding posture, lower the handlebars slightly. If you have back issues, raise them a bit.
Your indoor cycling experience depends heavily on how your upper body feels. Do not ignore this. A small change in handlebar height can turn a miserable ride into a great one.
Handlebar Reach
Now check how far the handlebars are from you. Sit on the bike and reach forward. You should be able to grip the bars without locking your elbows. Your arms should stay slightly bent.
If the handlebars feel too close, you will hunch over. If they feel too far, you will stretch uncomfortably. Both positions cause pain over time. Adjust the stem or seat post until you find a natural, relaxed reach.
When you ride for workout comfort, your upper body should feel relaxed. Your shoulders should drop down, not creep up toward your ears. This is a common mistake. Keep them loose.
Adjusting the Pedals and Foot Straps
The pedals connect you to the bike. They transfer your power into motion. Getting them right is essential for both performance and safety.
Pedal Strap Setup
Most spin bikes come with toe straps. These are the cages that wrap around the pedal. Adjust them so the strap sits across the widest part of your foot. Not too tight. Not too loose.
You should be able to slide your foot in and out easily. But once clipped in, the strap should hold your foot firmly in place. This prevents your foot from slipping during intense resistance level sprints.
Cleat Positioning (If You Use Clipless Pedals)
If your bike has clipless pedals, you need cleats on your shoes. Position the cleat so the ball of your foot sits directly over the pedal axle. This gives you the most efficient pedal alignment possible.
Take your time with this one. A misaligned cleat can cause hot spots, numbness, and even foot pain. Walk around in your shoes after attaching the cleats. Make sure everything feels natural before you start riding.
Foot Placement Matters
Where you place your foot on the pedal changes everything. Always pedal with the ball of your foot, not your arch. This engages the right muscles and protects your ankles.
Think of it like standing on your tiptoes. That is where your power lives. Use that spot. It makes every pedal stroke more effective and more comfortable.
Fine-Tuning Your Riding Setup
Once the big three are set (seat, handlebars, pedals), it is time for the finishing touches. These small details round out your proper bike fit.
Resistance and Tension
The resistance knob controls how hard it is to pedal. Start with a light resistance and gradually increase it. Your legs should feel challenged but never strained.
Too much resistance slows your cadence and puts stress on your knees. Too little resistance makes your workout feel pointless. Find the sweet spot where you can maintain a steady cadence of 80 to 100 revolutions per minute.
This is especially important during spin class sessions. The instructor may call for high resistance, but listen to your body. You know your limits better than anyone.
Console and Display Settings
Most modern bikes have a console that tracks speed, distance, and calories. Set it up before you start riding. This keeps you focused on your workout instead of fumbling with buttons mid-ride.
Some riders also adjust the fan or fan speed on the bike. A cool breeze helps you stay comfortable during intense sessions. Do not underestimate the power of staying cool.
Riding Posture Check
Once everything is set, sit on the bike and do a slow test ride. Pay attention to how your body feels. Are your wrists aching? Is your lower back tight? Are your knees tracking straight?
Make small tweaks based on what you feel. Adjust the seat by a few millimeters. Raise or lower the handlebars slightly. These tiny changes compound into a huge difference over time.
The goal is a riding efficiency that feels effortless. You should be able to ride for 30 minutes or more without discomfort. If something hurts, stop and recheck your setup.
Common Mistakes to Avoid
Even experienced riders make setup mistakes. Here are the ones to watch out for.
- Setting the seat too low. This puts extra pressure on your knees and reduces your power output.
- Locking your elbows. Your arms should always stay slightly bent to absorb road vibration and reduce joint stress.
- Over-tightening the straps. This cuts off circulation and causes numbness in your feet.
- Ignoring the handlebar reach. A poor reach leads to neck and shoulder pain that builds over time.
- Skipping the test ride. Never start a full workout without first doing a slow test ride to check your body alignment.
Avoid these mistakes and your rides will feel better from the very first pedal stroke. Take the time to get it right. It is worth it.
How Long Should You Ride After Adjusting Your Bike?
Once your spin bike is properly adjusted, you might wonder how long your sessions should be. The answer depends on your fitness level and goals.
For beginners, start with 15 to 20 minutes. Focus on maintaining good form and a steady pace. As you build endurance, you can gradually increase your ride time. For a solid cardio workout, aim for 30 to 45 minutes at a moderate intensity.
How long you ride also depends on what you want to achieve. If you are training for a specific event, you may need longer sessions. If you are just staying active, shorter rides still count.
For more detailed guidance on ride duration, check out our article on how long you should be on a stationary bike. It covers everything from beginner routines to advanced training plans.
Remember, consistency beats intensity. A well-adjusted bike ridden regularly will deliver better results than a poorly set up bike ridden hard once a week. Take care of your setup, show up often, and the progress will follow.
Final Thoughts on Spin Bike Adjustment
Adjusting your spin bike might seem like a small thing. But it is the foundation of every great ride. When your seat is at the right height, your handlebars are positioned correctly, and your pedals are set up properly, something magical happens. You ride better. You feel stronger. You enjoy the process more.
Take the time to go through each adjustment step. Do not rush through it. Your body is unique, and your bike should fit you specifically. What works for someone else might not work for you. Trust your instincts. If something feels off, adjust it.
Also, remember that your body changes over time. You might get more flexible. You might develop new riding habits. Re-check your setup every few weeks. A quick five-minute review can keep your bike fit dialed in and your rides enjoyable.
Now that you know how to adjust your bike properly, it is time to get out there and ride. Your perfect setup is waiting. Enjoy every pedal stroke.
Frequently Asked Questions
How do I know if my spin bike seat is at the right height?
Do the heel test. Sit on the bike and place your heel on the pedal at its lowest point. Your leg should be completely straight with no bend. When you switch to the balls of your feet, you should feel a slight bend. This is your perfect seat height for proper bike fit and cycling comfort.
Can I adjust my spin bike handlebars while riding?
No. Always make handlebar adjustments before you start riding. Getting on and off the bike while making changes can throw off your balance and cause injury. Take a few minutes to set everything up correctly before your indoor cycling session.
How tight should the pedal straps be?
The straps should be snug but not restrictive. You should be able to slide your foot in and out with moderate effort. If your feet go numb or your circulation feels cut off, the straps are too tight. Proper strap tension improves your pedal alignment and overall riding efficiency.
Should I adjust my spin bike every time I ride?
No. A good setup should last for several weeks. However, check your settings if you share the bike with someone else or if you notice discomfort during your rides. A quick spin bike adjustment check every few weeks keeps everything dialed in.
What resistance level should I use on a spin bike?
Start with light resistance and increase gradually. Your cadence should stay between 80 and 100 revolutions per minute. If you cannot maintain that pace, the resistance is too high. The right resistance level challenges your legs without causing joint strain or burnout.
How long does it take to properly adjust a spin bike?
A complete setup takes about 10 to 15 minutes. Once you learn the process, it becomes second nature. The time investment is small compared to the comfort and performance gains you get. A well-adjusted bike makes every ride feel better and last longer.
=== CONCLUSION ===
Knowing how should a spin bike be adjusted is one of the most valuable skills you can develop as an indoor cyclist. It transforms your rides from uncomfortable to amazing. You protect your joints, boost your power, and ride with confidence.
Start with the seat. Move to the handlebars. Finish with the pedals. Take your time. Trust the process. Your body will guide you to the perfect setup.
Now grab your water bottle, clip in, and enjoy the ride. Your spin bike is ready for you. Make every minute count.