Packing your road bike for air travel doesn’t have to be stressful. The key is using a proper bike case, methodically disassembling your bike, and protecting every component with padding. Always check your airline’s specific policies and fees beforehand. With the right preparation, you can ship your bike safely and confidently to your destination, ready to ride upon arrival.
Key Takeaways
- Invest in a proper bike travel case: A hard-shell case offers the best protection, while a quality soft case is more affordable and lighter. Never use a simple cardboard box for regular travel.
- Master basic bike disassembly: You must remove the pedals, handlebars (with stem), saddle, and often the front wheel. Practice at home before your trip.
- Padding is non-negotiable: Use frame protectors, bubble wrap, and foam tubing on all carbon fiber parts and any points that could shift or rub against the case.
- Know your airline’s rules: Policies on size, weight, and fees vary wildly. Some treat bikes as standard baggage, others as special sports equipment with steep charges. Always confirm in writing.
- Document and label clearly: Take photos of your packed bike and bike before disassembly. Affix “FRAGILE” and “THIS SIDE UP” stickers and include your contact info inside and outside the case.
- Pack essential tools: Bring a multi-tool, pedal wrench, and any unique tools for your components (like a Torx key for certain stems) in your checked luggage or personal item.
- Reassembly requires a clean workspace: Arrive at your destination with a plan. A bike stand is ideal, but a clean floor and good lighting will suffice for a careful rebuild.
📑 Table of Contents
- So, You Want to Fly With Your Road Bike?
- Choosing Your Bike’s Suitcase: Cases and Bags Explained
- The Critical Disassembly: Step-by-Step Bike Breakdown
- Packing the Case: A Blank Canvas for Protection
- Navigating the Airline Maze: Fees, Policies, and Pro Tips
- Reassembly: The First Ride Home
- Pro Tips, Common Mistakes, and Final Advice
- Conclusion: Confidence Comes From Preparation
So, You Want to Fly With Your Road Bike?
There’s a special kind of magic in landing in a new city, unfolding your own trusted steed from its travel cocoon, and hitting the open road. But getting your prized road bike from Point A to Point B by air can feel like a logistical puzzle wrapped in anxiety. Will it get damaged? How much will the airline charge? What if they lose it? These are common worries, but with a systematic approach, you can transform the process from a gamble into a reliable routine. This guide will walk you through every single step of how to pack a road bike for air travel, from choosing the right bag to the final bolt-tightening at your destination. We’ll focus on practicality, safety, and saving you money and stress.
The golden rule is simple: your bike is not luggage; it’s delicate cargo. Even a minor bump in the cargo hold can misalign a carbon frame or crack a rim if it’s not secured. Airline baggage handlers are not bike mechanics. They deal with thousands of bags daily, and your bike case will be treated like any other heavy, awkward item. Your job is to make that item as protected and clearly labeled as possible. We’ll cover the three most common methods: a dedicated hard-shell bike case, a padded soft case, and the budget (but risky) cardboard box. For most travelers, a dedicated case is the only sensible choice.
Choosing Your Bike’s Suitcase: Cases and Bags Explained
Your choice of container is the single most important decision you’ll make. It dictates the level of protection, the weight you’ll carry, and often, the airline fee you’ll pay. Let’s break down the main options.
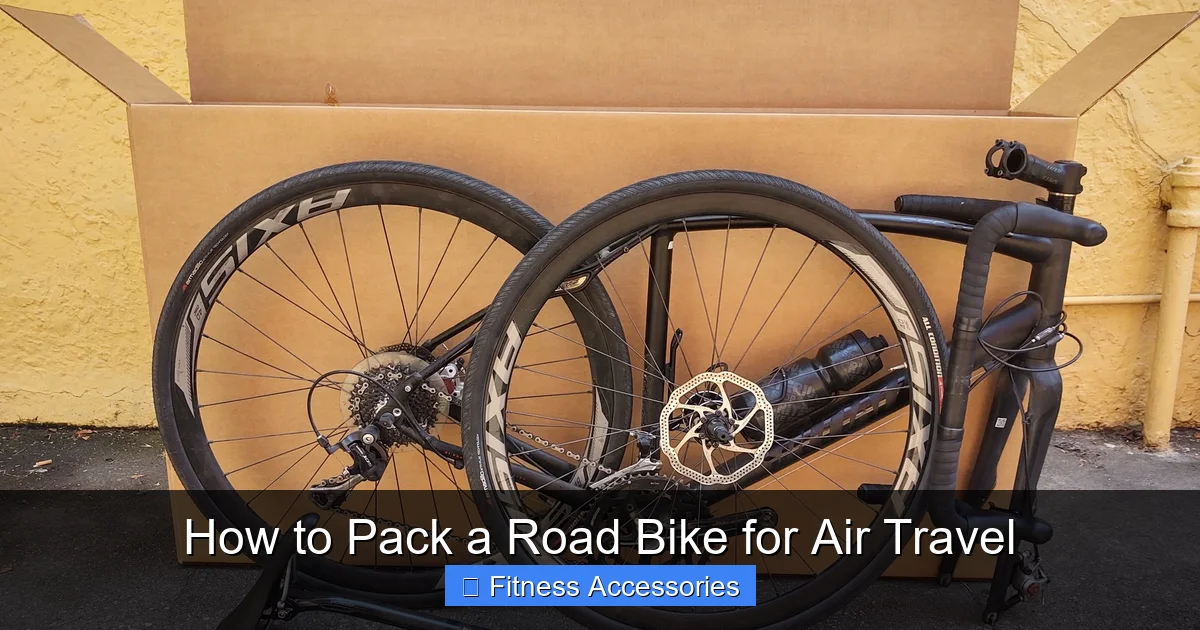
Visual guide about How to Pack a Road Bike for Air Travel
Image source: cdn.shoplightspeed.com
The Gold Standard: Hard-Shell Bike Cases
Hard-shell cases, typically made from durable plastics like ABS or composite materials, are the airline industry’s answer to transporting fragile equipment. They are essentially a rigid, shaped box for your bike.
- Pros: Unmatched protection against impacts, crushing, and weather. They often have locking mechanisms and integrated wheels for easier transport. They look professional, which can sometimes deter rough handling.
- Cons: Heavier (often 15-25 lbs / 7-11 kg empty), bulkier to store at home, and significantly more expensive ($300-$800+).
- Best For: Frequent travelers, owners of high-end carbon fiber bikes, and anyone shipping a bike internationally where handling is less predictable.
Popular brands include Evoc, Thule, Pro Bike Tool, and B&W. Look for models with customizable foam inserts that you can cut to fit your specific frame shape.
The Practical Middle Ground: Padded Soft Cases
These are heavy-duty, padded duffel bags designed specifically for bikes. They offer a great balance of protection, weight, and cost.
- Pros: Lighter than hard cases (8-15 lbs / 4-7 kg), more compact when not in use, and less expensive ($150-$400). Many have backpack straps, making them easier to maneuver through airports.
- Cons: Protection is against scratches and minor bumps, not major impacts or stacking weight. They offer no structural rigidity.
- Best For: Most recreational and club riders, domestic travel, and those who travel a few times a year.
Brands like Bicisupply, Backcountry, and Topeak make excellent models. Ensure it has thick, dense padding, reinforced stitching at stress points, and sturdy zippers.
The Budget Option (Use With Extreme Caution): Cardboard Box
You can often get a large cardboard box from a bike shop. Some travelers swear by this method for its zero cost and airline-friendly size (it’s often seen as “oversized baggage” but not always a “special item”).
- Pros: Free or very cheap. Can be a perfect, snug fit if you find the right box.
- Cons: Zero protection from moisture, crushing, or tearing. It offers no structural support. It’s a one-time use and a flag to handlers that the contents are fragile but packed poorly. Highly not recommended for valuable bikes.
- Best For: Beater bikes, one-time emergencies, or if you’re willing to accept a high risk of cosmetic damage.
Our Verdict: Unless your bike is a disposable beater, invest in a dedicated bike case. The peace of mind and protection for your $2,000+ investment are worth every penny.
The Critical Disassembly: Step-by-Step Bike Breakdown
Packing starts long before you touch the case. It starts with turning your bike back into a collection of parts. This is the most technical part of the process. If you are not comfortable with these steps, practice at your local bike shop or take a basic maintenance class. Always work on a clean, well-lit surface with a soft blanket or mat to lay parts on.
Visual guide about How to Pack a Road Bike for Air Travel
Image source: images.bike2where.com
1. The Pedals: Lefty Loosey, Righty Tighty (Mostly)
This is the first and most crucial step. Pedal threads are opposite. The right pedal (drive side) tightens clockwise. The left pedal tightens counter-clockwise. Use a proper pedal wrench or Allen key. Push the wrench from the back of the pedal toward the front of the bike for leverage. Once loose, spin the pedal off. Pro Tip: Apply a tiny dab of anti-seize lubricant to the pedal threads when reinstalling. This prevents them from seizing in the future.
2. The Handlebar and Stem
This is the bulkiest part after the frame. First, you need to remove the handlebar from the stem. Most modern stems have a faceplate held by 2 or 4 bolts. Loosen these bolts evenly (don’t remove them completely) and lift the handlebar/stem combo off the fork steerer tube. You’ll likely need to also remove the stem from the handlebar itself. Keep all bolts and parts together in a small bag or the tool pocket of your case. Caution: If you have integrated brake/shift levers, be gentle with the cables and housing. Do not kink them.
3. The Saddle and Seatpost
Loosen the seatpost clamp (usually a quick-release or a bolt) and slide the entire seatpost and saddle out. If your seatpost is very long, you may need to mark it for correct reinsertion depth later. For carbon seatposts, handle with care and avoid clamping them in a vice.
4. The Wheels
Most road bike cases require you to remove at least the front wheel. Many also require the rear wheel for a smaller, more manageable package. To remove the front wheel, open the quick-release or thru-axle. For thru-axles, note the orientation (they often have a lever on one side). Deflate the tires slightly (to about 30-40 PSI) to give the rims a little flex and reduce pressure on the spokes during transit. For the rear wheel, you must first shift the chain onto the smallest cog and smallest chainring to minimize its size. Then, pull the derailleur cage back and drop the wheel out.
5. Optional but Recommended: Drivetrain & Brakes
For ultimate protection, especially with a soft case, you can remove the derailleur (shift it to the smallest gear first) and caliper brakes. This prevents them from being snagged or bent. If you do this, protect the threads and pad the hangers. Most travelers skip this step and simply ensure the derailleur is tucked in and the brake calipers are padded.
Packing the Case: A Blank Canvas for Protection
Now you have a pile of bike parts and an empty case. The goal here is to prevent any movement, vibration, or metal-on-metal contact. Think of it as building a custom nest for each component.
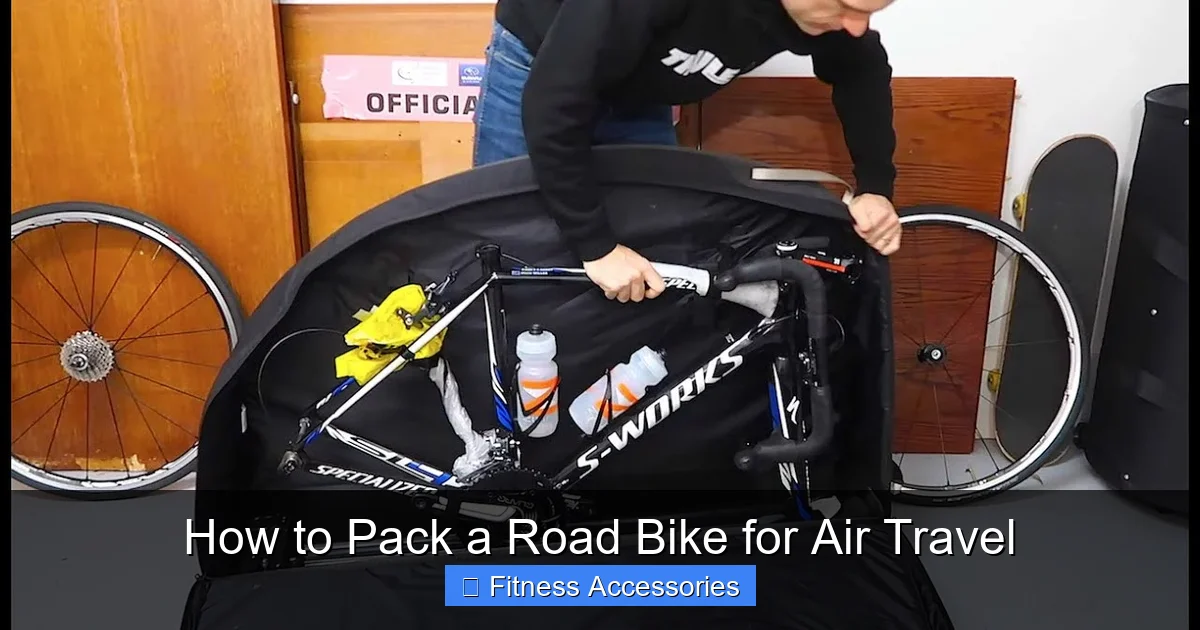
Visual guide about How to Pack a Road Bike for Air Travel
Image source: i.ytimg.com
Layering Your Defense: Padding Materials
You need a multi-layer defense system.
- Primary Layer (Structure): Use the foam inserts that came with your hard case, or for a soft case, use large moving blankets or thick foam sheets to create a padded “floor” and “walls.”
- Secondary Layer (Cushioning): Bubble wrap (the large-bubble kind is best for shock absorption), foam pipe insulation (cut to length for frame tubes), and corner protectors for sharp points like axle ends.
- Tertiary Layer (Filling Gaps): Use packing paper, old clothes, or foam peanuts to fill any voids. Parts must not shift when you shake the case.
The Order of Assembly: Frame First
Place the frame in the case first, as it’s the largest and most critical piece. Orient it so the drivetrain side (right side) faces outward, away from the case’s interior walls. This protects your expensive cassette and chainrings. Wrap the entire frame in a moving blanket or foam sheet, securing it with tape or zip-ties. Pay special attention to the chainstays and seatstays—common impact points. If your case has a dedicated frame slot, use it.
Wheels, Fork, and Handlebars
Place the wheels in their designated wheel wells or along the case’s sides. Use wheel protectors (plastic discs that go over the axle and spokes) or simply pad the axles heavily with foam. The fork can often be placed alongside the frame. The handlebar/stem assembly should be placed on top or in a separate compartment. Ensure brake levers and shifters are not bearing any weight. Tuck cables neatly away.
The “No-Zone” Checklist
Before you zip it up, run a final check. Ensure:
- No part can rattle or move if you tilt the case.
- All carbon fiber components (frame, fork, seatpost, handlebars) have at least 1/2 inch of padding around them.
- Axle ends, pedal threads, and brake rotor edges are covered.
- The drivetrain (chain, cassette) is not rubbing against anything.
- You have a small bag with all removed bolts, quick-release skewers, and any special tools inside the case (and a spare set in your carry-on, just in case).
Navigating the Airline Maze: Fees, Policies, and Pro Tips
This is where most people get frustrated. Airline policies are not uniform. They change, and the person at the check-in counter may not know the specifics. Your defense is knowledge and documentation.
Decoding the Fee Structure
You will typically encounter one of these fee models:
- Standard Checked Bag Fee: Some airlines (like Southwest) treat a bike in a case as a regular checked bag if it meets size/weight limits (usually 50 lbs / 23 kg, 62 linear inches). This is the holy grail—often free on the first bag for some carriers.
- Special Sports Equipment Fee: This is a fixed fee (e.g., $50-$150 each way) on top of any standard bag fee. It’s common on major legacy carriers for “oversized” items.
- Oversize/Overweight Fees: If your bike case exceeds 62 linear inches (Length + Width + Height) or 50 lbs, you’ll pay hefty oversize/overweight fees, which can be $100-$300+ per segment.
The Single Most Important Action: Find the “Special Baggage” or “Sports Equipment” page on your airline’s official website. Screenshot the section that mentions bicycles and their specific fees/requirements. Print it out. Have it on your phone. This is your contract.
Weight and Size Management
Weigh your packed case at home with a luggage scale. Aim for under 50 lbs / 23 kg to avoid overweight fees. A hard case with a bike can easily hit 45-50 lbs. A soft case with a light bike can be under 40 lbs. If you’re over, remove non-essentials (like a heavy lock, extra tools, or clothing you can pack elsewhere). For size, measure the case’s exterior dimensions. A standard road bike in a 170cm (67″) hard case is often right at the 62″ linear inch limit (L+W+H). A soft case is usually smaller.
At the Airport: Check-In Strategy
Arrive early. Go to the oversize/oversized baggage counter, not the regular check-in kiosk or line. Be polite, confident, and have your documentation ready. When they tag your bag, ask for a “special handling” tag if available. Politely request they place the “FRAGILE” and “THIS SIDE UP” stickers on the case themselves—sometimes a personal request from a passenger carries more weight than a sticker you applied. Never check your bike curbside with a skycap. They are not trained for special items and you have no recourse if it’s mishandled.
Reassembly: The First Ride Home
You’ve landed. You’re at the baggage claim, heart pounding as the carousels spin. Then you see it—your case, maybe a little scuffed, but intact. Take a deep breath. Now, the reverse process.
Unpacking and Inspection
Find a clean, quiet corner away from the crowd. Open the case and do a quick visual and tactile inspection of your bike before you even reassemble it. Check the frame for any new cracks or deep scratches. Spin the wheels—do they true? Squeeze the brake levers. Look at the derailleur hanger. Take photos of everything before you start putting it back together. If you notice damage, go straight to the airline’s baggage office before you leave the airport. File a claim immediately. Do not reassemble and then claim damage—they will deny it.
Reassembly Order
- Wheels: Reinstall the rear wheel first (if you removed it), ensuring the chain is on the correct cog. Then the front. Inflate tires to your normal pressure.
- Handlebar/Stem: Place the stem on the fork steerer tube to your preferred height/angle, tighten the stem’s top cap/preload bolt to remove any play, then tighten the stem bolts to torque spec. Reattach the handlebar to the stem.
- Saddle: Reinstall the seatpost and saddle to your preferred height and setback.
- Pedals: This is last. Remember the thread directions! Right pedal tightens clockwise. Left pedal tightens counter-clockwise. Hand-thread them first to avoid cross-threading, then tighten firmly with your wrench.
Do a full mechanical check: brakes, shifting, tire pressure, and a quick visual of all bolts. A short test ride in the airport parking lot is a great idea.
Pro Tips, Common Mistakes, and Final Advice
Let’s consolidate wisdom from thousands of bike-packers.
What to Pack in Your Carry-On
Never pack all your tools in the bike case. In your carry-on, always include:
- A multi-tool (with a chain tool if you’re adventurous).
- A pedal wrench (if your case doesn’t have a dedicated pocket).
- Any special, irreplaceable tools for your components (e.g., a Torx T25 for certain Shimano bolts).
- A spare tube, tire levers, and a mini-pump or CO2.
- Your bike computer, heart rate monitor, and any other electronics.
This ensures you can fix a problem at your destination even if your bike case is delayed.
Common & Costly Mistakes to Avoid
- Forgetting to deflate tires: Changes in cabin pressure can cause inner tubes to explode, damaging rims and the case.
- Not protecting carbon: A carbon frame can be cracked by a sharp edge inside the case. Wrap it thoroughly.
- Over-tightening bolts during packing: You’re securing parts, not torquing them. Use just enough force to stop movement. Over-tightening can crush components.
- Leaving tools in the case: A loose wrench is a projectile that can dent your frame.
- Assuming policies are the same: A bike on Delta is not the same as a bike on United or JetBlue. Always verify for your specific airline and route.
Consider Bike Shipping Services
For one-way trips or if airline fees are astronomical (international travel often sees $200-$400+ fees), look into specialized bike shipping companies like BikeFlights, ShipBikes, or FedEx/UPS with a bike box. They often provide the box, handle the logistics, and can be cheaper and more reliable than airline baggage, especially internationally. They also offer insurance.
Conclusion: Confidence Comes From Preparation
Packing a road bike for air travel is a skill. Like any skill, it feels daunting at first but becomes second nature with practice. The process is a ritual: the careful disassembly at home, the meticulous padding and packing, the strategic airport check-in, and the satisfying click of the final bolt tightened in a foreign parking lot. By investing in a good case, mastering the basic breakdown, understanding your airline’s rules, and packing with military-grade padding, you remove the uncertainty. You transform your bike from a potential liability into a trusted companion that meets you at the gate of every new adventure. The open road awaits—now you know how to get your two-wheeled passport there safely. Go ride.
Frequently Asked Questions
How much does it typically cost to fly with a road bike?
Costs vary dramatically by airline and route. Domestic U.S. flights can range from $0 (if counted as a standard first bag) to $150. International flights often have fixed sports equipment fees of $100-$400 each way. Always check your specific airline’s “special baggage” fees before booking.
Can I lock my bike case?
Yes, but use a TSA-approved lock (look for the “Travel Sentry” logo). TSA agents may need to inspect your case and will cut non-approved locks. Informational stickers like “FRAGILE” are helpful, but a lock alone won’t prevent rough handling.
Will TSA open my bike case?
Yes, they can and will if they select it for inspection. That’s why it’s crucial to pack all tools and removable parts inside the case itself, not just strapped to the outside. A clear, organized pack with a packing list taped to the lid can facilitate a quicker, less invasive inspection.
What is the biggest risk to my bike during air travel?
The biggest risk is not a catastrophic crash, but mishandling causing misalignment. This includes bent derailleur hangers, misaligned wheels, or stress on carbon frames from shifting cargo. Proper padding and securing every part to prevent movement is the best defense against this.
Should I buy a bike-specific case or use a通用的 luggage case?
Always buy a bike-specific case or bag. Generic luggage lacks the shaped compartments, wheel wells, and padding zones designed for a bike’s geometry. A bike case makes packing faster, more secure, and provides targeted protection for critical areas like the frame and fork.
What if my bike case is damaged or lost by the airline?
File a claim immediately at the airport baggage office before you leave. Get a copy of the Property Irregularity Report (PIR). For damage, document everything with photos. Airlines have limited liability for sporting goods unless you purchased additional insurance or declared a higher value. This is another reason a hard case is a wise investment—it’s less likely to be damaged in the first place.