Yes, you can often ride a stationary bike with peroneal tendonitis, but it requires careful management. The stationary bike is a low-impact cardiovascular option that avoids the jarring forces of running or walking. However, improper bike fit, high resistance, or ignoring pain can aggravate the condition. Success depends on a proper bike setup to minimize ankle eversion and stress, using very low resistance, and listening intently to your body’s pain signals. Always consult with a doctor or physical therapist before starting any exercise with an acute injury. When done correctly, it can maintain fitness without hindering recovery.
Key Takeaways
- Low-Impact Potential: A stationary bike provides a controlled, low-impact cardio workout that can be safer than weight-bearing activities like walking or running for those with peroneal tendonitis.
- Bike Setup is Non-Negotiable: Proper adjustment of seat height, handlebar position, and pedal stroke technique is critical to minimize the ankle’s outward rolling (eversion) that stresses the peroneal tendons.
- Resistance Must Be Minimal: Use the lightest possible resistance to maintain a smooth, high-cadence pedal stroke. The goal is movement and circulation, not strength training or a cardio burn.
- Pain is Your Guide: You should feel no sharp, stabbing, or acute pain in the outer ankle during or after your ride. Any increase in symptoms means you must stop, reassess your setup, or discontinue the activity.
- Warm-Up & Cool-Down are Essential: Gentle dynamic stretches and a slow 5-10 minute warm-up before increasing pace, followed by a thorough cool-down and post-ride icing, support tendon health.
- Not a Cure-All: Stationary biking is a temporary tool for cardiovascular maintenance. It does not address the underlying biomechanical causes of peroneal tendonitis, which require targeted rehab exercises and professional assessment.
- Professional Guidance is Key: A physical therapist can provide a definitive “yes” or “no” for your specific case, teach you the correct pedal stroke, and design a comprehensive rehab program alongside any biking.
📑 Table of Contents
- Understanding Your Diagnosis: What is Peroneal Tendonitis?
- The Stationary Bike: A Friend or Foe for Peroneal Tendonitis?
- The Golden Rules: How to Set Up Your Bike for Peroneal Tendonitis Safety
- Your Safe Riding Protocol: Step-by-Step Guidelines
- When the Bike Might Be a Bad Idea: Red Flags and Contraindications
- Complementary Exercises and The Bigger Picture of Recovery
- Conclusion: A Tool, Not a Treatment
Understanding Your Diagnosis: What is Peroneal Tendonitis?
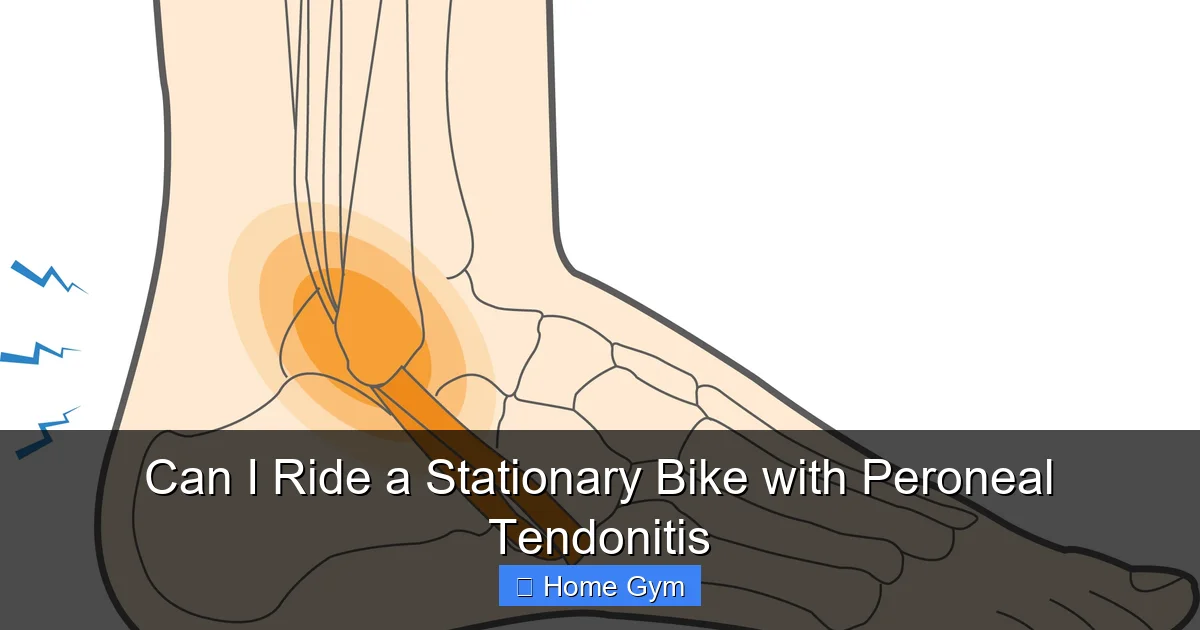
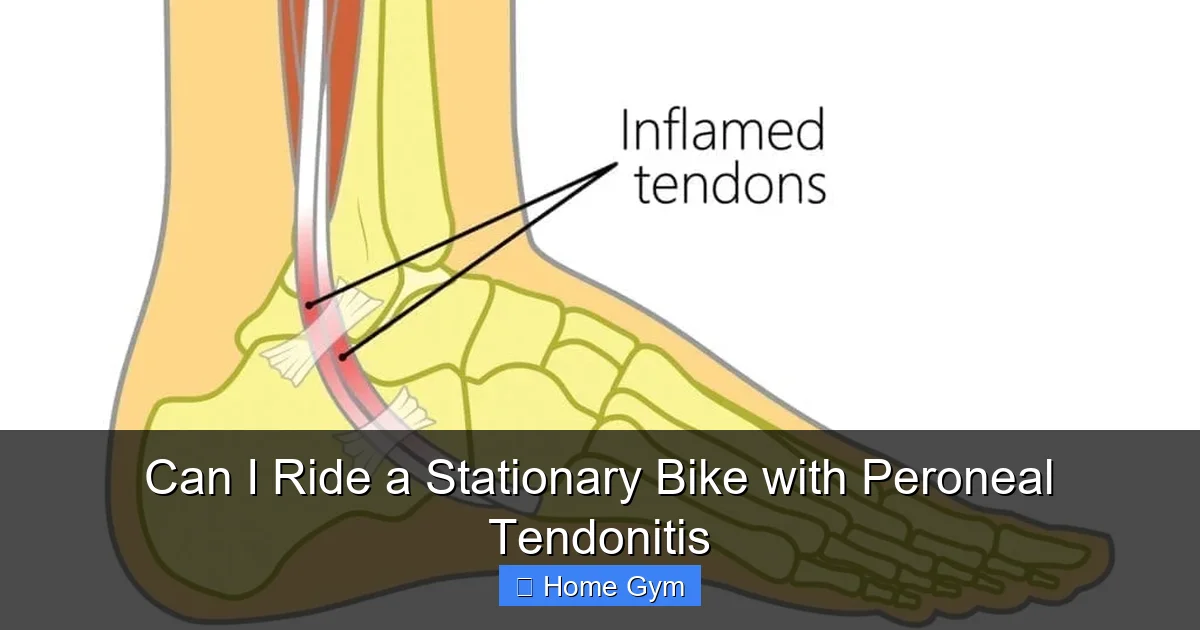
Before we pedal forward, let’s get clear on what we’re dealing with. Peroneal tendonitis is inflammation or irritation of the peroneal tendons. These two strong cords run along the outer (lateral) side of your ankle and foot, behind the bony bump called the lateral malleolus. Their primary jobs are to evert your foot (roll it outward) and help point your toes downward (plantarflexion). They are crucial for ankle stability, especially on uneven ground or during activities that involve cutting, pivoting, or rolling the ankle.
This condition typically arises from overuse, sudden increases in activity, or biomechanical issues like overpronation (your foot rolling inward too much) or high arches. Poor footwear, running on sloped surfaces (like a beach or the side of a road), and even an old ankle sprain that didn’t heal perfectly can set the stage. The hallmark symptoms are pain, tenderness, and sometimes swelling along the outer ankle, particularly during activity or when pressing on the tendons. You might feel a sharp pain when pushing off your foot or a dull ache that worsens with continued use.
Understanding this is vital because the very motion that engages these tendons—eversion and plantarflexion—is replicated in the pedal stroke on a bike. This means the stationary bike isn’t a neutral activity; it directly stresses the injured tissues. Our goal, therefore, is not to eliminate stress (which is impossible for movement), but to manage it so it’s a gentle, therapeutic load that promotes blood flow and mobility without causing further damage. This delicate balance is why the answer to “Can I ride?” is a qualified “yes, but…” followed by a list of critical conditions.
The Stationary Bike: A Friend or Foe for Peroneal Tendonitis?
Let’s weigh the pros and cons. On the positive side, the stationary bike is a champion of low-impact cardiovascular exercise. Unlike running, where your body weight slams down with each step, your feet are supported on pedals. There’s no pounding, no jarring impact shock traveling up through your ankle. This alone makes it a far more attractive option than the treadmill or trail running for someone with an inflamed tendon. It allows you to maintain hard-earned cardio fitness, manage weight (which reduces stress on all joints), and get a good sweat without the repetitive high-force loading that likely contributed to the injury in the first place.
Visual guide about Can I Ride a Stationary Bike with Peroneal Tendonitis
Image source: upswinghealth.com
Furthermore, it’s a controlled environment. You control the resistance, the speed (cadence), and the duration. There’s no wind, no unexpected potholes, no need to navigate crowds. You can focus entirely on your form and your body’s signals. For many, this sense of control is psychologically comforting during a frustrating injury period. It provides an outlet for endorphins and a routine, which is important for mental health during recovery.
The Critical “But” – Potential Pitfalls
However, the bike is not inherently safe. The pedal stroke is a circular motion. The phase where you push down and slightly outward (the power phase from roughly 12 o’clock to 6 o’clock) actively engages the peroneal muscles and tendons. If your foot is not in a neutral position on the pedal, or if you are using a clipless system that forces your foot into a fixed, possibly externally rotated position, you can create excessive eversion stress. A seat that is too low forces your ankle into excessive dorsiflexion (toes pointing up) at the top of the stroke, which can also strain the tendons. High resistance turns a smooth, circulatory motion into a forceful, muscle-building pull that overloads the tendons. Ignoring pain and pushing through “just a little discomfort” is the fastest way to turn tendonitis into a chronic, degenerative tendinopathy.
The Golden Rules: How to Set Up Your Bike for Peroneal Tendonitis Safety
This is the most important section. Your bike’s configuration will make or break your ability to use it safely. Think of this as building a custom rehabilitation device. The goal is to create a pedal stroke that is as neutral and stress-free as possible for your outer ankle.

Visual guide about Can I Ride a Stationary Bike with Peroneal Tendonitis
Image source: marathonhandbook.com
1. Seat Height: The Foundation
This is your first and most crucial adjustment. A seat that is too low is a common mistake that drastically increases ankle dorsiflexion. At the bottom of your pedal stroke (6 o’clock position), your knee should have a very slight bend—about 25-30 degrees. You should not feel a hard lock in your knee, but you also should not be rocking your hips on the saddle to complete the stroke. To find this, sit on the bike with your heels on the pedals. Pedal backward slowly. Your legs should be fully extended without your hips coming off the seat. If you have to rock your hips, the seat is too low. Once you find this heel height, move the balls of your feet onto the pedals; you now have the correct slight knee bend. A proper height reduces the need for your ankle to flex excessively.
2. Handlebar Position: Upright is Right
Resist the urge to crouch into a racing position. A more upright torso position (handlebars higher) shifts your center of gravity backward. This encourages you to push down more than reach forward, which can alter pedal mechanics. For peroneal tendonitis, you want a relaxed, neutral spine. On an upright or recumbent bike, this is naturally achieved. On a spin bike, raise the handlebars as high as they go. The goal is comfort and a neutral pelvis. Leaning forward excessively can lead to compensatory movements in the lower leg.
3. Foot Position on the Pedal
If you’re using flat pedals with athletic shoes, place the ball of your foot over the pedal axle. Your foot should point straight ahead, or with a very slight natural outward toe angle (your natural gait). Do not force your toes to point dramatically outward to “engage the glutes” or inward to “protect the knee.” A neutral foot position is paramount. If using clipless pedals, this is trickier. The cleat position can force external rotation. If possible, set your cleats to allow for a more neutral foot angle. Some riders with lateral ankle issues find it helpful to use a “float” setting that allows a few degrees of natural foot rotation during the stroke. Consult a bike fit specialist if using clipless systems with this injury.
4. The Pedal Stroke Technique: Circle, Don’t Stomp
Focus on a smooth, circular stroke. Imagine you are “scrubbing” the bottom of the stroke to remove mud, actively pulling up and back as well as pushing down. This engages your hamstrings and hip flexors to share the workload. A “stomping” motion, where you only push down hard with your quads, creates a sharp, jerky force that spikes ankle eversion at the bottom of the stroke. A high cadence (90-100 RPMs) with very low resistance naturally promotes this smoother, more efficient circle. It’s about momentum and flow, not brute force.
Your Safe Riding Protocol: Step-by-Step Guidelines
With your bike set up perfectly, now you must execute the ride correctly. This protocol is your safety net.
Visual guide about Can I Ride a Stationary Bike with Peroneal Tendonitis
Image source: upswinghealth.com
- Start with Zero or Minimal Resistance: The first few sessions should be with the resistance dial at its lowest setting. Your goal is simply to move the legs through a full, pain-free range of motion. This promotes synovial fluid circulation in the ankle joint, which nourishes tendons, and gently warms the tissues.
- Warm-Up Thoroughly (5-10 minutes): Begin at a very slow, easy pace. Use this time to focus on your form—smooth circles, relaxed upper body. Follow this with gentle dynamic ankle circles (both directions), alphabet writing with your big toe, and gentle calf stretches against a wall. Do not static stretch cold tendons.
- Maintain a High Cadence: Aim for 90-110 revolutions per minute (RPM). Most modern bikes have a digital display. This high cadence with low resistance is the key to minimizing force per pedal stroke. It turns the activity into a circulatory, aerobic exercise rather than a strength-based one that strains tendons.
- Duration: Start Short: Begin with just 10-15 minutes of actual pedaling after your warm-up. Yes, it’s short. That’s okay. The goal is quality, not quantity. You can gradually increase by 2-5 minutes per session as long as you have zero increase in pain. Never push through pain to hit a time goal.
- Monitor Pain in Real-Time: Your mantra is “no pain, all gain.” A mild, generalized sense of warmth or “working” in the calf is different from a specific, sharp, or achy pain localized to the outer ankle tendons. The moment you feel that specific tendon pain, STOP. Reduce resistance or stop entirely. Pain during the activity is a definitive sign the load is too much.
- Cool-Down and Ice: The last 5 minutes should be a gradual decrease in pace back to the zero-resistance warm-up speed. After you get off the bike, immediately apply ice to the painful outer ankle region for 15-20 minutes. This helps manage any inflammatory response from the activity.
When the Bike Might Be a Bad Idea: Red Flags and Contraindications
There are absolutely scenarios where riding a stationary bike is contraindicated. If you are in the acute, inflammatory phase—meaning you have significant swelling, redness, and sharp pain at rest—you need to rest and ice. Movement may be too irritating. The goal in acute phase is often to reduce inflammation, not to promote circulation through a potentially irritating motion.
If you experience any of the following, stop and seek professional guidance:
- Sharp, shooting pain that makes you gasp or stop mid-stroke.
- Increased swelling or throbbing pain that persists for several hours after riding.
- A feeling of instability or “giving way” in the ankle.
- Pain that is reproduced by simply moving your foot into eversion (outward roll) without any resistance.
Additionally, if your peroneal tendonitis is accompanied by a known tear (diagnosed via MRI), the load from pedaling, even with good form, may be directly counterproductive to healing. A complete rehab program under supervision is essential first. Remember, the stationary bike is a tool for *maintenance* and *controlled loading* during the sub-acute and chronic phases of rehab, not for the initial “fire-fighting” stage of severe inflammation.
Complementary Exercises and The Bigger Picture of Recovery
Riding a bike is a single piece of the puzzle. Relying on it alone will not fix peroneal tendonitis. You must address the root cause. This is where a physical therapist becomes invaluable. They will likely prescribe a combination of:
Isometric Exercises:
These are gentle, static contractions of the peroneal muscles that can provide pain relief and begin to load the tendon without movement. For example, sitting with your foot flat, gently press the outside of your foot against a wall or immovable object, holding for 30 seconds.
Eccentric Strengthening:
This is the gold standard for tendon rehab. It involves slowly lengthening the tendon under load. A common exercise is using a resistance band to evert the foot (pull the foot outward) and then very slowly (3-5 seconds) returning to the start position against the band’s resistance.
Proprioception and Balance Training:
Your peroneal tendons are key stabilizers. Re-training your ankle’s balance and coordination is crucial. This includes simple single-leg stands, progressing to standing on a wobble board or cushion.
Addressing Biomechanics:
You may need orthotics or specific footwear advice if overpronation is a culprit. Stretching and mobilizing tight calf muscles (gastrocnemius and soleus) and the Achilles tendon is also frequently part of the solution, as tightness here can alter ankle mechanics.
The stationary bike fits in here as your cardio piece that allows you to work on these other exercises without losing overall fitness. It’s part of a balanced diet of movement, not the entire meal.
Conclusion: A Tool, Not a Treatment
So, can you ride a stationary bike with peroneal tendonitis? The empowered answer is: You can likely use it as a carefully managed tool within a broader recovery plan, but you cannot use it as a casual workout. It demands respect, precision, and self-awareness. The bike’s low-impact nature is its greatest advantage, but its potential to aggravate if misused is its greatest danger. Your success hinges on the three pillars of Setup, Speed, and Self-Monitoring. Dial in that seat height, commit to a high-cadence, low-resistance stroke, and become a ruthless observer of your own pain signals.
Finally, view this period not as a setback, but as a chance to become a smarter, more body-literate athlete or fitness enthusiast. Use the forced moderation to work on core strength, upper body conditioning, or that neglected flexibility routine. And please, partner with a healthcare professional—a sports medicine doctor or a physical therapist. They can give you the personalized “green light” and tailor the bike parameters and rehab exercises to your unique anatomy and injury story. Healing a tendon takes patience. By respecting the process and using tools like the stationary bike wisely, you can maintain your momentum and emerge on the other side with stronger, more resilient ankles.
Frequently Asked Questions
Will riding a stationary bike hurt my peroneal tendonitis?
It should not cause sharp or worsening pain. A mild, warm sensation is acceptable, but any specific outer ankle pain during or after riding is a sign to stop and reassess your setup or discontinue the activity. Pain is your body’s stop signal.
What is the best resistance level to use?
The absolute lowest possible resistance that allows you to maintain a smooth, high-cadence (90-110 RPM) pedal stroke. The goal is circulation and range of motion, not building leg strength. High resistance directly overloads the peroneal tendons.
How long should my stationary bike sessions be?
Start with just 10-15 minutes of actual pedaling after a warm-up. You can gradually increase by 2-5 minutes per session only if you experience zero increase in pain. Quality and pain-free movement are far more important than duration.
Are recumbent bikes better than upright bikes for this condition?
Recumbent bikes can be an excellent option because their reclined seat position naturally promotes a more upright torso and a pedal stroke that may place less shear stress on the ankle. The back support also reduces core strain, allowing for greater focus on leg form. They are often the safest starting point.
What other exercises can I do instead of or alongside biking?
Excellent alternatives include swimming (freestyle with a kickboard), water walking, upper body ergometers (arm bikes), and non-weight-bearing leg exercises like straight leg raises. Complement biking with targeted peroneal isometrics, eccentric strengthening, and balance work as prescribed by a physical therapist.
How long does it typically take for peroneal tendonitis to heal?
Healing time varies widely based on severity and compliance with rehab. Mild cases may improve in 4-6 weeks with proper care. Moderate to severe cases can take 3-6 months or longer. Consistent, pain-managed activity (like proper stationary biking) combined with targeted rehab is key to a timely recovery.